Azure DevOps Integration Guide
Integrating CodeSign Secure with Azure DevOps enhances your CI/CD pipelines by automating the signing process. This ensures that each build is signed both securely and efficiently, reducing manual errors and strengthening the trustworthiness of your software supply chain.
Set up CodeSign Secure KSP
The Encryption Consulting Key Storage Provider (KSP) for Windows is a software component that extends the Microsoft Cryptography API: Next Generation (CNG) framework. Its primary purpose is to enable Windows applications, such as signtool.exe, to interact seamlessly with the cryptographic keys and certificates stored within an HSM.
Steps:
-
Download the EC KSP
-
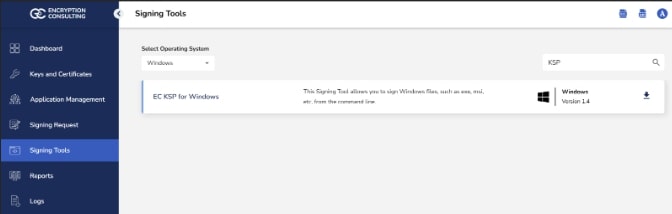
Log in to the CodeSign Secure portal and navigate to the Signing Tools section to download “EC KSP for Windows.”
- Extract the zip file to get the “Setup.msi” file.
-
-
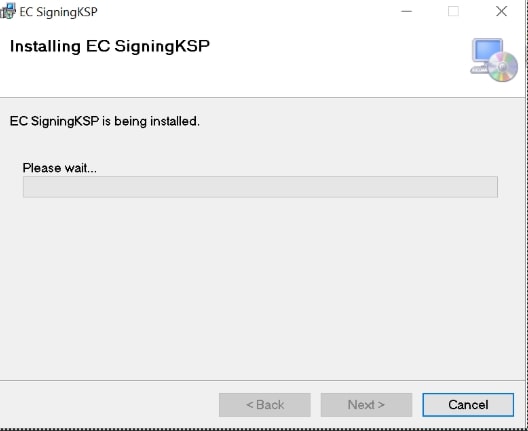
Install the EC KSP
-
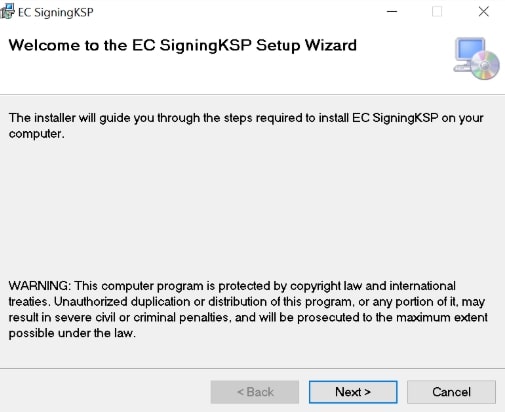
Run the “Setup.msi” installer with Administrator privileges.
-
Follow the on-screen prompts of the installation wizard.
- Accept the End-User License Agreement.
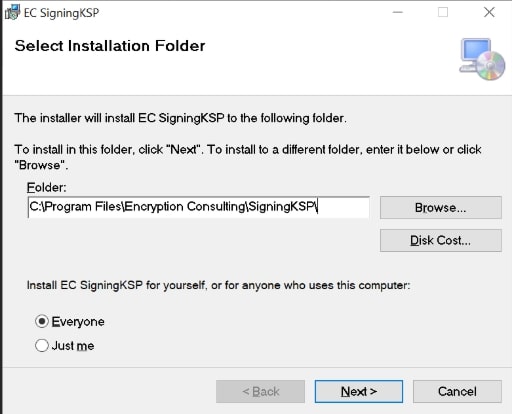
- Choose the installation directory (the default is C:\Program Files\Encryption Consulting\SigningKSP).
- Choose whether you want to install the KSP for Everyone or just for the current user
-
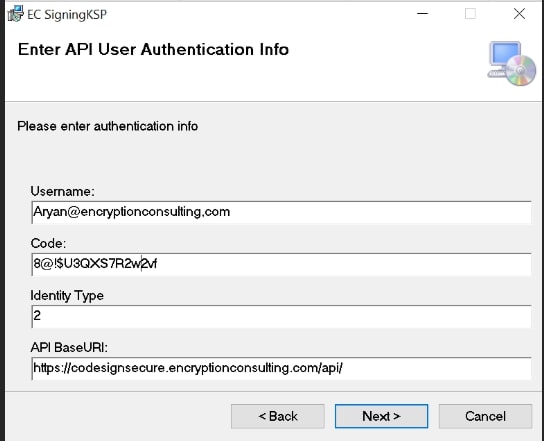
Enter the prompted details such as:
- Username: The username/email that you use to log in to the CodeSign Secure portal.
- Code: The secret code that you set at the time of setting up the CodeSign Secure solution.
- IdentityType: Keep this field as default (2)
- CodeSign Secure URL: The URL to access the portal (Remember to add “/api/” at the end of the URL)
-
Click Next and confirm the installation.
-
-
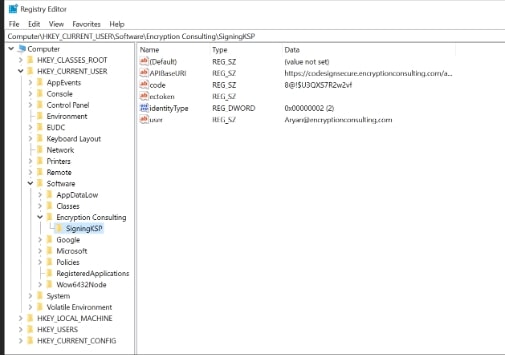
Configure the Registry Editor settings
-
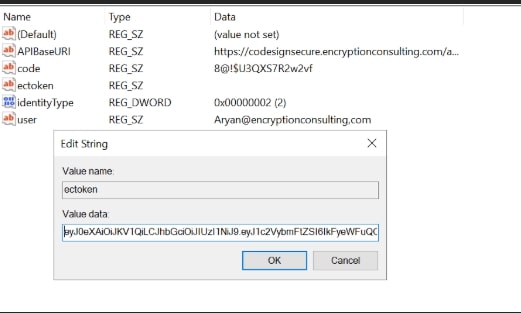
Open the Registry Editor and navigate to HKEY_CURRENT_USER>Software>Encryption Consulting>SigningKSP directory.
-
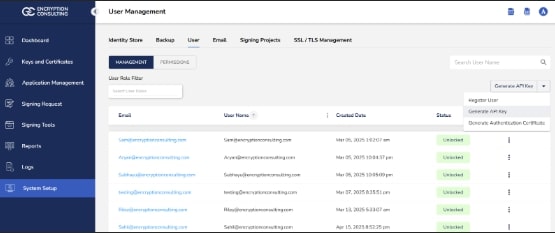
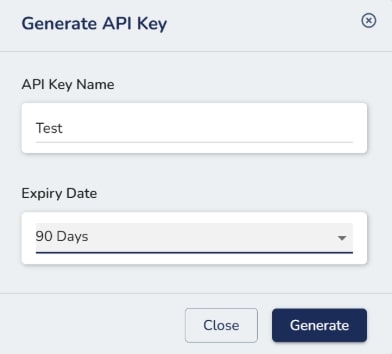
Now open the CodeSign Secure portal and navigate to System Setup>User. Select the drop-down from the right side to “Generate API Key”.
-
Create a token for your account by providing a name and the validity period. Remember to copy the token as it will be shown only once.
-
Add this token to the “ectoken” field in the Registry Editor.
-
Set up P12 Authentication Certificate
Setting up a P12 Certificate involves configuring your environment variables to authenticate your client machine with Encryption Consulting’s CodeSign Secure.
Steps:
-
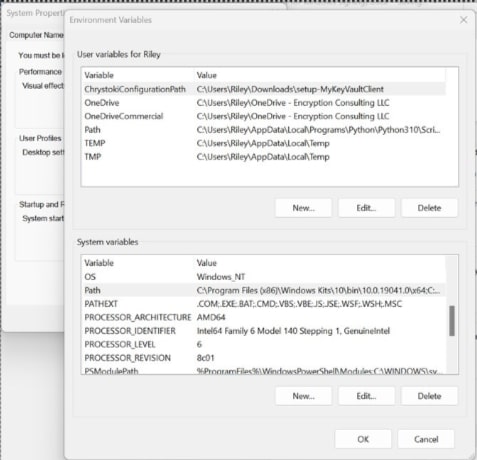
Configure the Environment Variables
-
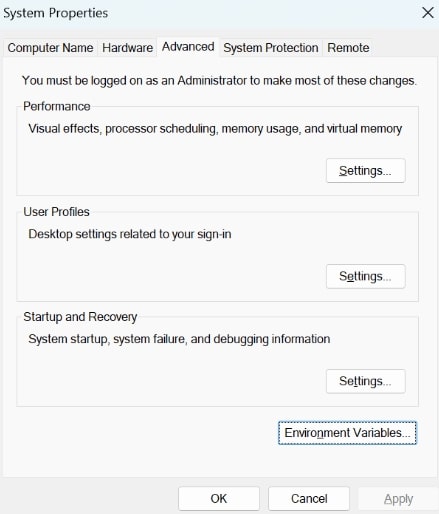
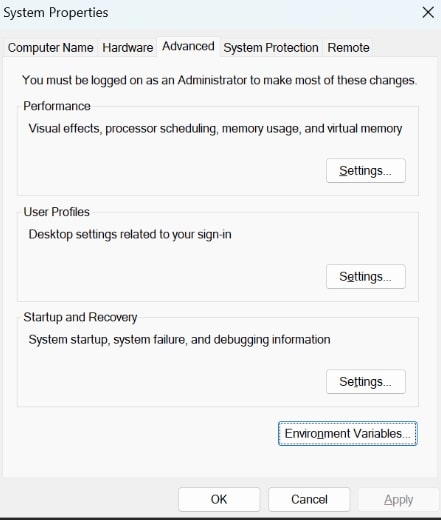
Open the Environment Variables from your Start Menu
-
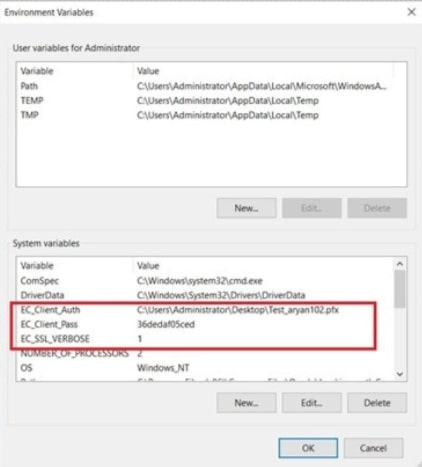
Add new system variables by clicking on the New button. Provide the following variable name and its corresponding details.
- EC_Client_Auth: Corresponds to the path of your SSL Authentication certificate, which can be created from CodeSignSecure
- EC_Client_Pass: Corresponds to the password of your certificate, which is provided at the time of creation of the certificate.
- EC_SSL_VERBOSE: Corresponds to the setting to either enable (1) or disable (0) the debugging output for EC KSP.
-
Set up Signtool for Signing
Setting up signtool for code signing involves ensuring that the Signtool.exe utility is available on your machine and configured to correctly interact with Encryption Consulting's cryptographic provider that provides access to your code signing certificate’s private key.
Steps:
-
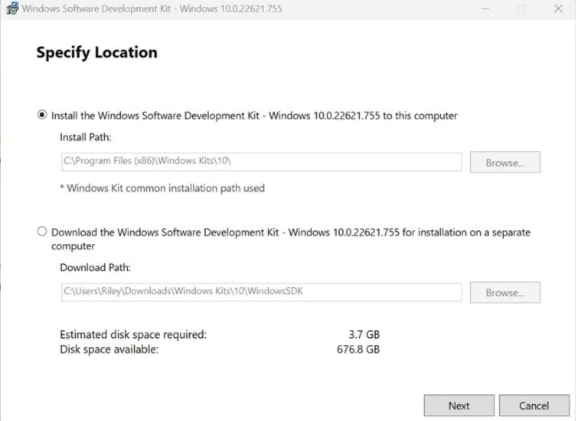
Download and Install Windows SDK
-
Using the following download link, download the Windows Software Development Kit with the following tools selected: developer.microsoft.com/en-us/windows/downloads/windows-10-sdk/

-
Open the installer once downloaded and select “Next” on the first screen to keep the default settings.
-
Follow the on-screen prompts of the installation wizard.
- Accept the Windows Kit Privacy.
- Accept the End-User License Agreement.
-
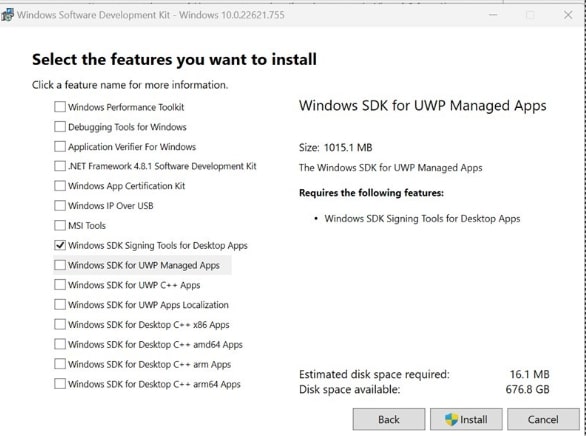
Deselect everything except “Windows SDK Signing Tools for Desktop Apps” and select “Install”.
-
Go to the following path where the tools should have been downloaded to: “C:\Program Files (x86)\Windows Kits\10\bin”. Select the desired version directory and check whether the “signtool.exe” file is present.
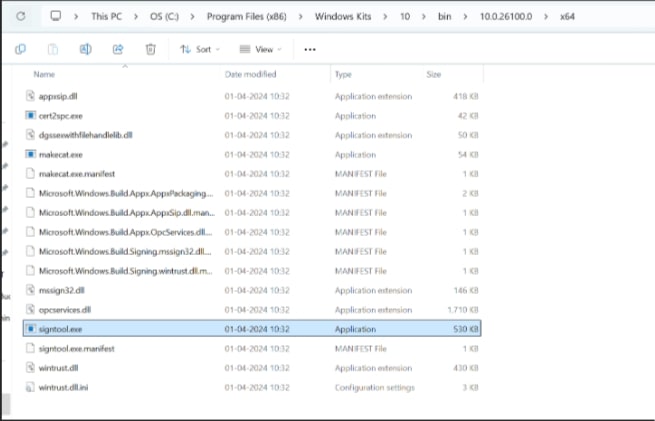
- Ensure you are in the x64 directory and copy this directory path.
-
-
Add Path to Signtool.exe in Environment Variables
-
Open the Environment Variables from the Start Menu.
-
Scroll down through the system variables on the bottom table until you find PATH in the variable names.
-
Double click on PATH in system variables and select New on the left of the screen. Paste your copied directory path of “signtool.exe” into the new selection.
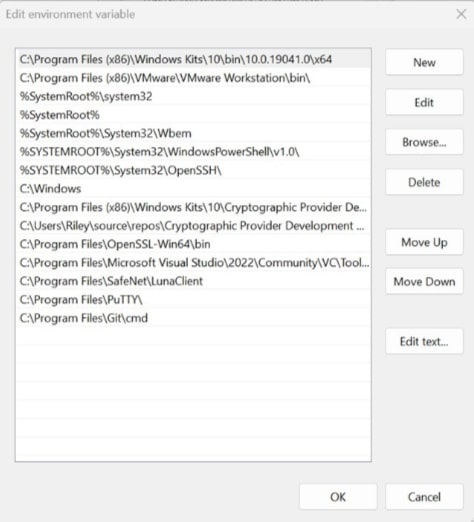
- Select OK at the bottom to exit the Environment Variables page.
-
Set up Azure DevOps
Setting up Azure DevOps involves configuring your Azure DevOps organization, project, and specifically your build pipelines for signing files using signtool on a Windows machine.
Steps:
-
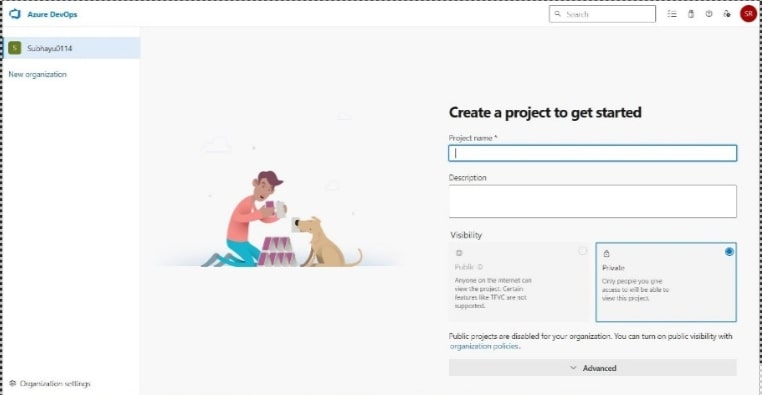
Create an Azure DevOps Project
- Navigate to dev.azure.com and sign in with your Microsoft account, or you can start for free with your GitHub Account too
-
Give the details as prompted

- You'll be asked to create an organization if you haven't already. Create an organization and get started with the project.
-
If you already have a project where you want to build the pipeline, navigate to pipelines. If not, create a simple project first. Provide the necessary details to continue.
-
Create a Personal Access Token
-
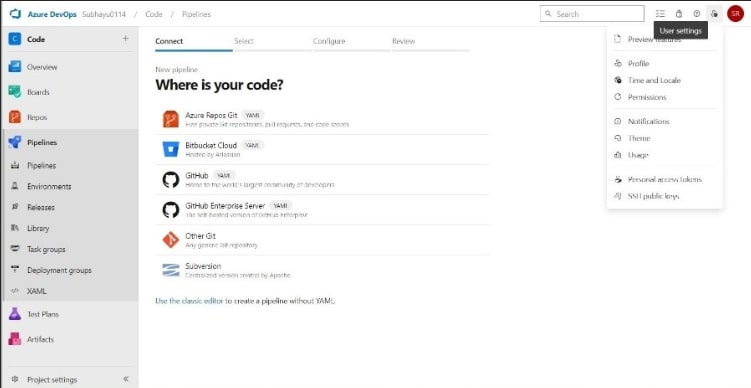
After a project is made, navigate to user settings at the top left corner of your screen and click on Personal Access Token. On the next page, click on “New Token”.
-
In the dialogue box prompted, provide necessary details such as the name of the token, organization name (the organization you created/accessed earlier. Set Expiration and Scopes. I have set the Scope to full access.
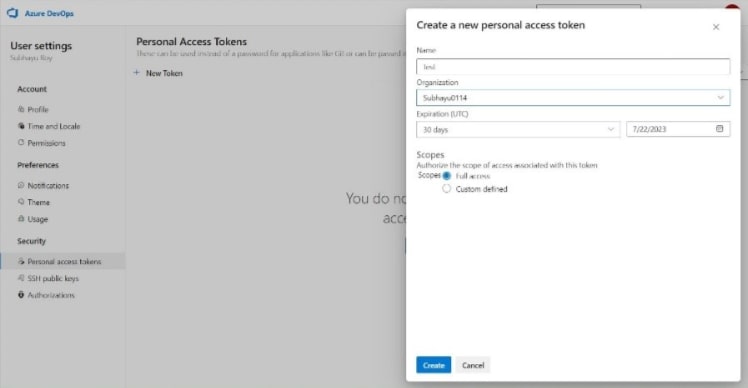
- Click on create and copy the token somewhere, as you won’t be able to see the token again.
-
-
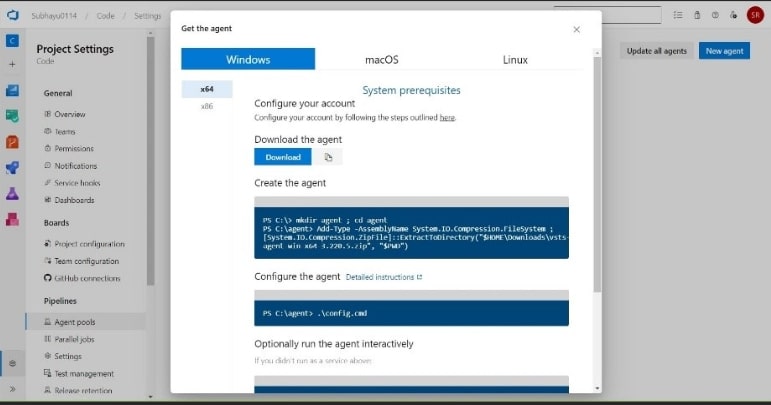
Set up and Download an Agent
-
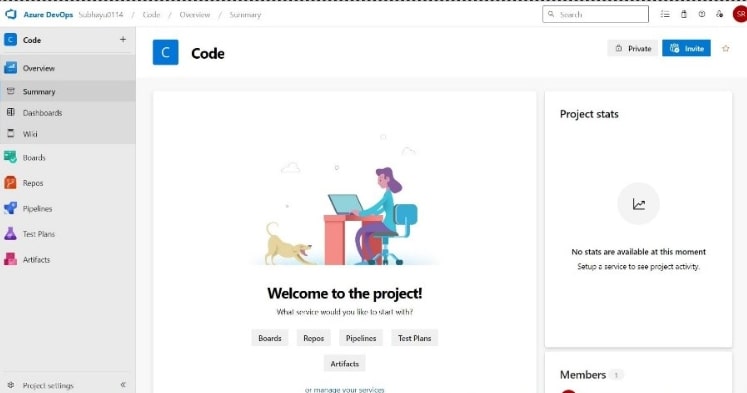
After we are done getting a token, we need to set up a self-hosted runner. This is a machine where Signtool and ECSigningKSP are installed and configured. To do so, return to the Code Summary page, and on the bottom left of the screen, you'll see Project settings. Click on that.
-
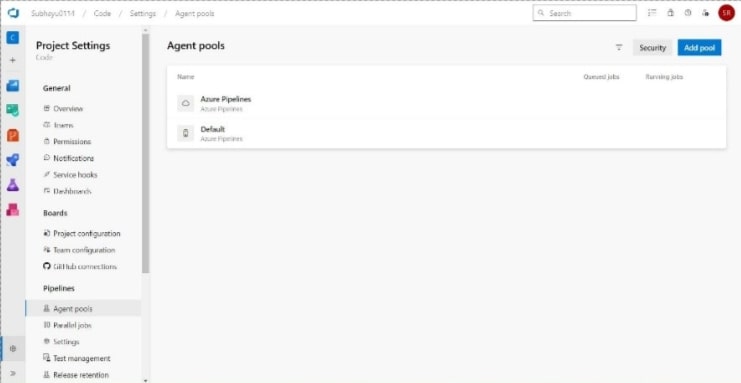
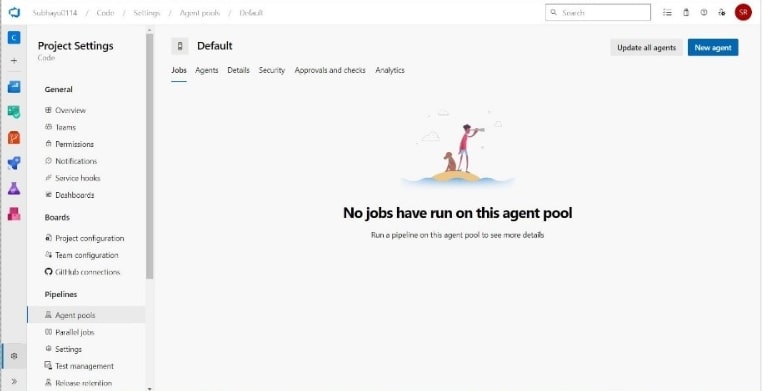
Under Pipelines, you'll see Agent Pools. Click on that and then click on default.
-
Click on the new agent at the top left.
-
Get the agent as per your operating system. I am proceeding with Windows. Download the agent, extract it to a folder “C:\agents”. You can also follow this documentation for more help with this.
-
-
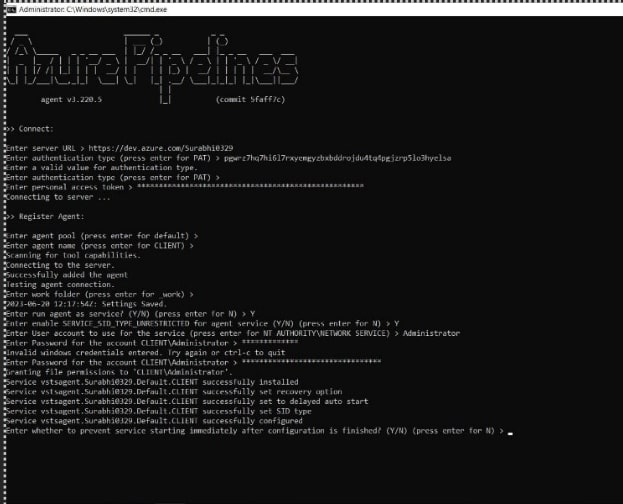
Configure the Agent
- After you extract the files, navigate to the folder where you extracted it to from cmd and run .\config.cmd.
-
Now, the server URL will be https://dev.azure.com/<your_organization_name>
Just press Enter for PAT on the authentication type, and on the next question, provide the token copied earlier.
- Once the Agent is registered, for Agent Pool, since we've it as default, press enter. If you want to name your agent something, you can name them, but press Enter for it to be named as CLIENT.
- Once the agent it added, You can leave the work folder as default or change as per your choice For Running Agent as a Service enter Y as in yes For User account to use for service make sure you set this as Administrator, this is important because you'll require Administrative Privilege to perform code signing. Provide the password for your administrative account on your machine
- Since we have set this as a service, the agent will run automatically; if we hadn't set this as a service, we would have to manually run the agent.
- Navigate to services.msc and scroll down to Azure Pipeline Agent to see that you've set Log on as Administrator. If you didn't do so, you can change it yourself. Just click on log on, and a dialogue box will appear; navigate to log on, set it to Administrator, provide the password for the same, and restart the service. Once this is done, go back to Azure DevOps to build the pipeline.
-
Create the Pipeline on Azure DevOps
-
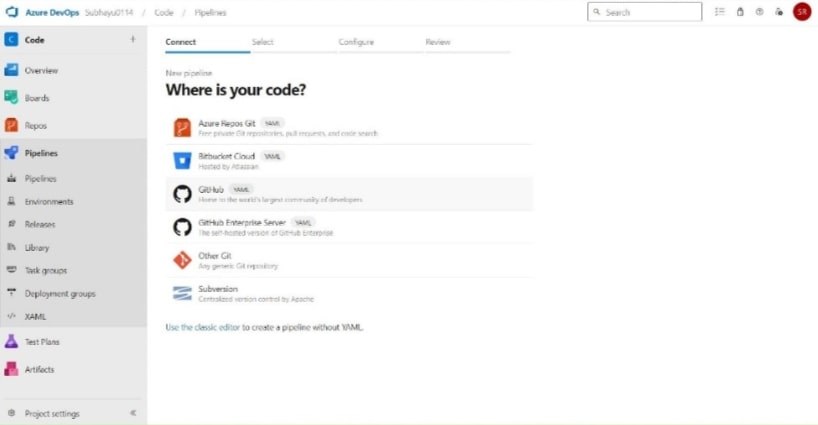
Click on “Pipelines” on Azure DevOps to get started, and click on “Create Pipeline” on the following page.
-
On the next page, in the Connect section, choose where your code is. In this, my code is on GitHub, and I am proceeding with so. You will require administrative privileges for your repository to grant access.
-
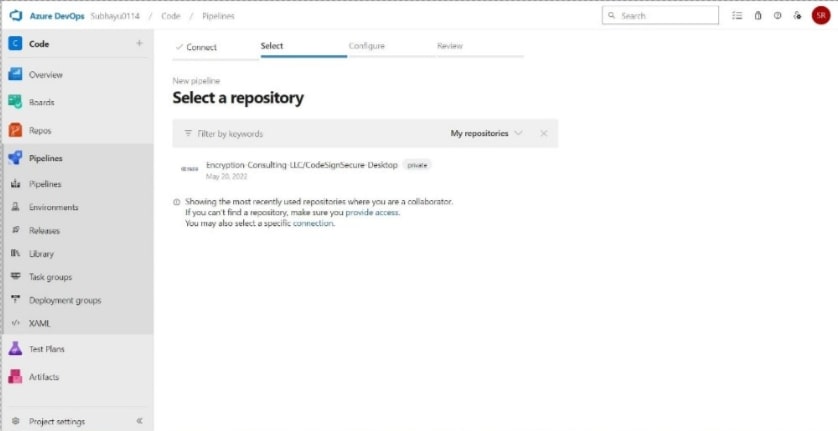
Select the repository where you've your code.
-
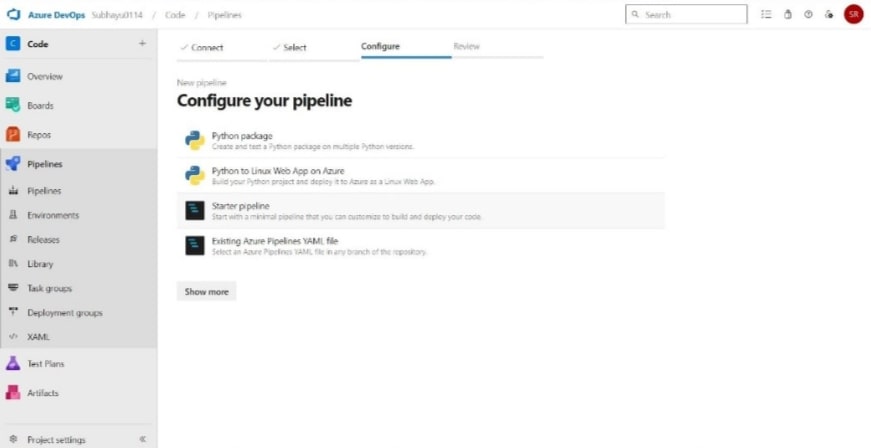
Now in the Configure Section, if you don't already have a .yml file in your repository, click on Starter Pipeline; if you do, click on Existing Azure Pipeline. For the starter pipeline, you may need to create a new branch or commit on the main branch itself.
-
In the editor, write the following script
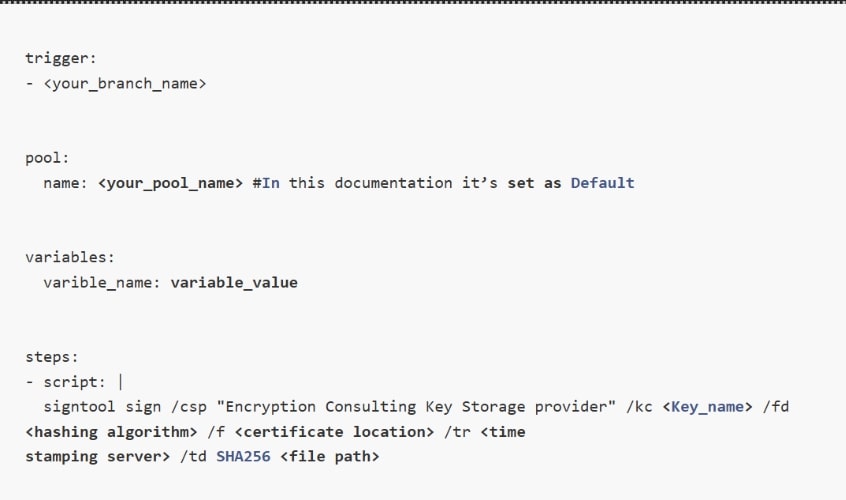
Please replace the variables specified under <variable name>. A short description of the expected variable is given below.
- <key name>: This refers to the cryptographic key used to sign the code. Example: evcodesigning
- <hashing algorithm>: You need to provide the name of a hashing algorithm, such as SHA256, SHA384, or SHA512. It must be one of these three values.
- <certificate location>: Provide the path to the code signing certificate that you got from the CodeSign Secure portal.
- <time stamp server>: A timestamp server provides proof that a digital signature was performed at a specific time, allowing verification in the future that a file was signed at a particular time. The one we generally use is http://timestamp.digicert.com
- <file path>: This is where you provide the path of the file that you want to sign. Example C:\<Folder_name>\<File_name>. Make sure you have provided a file name with the proper extension.
Note: In the “variables” section, you will need to provide the same fields and values that you have set in your Environment Variable for P12 Authentication Certificate.
-
-
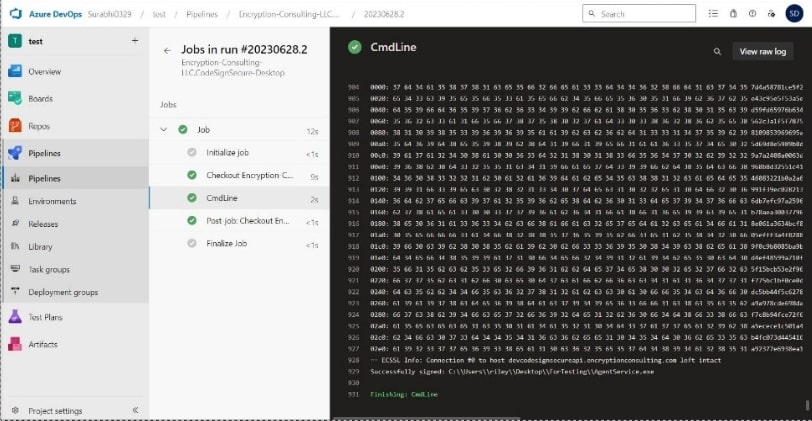
Run Azure DevOps Pipeline
When you click save and run, you'll be prompted with a branch tag, make sure the name provided here and under trigger in the script is the same before running the script.
Once the build is successful, you'll see that your file has been successfully signed.