Azure Key Vault Integration Guide
Prerequisites
A system administrator with the necessary Azure permissions must:
- Have access to Microsoft Entra ID (Azure AD).
- Have permission to create app registrations.
- Have permission to assign roles or create access policies in Azure Key Vault.
- Have the necessary access to CertSecure Manager for registration.
Integration Steps
Register an App in Microsoft Entra ID (Azure AD)
- Go to Microsoft Entra ID > App registrations.
-
Click New registration:
- Name: CertSecure_Manager_AKV
- Supported account types: Single tenant
- Leave Redirect URI empty.
- Click Register.
Generate a Client Secret
- Open your registered app → Go to Manage → Certificates & secrets.
-
Under Client secrets, click
New client secret:
- Description: e.g., AKVTesting
- Expiration: Choose a validity period (6 or 12 months).
- After saving, copy the secret value immediately (you won’t see it again).
Note the Following Values
You will need the following for CertSecure Manager:
- Tenant ID → Found in app Overview under “Directory (tenant) ID”.
- Client ID → Found in app Overview under “Application (client) ID”.
- Client Secret → Copied from Step 2.
Assign Access to Key Vault
Option 1: Using Role-Based Access Control (RBAC)
- Go to Key Vault in Azure Portal > Access control (IAM).
- Click Add > Add role assignment.
- Role: Select Key Vault Certificates Officer.
-
Assign access to:
User, group, or service principal → Search for your app name (e.g.,CertSecure_Manager_AKV_Test)
- Click Review + assign.
Option 2: Using Access Policy
- Go to Key Vault > Access policies.
- Click + Add Access Policy.
- Set Certificate permissions: check: Get, List, Import.
- Select your registered app as the Principal.
- Click Review + create.
Add Azure Key Vault in CertSecure Manager
Once you’ve completed the Azure-side configuration (App registration, client secret, and access permissions), follow these steps to add Azure Key Vault to CertSecure Manager:
- Login as Admin to the CertSecure Manager portal.
- Navigate to Utilities > Azure Key Vault. This section is visible only to administrators.
- Click on “Add Azure Key Vault”.
-
In the form that appears, fill in the following fields using the
values you gathered earlier:
- Key Vault Name: Provide a friendly name for internal reference.
- Tenant ID: Copied from the Entra ID app overview.
- Client ID: Application (client) ID from the registered app.
- Client Secret: The secret value you generated.
-
Click Save.

To Upload a Certificate to Azure Key Vault
- Navigate to Enrollment > Generate Certificate.
- Fill in the required details and click the Generate Certificate button.
- If Azure Key Vault integration is active, a pop-up window will appear.
-
In the pop-up:
- Select the desired Azure Key Vault.
- Specify a name (this becomes the unique identifier for the certificate in Key Vault).
-
Select the certificate format.

- Click Yes to proceed.
- Once the certificate is issued, it will be automatically uploaded to the selected Azure Key Vault.
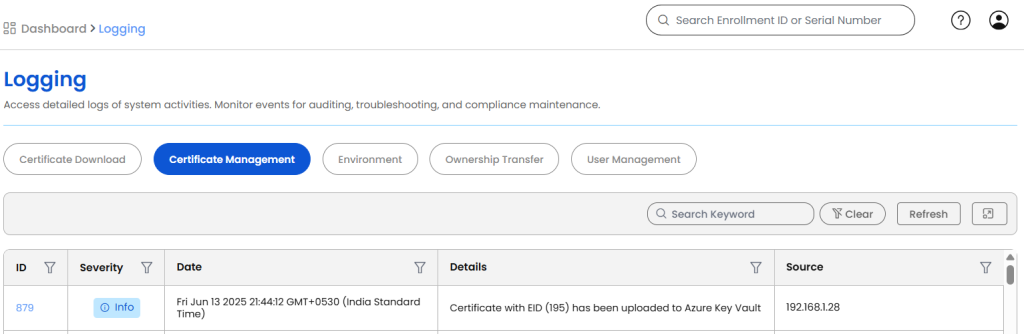
-
A log entry will be created under
Misc > Logging > Certificate Management,
indicating the success or failure of the
upload.