Jenkins Integration Guide
Integrating Jenkins with Encryption Consulting’s CodeSign Secure solution involves configuring your Jenkins environment and build jobs. It’s highly extensible through a vast ecosystem of plugins, making it adaptable to diverse development environments.
Set up CodeSign Secure KSP
The Encryption Consulting Key Storage Provider (KSP) for Windows is a software component that extends the Microsoft Cryptography API: Next Generation (CNG) framework. Its primary purpose is to enable Windows applications, such as signtool.exe, to interact seamlessly with the cryptographic keys and certificates stored within an HSM.
Steps:
-
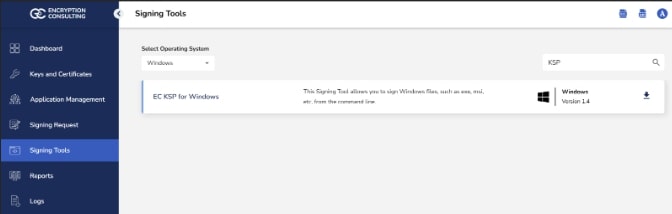
Download the EC KSP
-
Log in to the CodeSign Secure portal and navigate to the Signing Tools section to download “EC KSP for Windows.”
- Extract the zip file to get the “Setup.msi” file.
-
-
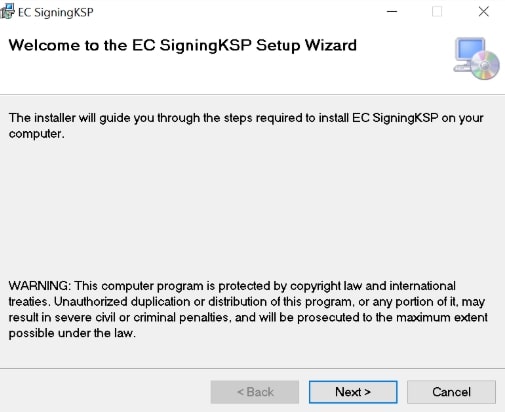
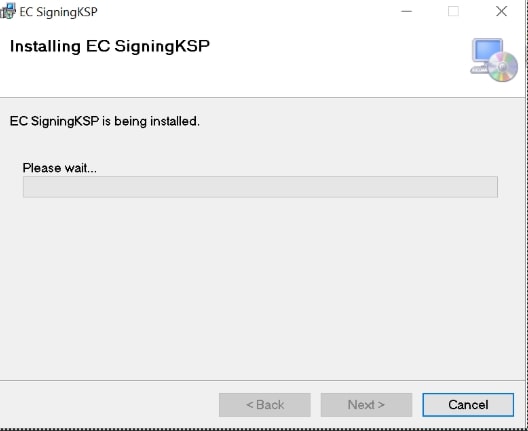
Install the EC KSP
-
Run the “Setup.msi” installer with Administrator privileges.
-
Follow the on-screen prompts of the installation wizard.
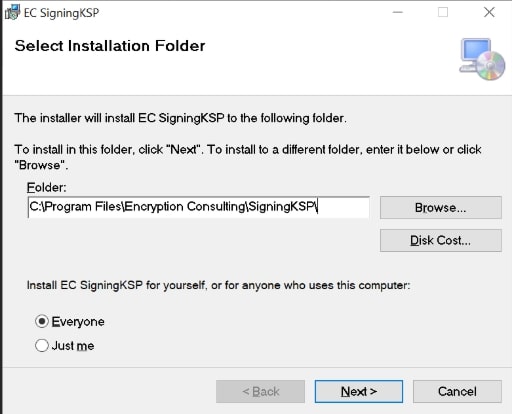
- Accept the End-User License Agreement.
- Choose the installation directory (the default is C:\Program Files\Encryption Consulting\SigningKSP).
- Choose whether you want to install the KSP for Everyone or just for the current user
-
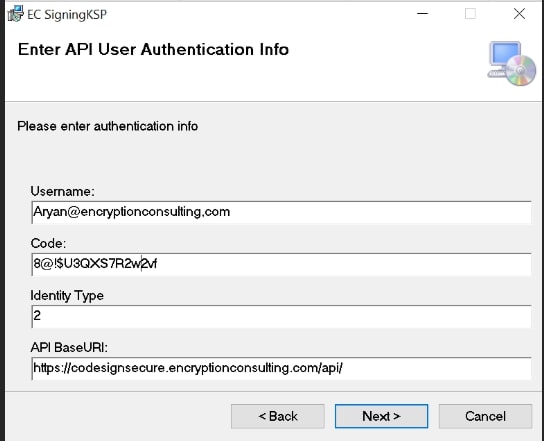
Enter the prompted details such as:
- Username: The username/email that you use to log in to the CodeSign Secure portal.
- Code: The secret code that you set at the time of setting up the CodeSign Secure solution.
- IdentityType: Keep this field as default (2)
- CodeSign Secure URL: The URL to access the portal (Remember to add “/api/” at the end of the URL)
-
Click Next and confirm the installation.
-
-
Configure the Registry Editor settings
-
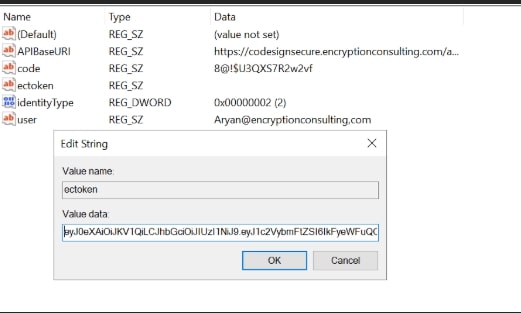
Open the Registry Editor and navigate to HKEY_CURRENT_USER>Software>Encryption Consulting>SigningKSP directory.
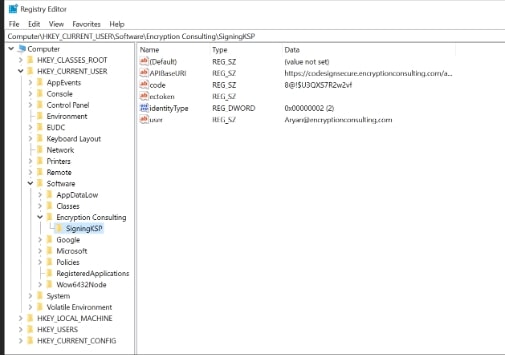
-
Now open the CodeSign Secure portal and navigate to System Setup>User. Select the drop-down from the right side to “Generate API Key”.
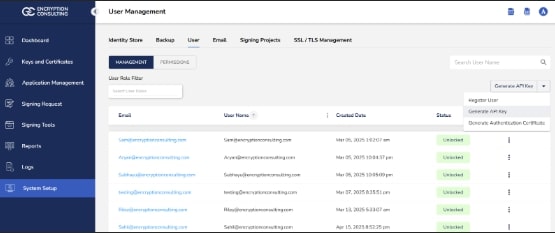
-
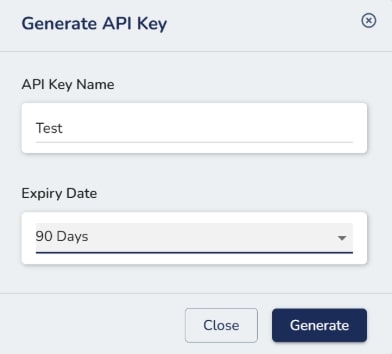
Create a token for your account by providing a name and the validity period. Remember to copy the token as it will be shown only once.
-
Add this token to the “ectoken” field in the Registry Editor.
-
Set up P12 Authentication Certificate
Setting up a P12 Certificate involves configuring your environment variables to authenticate your client machine with Encryption Consulting’s CodeSign Secure.
Steps:
-
Configure the Environment Variables
-
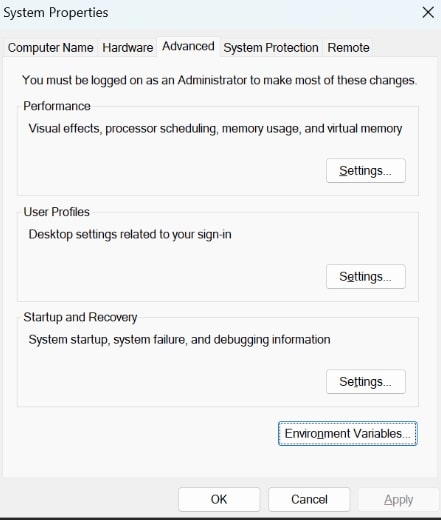
Open the Environment Variables from your Start Menu
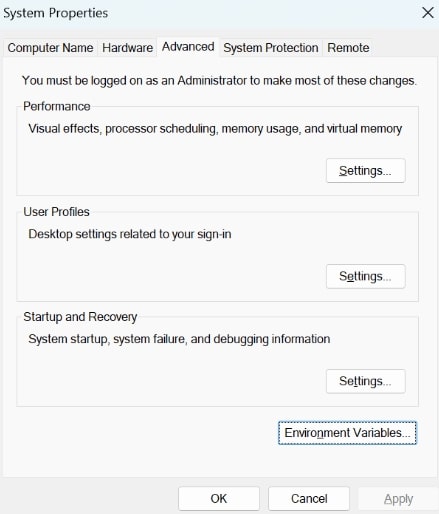
-
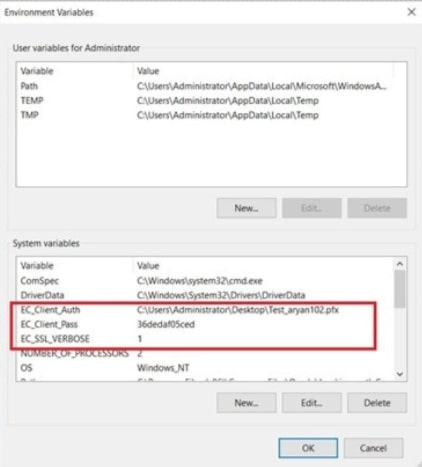
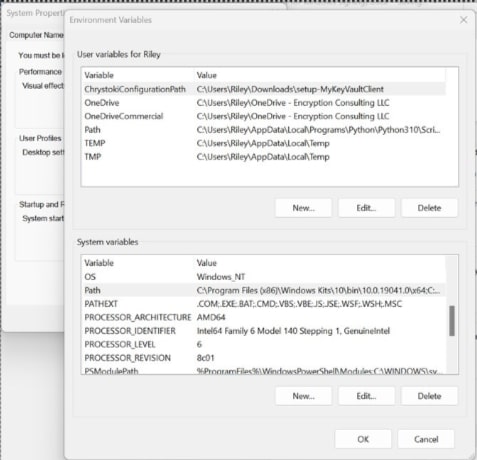
Add new system variables by clicking on the New button. Provide the following variable name and its corresponding details.
- EC_Client_Auth: Corresponds to the path of your SSL Authentication certificate, which can be created from CodeSignSecure
- EC_Client_Pass: Corresponds to the password of your certificate, which is provided at the time of creation of the certificate.
- EC_SSL_VERBOSE: Corresponds to the setting to either enable (1) or disable (0) the debugging output for EC KSP.
-
Set up Signtool for Signing
Setting up signtool for code signing involves ensuring that the Signtool.exe utility is available on your machine and configured to correctly interact with Encryption Consulting's cryptographic provider that provides access to your code signing certificate’s private key.
Steps:
-
Download and Install Windows SDK
-
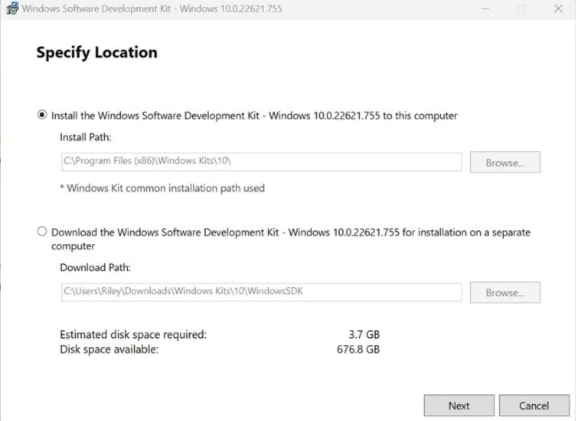
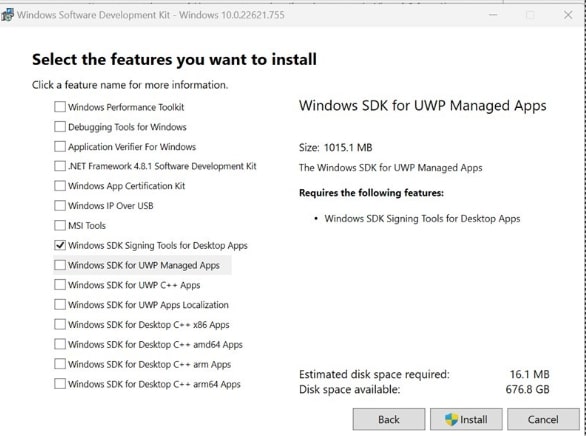
Using the following download link, download the Windows Software Development Kit with the following tools selected: developer.microsoft.com/en-us/windows/downloads/windows-10-sdk/

-
Open the installer once downloaded and select “Next” on the first screen to keep the default settings.
-
Follow the on-screen prompts of the installation wizard.
- Accept the Windows Kit Privacy.
- Accept the End-User License Agreement.
-
Deselect everything except “Windows SDK Signing Tools for Desktop Apps” and select “Install”.
-
Go to the following path where the tools should have been downloaded to: “C:\Program Files (x86)\Windows Kits\10\bin”. Select the desired version directory and check whether the “signtool.exe” file is present.
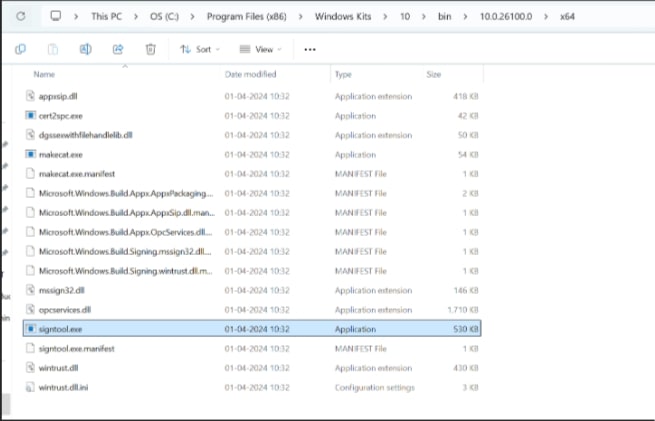
- Ensure you are in the x64 directory and copy this directory path.
-
-
Add Path to Signtool.exe in Environment Variables
-
Open the Environment Variables from the Start Menu.
-
Scroll down through the system variables on the bottom table until you find PATH in the variable names.
-
Double click on PATH in system variables and select New on the left of the screen. Paste your copied directory path of “signtool.exe” into the new selection.
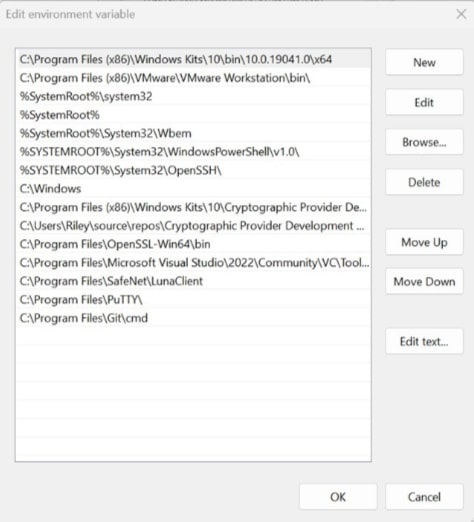
- Select OK at the bottom to exit the Environment Variables page.
-
Set up Jenkins
Setting up Jenkins involves configuring your Jenkins automation server and its build agents to integrate with Encryption Consulting’s CodeSign Secure solution for automated code signing.
Steps:
-
Download and install the Jenkins application
- Download the Jenkins application for Windows from here.
-
When you launch the Windows Installer, an Installation Setup Wizard will open. Click ‘Next’ on the Setup Wizard to begin your installation.
-
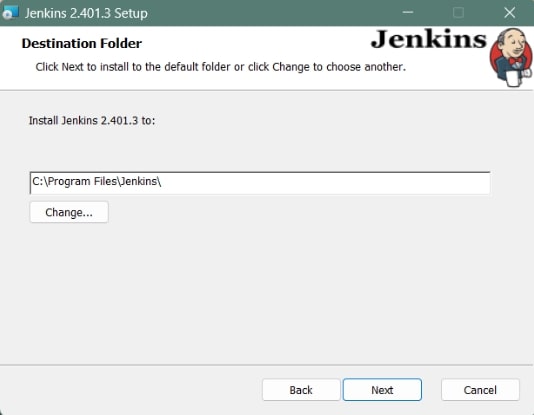
Choose the destination folder for your Jenkins installation, then click Next to proceed.
-
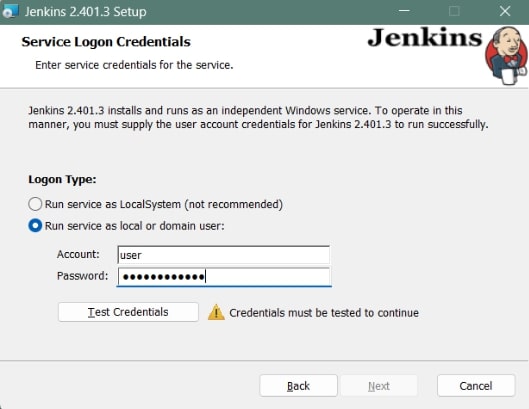
When setting up Jenkins, it’s advisable to install and run it as a standalone Windows service with a local or domain user. Enter the domain username and password for Jenkins. Then, click on Test Credentials to verify your domain credentials, and click Next.
-
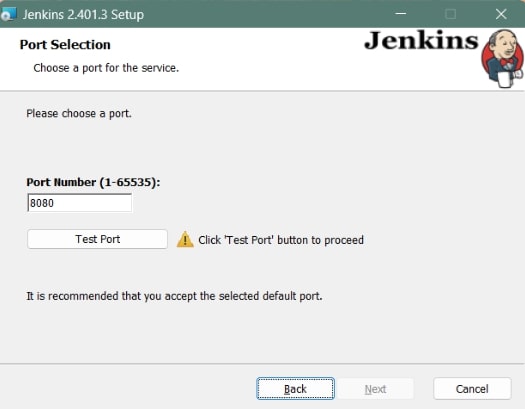
Choose the port for Jenkins to run. Use the Test Port button to check if the specified port is available on your machine. If the port is free, a green tick mark will appear below, allowing you to proceed by clicking Next.
-
The installation process verifies whether Java is present on your machine, automatically filling the dialog with the Java home directory. If the required Java version isn’t installed, you will be asked to install it. After selecting your Java home directory, click Next to proceed.
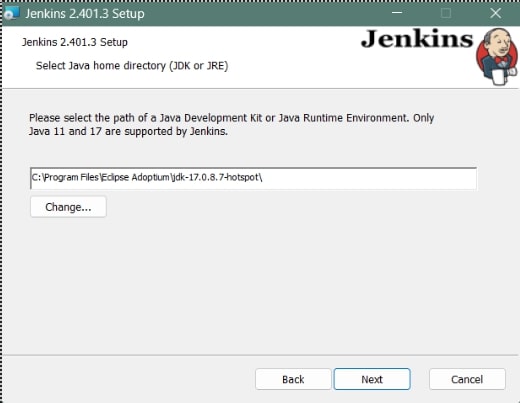
You can check the Java requirements and versions here.
-
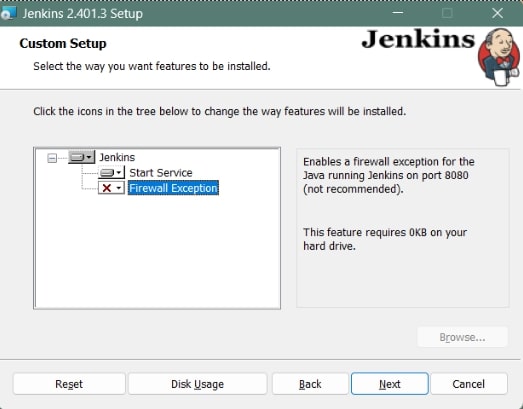
Choose additional services required for Jenkins installation, then click Next.
-
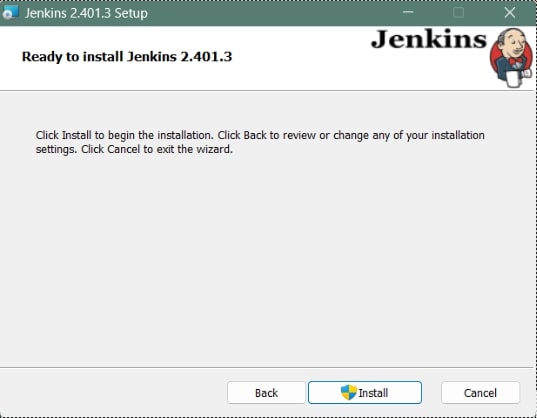
Press the Install button to begin installing Jenkins.

-
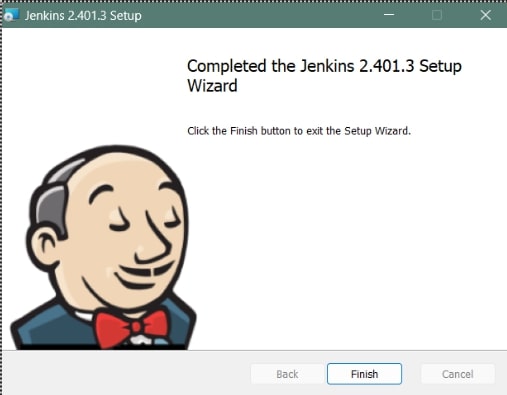
After the installation is finished, click Finish to complete the process.
-
Configure Jenkins Service
- Go to services on your system from the Start Menu
- Scroll down to Jenkins. In the “Log on As” column, you can see the user account set up for Jenkins. If it's set to anything (Local Service/System, Network Service/System) other than “.\Administrator”, then we have to set it for Administrator.
- Double-click on Jenkins or right-click> Properties to open Properties. Go to Log On. Select “This Account”. Set it as “.\Administrator”. Give a password, preferably an administrator password. Click on Apply once done.
- Once we have set this, we'll now head to Jenkins. Whichever URL/hostname you specified earlier while setting up, navigating to that from your browser will lead you to Jenkins. Here, I have set it up as http://localhost:8080/ (It is also the default).
-
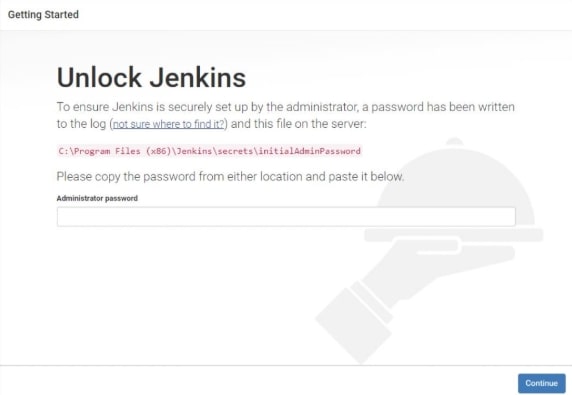
Unlock Jenkins
-
Navigate to http://localhost:8080 (or the specific port you set for Jenkins during installation) and wait for the Unlock Jenkins page to load.
-
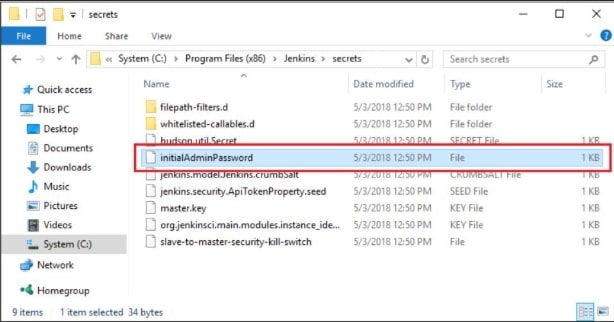
The initial Administrator password file will be present in the directory as shown on the Jenkins browser page, like “C:\Program Files (x86)\Jenkins\secrets”. If you can't find it there, check in the Jenkins installation directory specified during the Jenkins Installation process. There, you'll find a file named initialAdminPassword
-
Open the file and copy the content of the initialAdminPassword file.

- On the unlock page, paste this password into the password field and click Continue.
-
-
Set up the Jenkins Pipeline
-
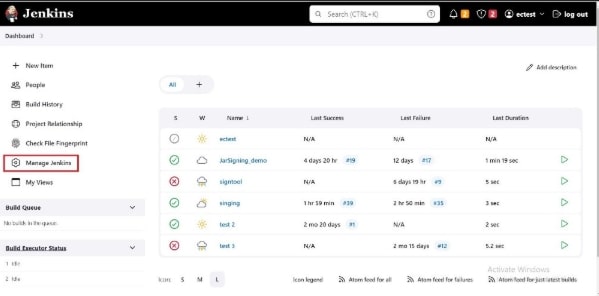
On the Dashboard, click on Manage Jenkins (NOTE: Manage Jenkins doesn't come up unless you have a job created)
-
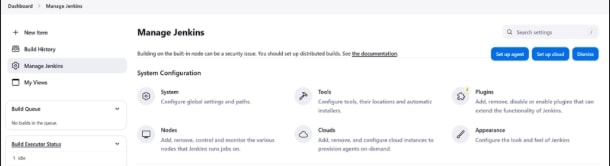
Scroll down to Plugins, Under System Configuration
-
In Manage Plugins, in the “Available Plugins” section, search for the PowerShell plugin. It won't show in the search results in this section if it has already been installed. You can see under “Installed Plugins” the plugins you have installed.
Click the Checkbox of the plugin (if not already installed), and click on Install without restart. You can refresh the page once installed.
- After doing so go to Global Tool Configuration. Dashboard> Manage Jenkins > Under System Configuration (as shown in the picture above) ‐ Global Tool Configuration
-
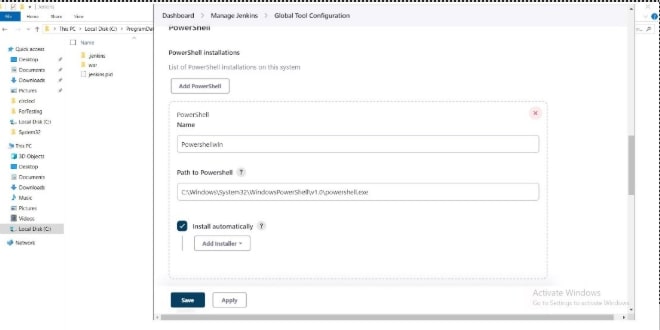
Scroll down to PowerShell. Click on Add PowerShell. You'll see a configuration window like the picture below. Name your PowerShell. Provide the path (where it is located on your machine) to your PowerShell.
The default path is C:\Windows\System32\WindowsPowerShell\v1.0\powershell.exe Click on Apply and Save.
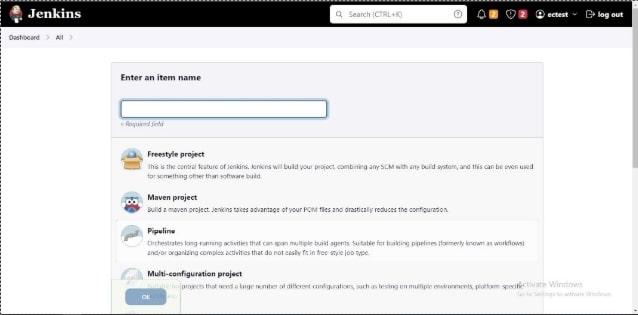
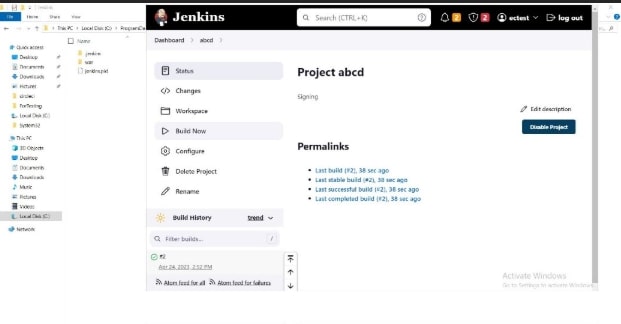
- Now, from the Dashboard, click on the “New Item” option.
-
Enter any item name and click on the pipeline, and click ok.
-
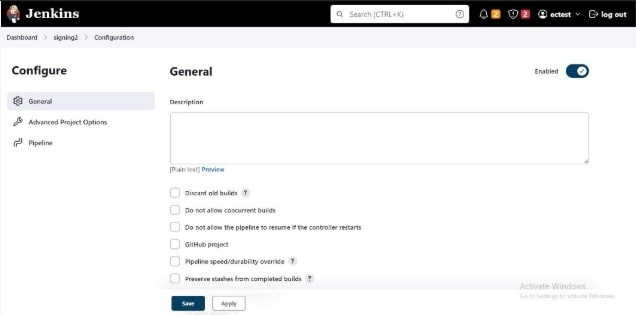
In the configuration page, under General, put up a description as you wish.
-
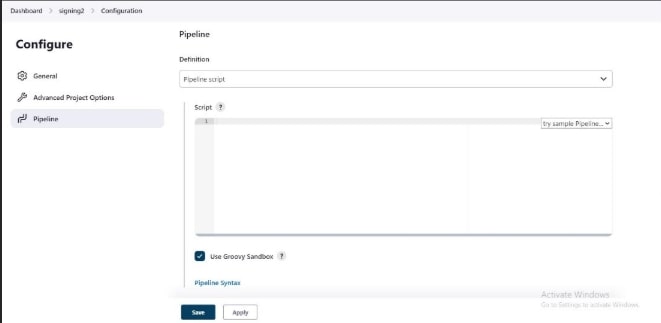
Scroll down to the bottom to find Pipeline.
-
Write the script in the script box and click on save. You'll need to edit your environment variable as per your setup.

-
-
Run the Jenkins Pipeline
-
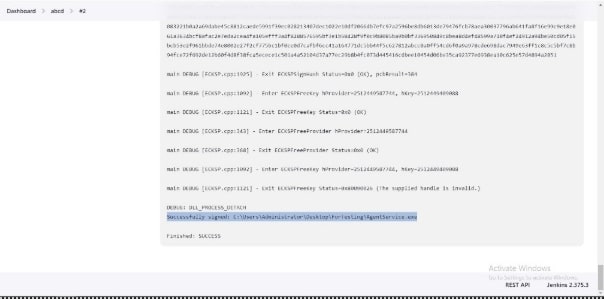
Click on build now, and you'll see a build number running on the screen.
-
If you click on the build number and go for console output you'll see that your file has been signed.
-