MSCA Connector Integration Guide
Prerequisites
Before deployment, ensure:
- CertSecure Manager frontend and backend are fully operational.
- Use an Admin CertSecure account for setup.
- Machine is domain-joined.
-
A Service Account is used with the following permissions:
- Log on as a Service
- Log on as a Batch Job
- Allow Log on through Remote Desktop Services
- Service account has Read and Enroll permissions on each certificate template.
Hardware Requirements:
- CPU: 16 cores
- RAM: 32 GB
- Storage: 200 GB
Software Requirements:
- OS: Windows 11 or Windows Server 2019 (or later)
Step-by-Step Guide
-
Running the Installer
- Mount the ISO by right-clicking and selecting Mount.
- Open the mounted drive, find the installer, and run as Administrator.
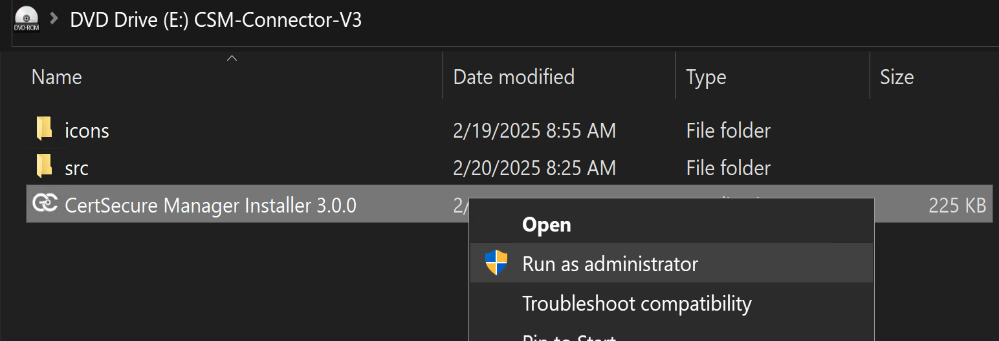
Note: If v1.98 or older connector is running, manually terminate it first.
-
Installation and Service Configuration
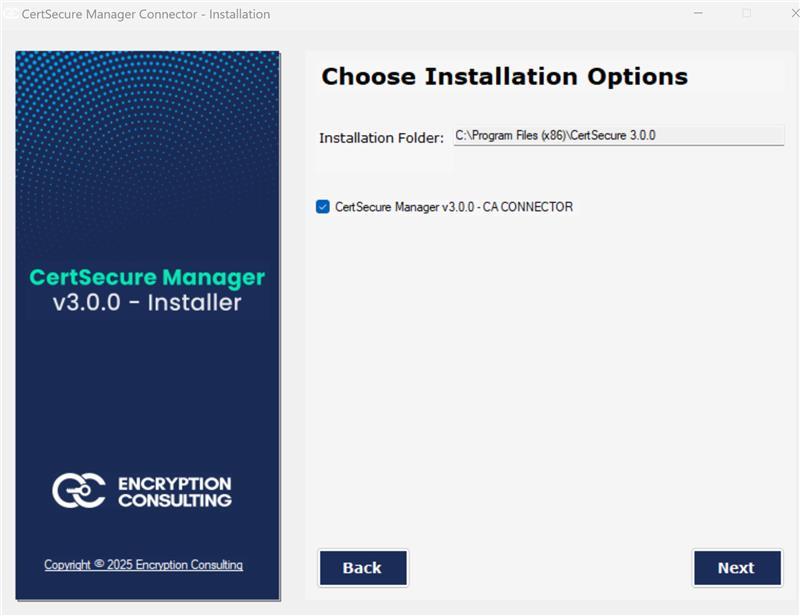
- Click Next → Accept license → Default path: C:\Program Files (x86)\CertSecure 3.0 → Click Next.
-
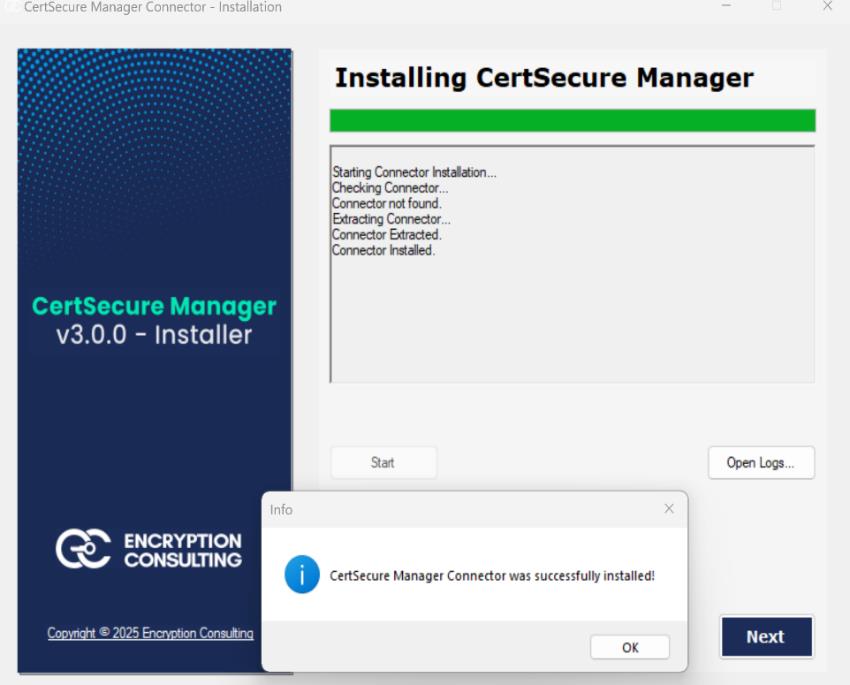
Click Start on installation page → wait for completion.
View logs if needed → Click OK, then Next.
-
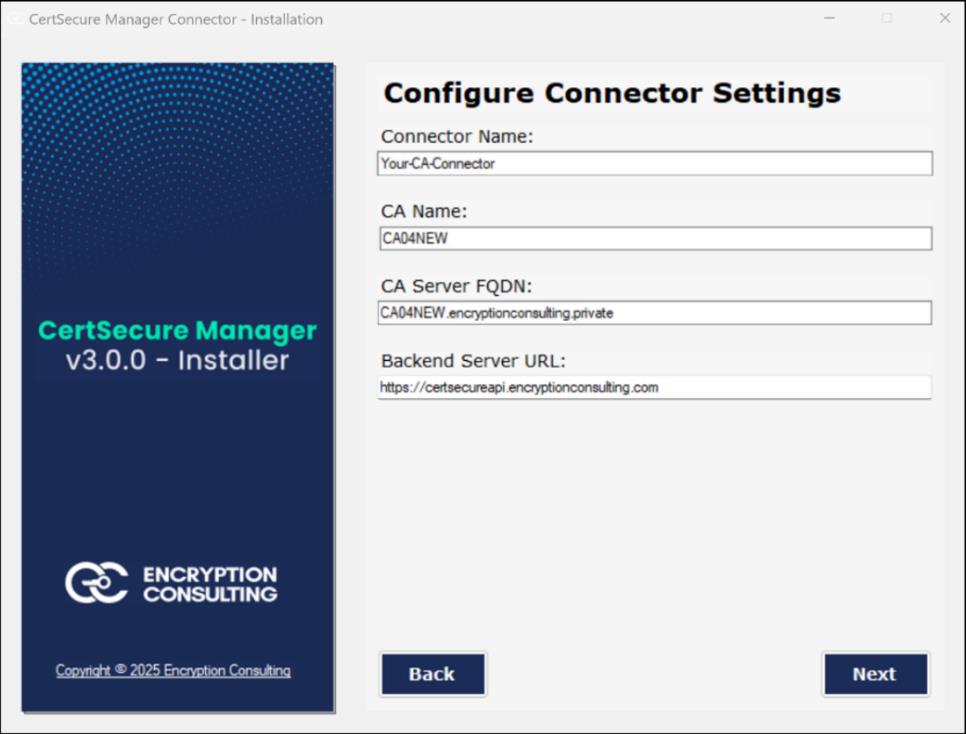
On Configure Connector Settings page:
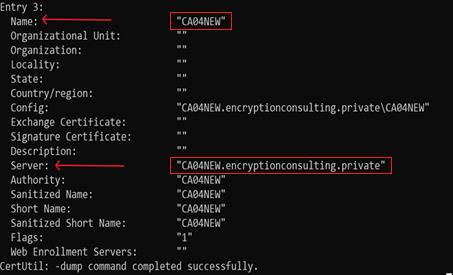
- Run certutil in Admin CMD.
- Note down Name = CA Name, and Server = CA Server FQDN.
- Enter Connector Name (any value) → Click Next
-
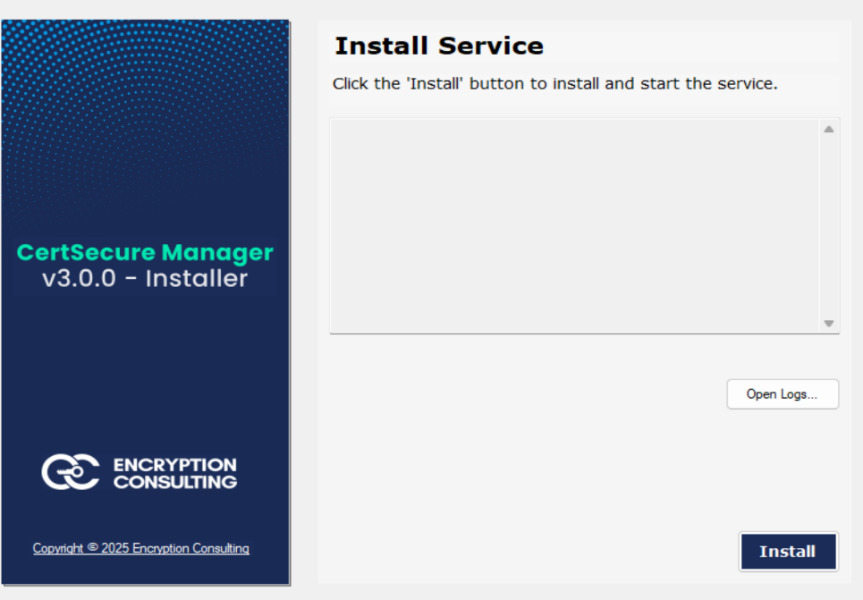
On Install Service page:
- Click Install.
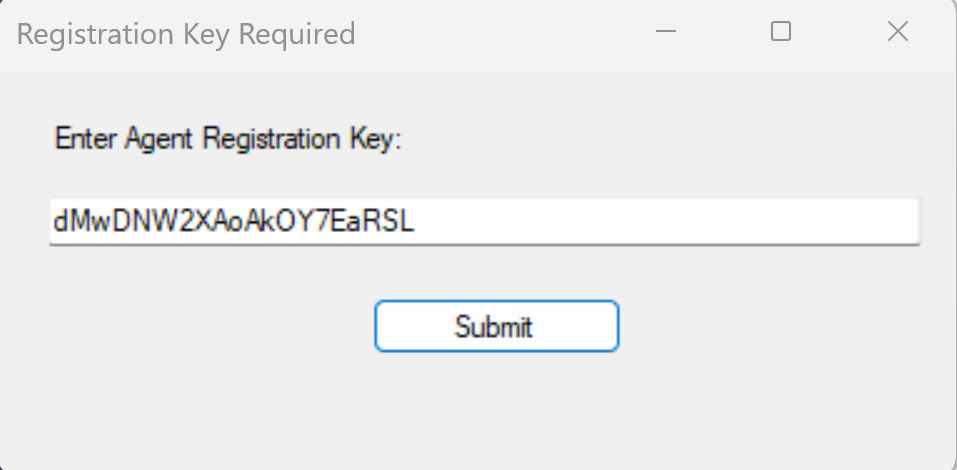
- After service installs, a prompt will ask for Registration Key.
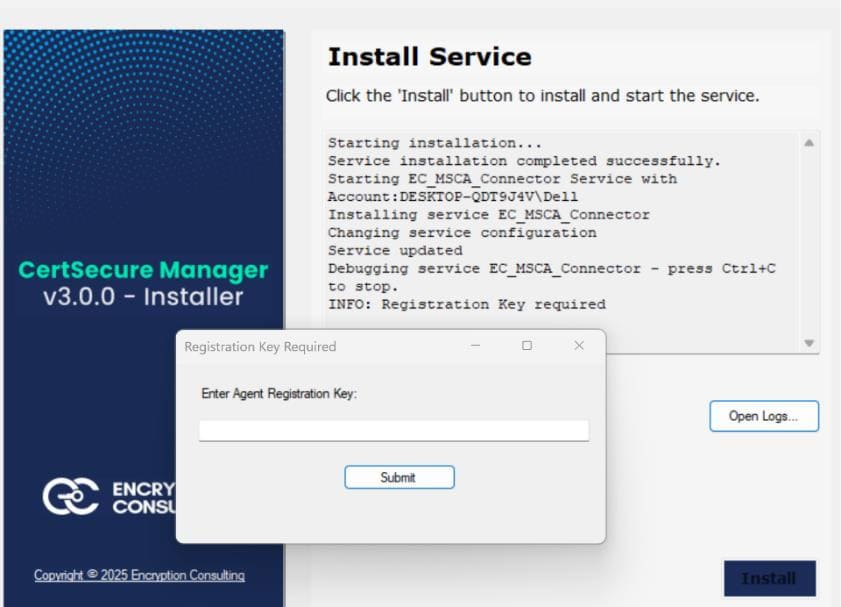
-
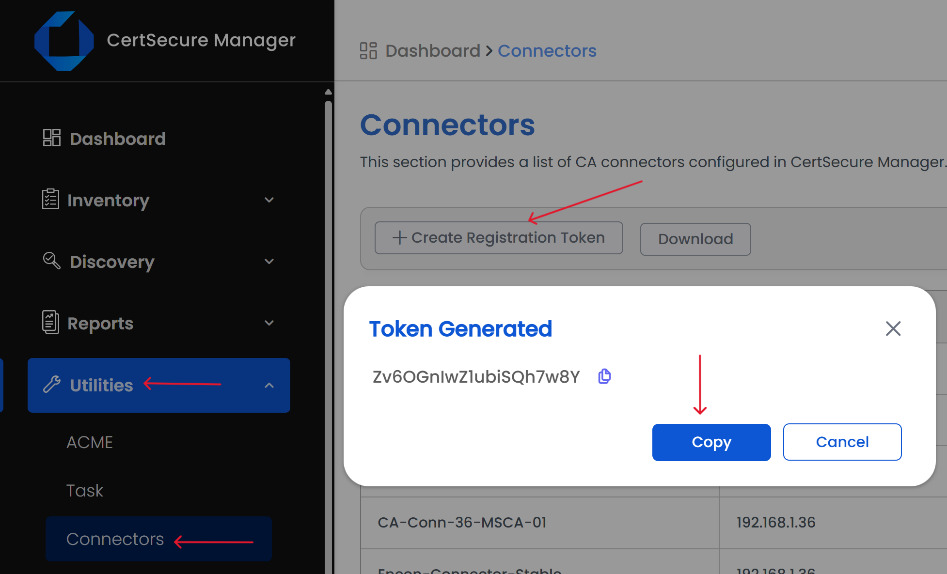
On CertSecure UI → Go to Utilities > Connectors
- Click Create Registration Token.
- Copy token → paste into prompt on installer → Click Submit → Close prompt → Click OK → Click Next.
-
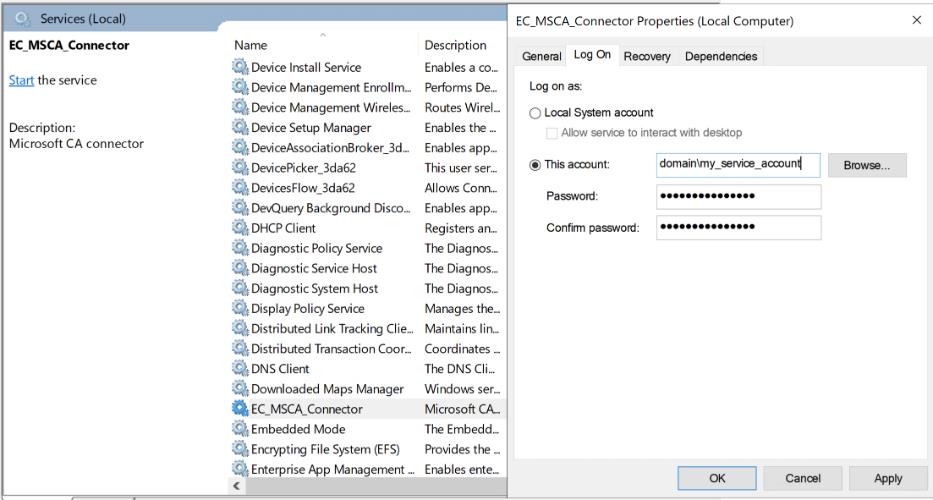
Open Services.msc →
- Right-click EC_MSCA_Connector → Properties > Log On → Select This Account
- Enter Service Account credentials → Click OK
- Right-click service again → Click Start
-
Service Status will become “Running”
Go to UI → Click Refresh to see the connector displayed.

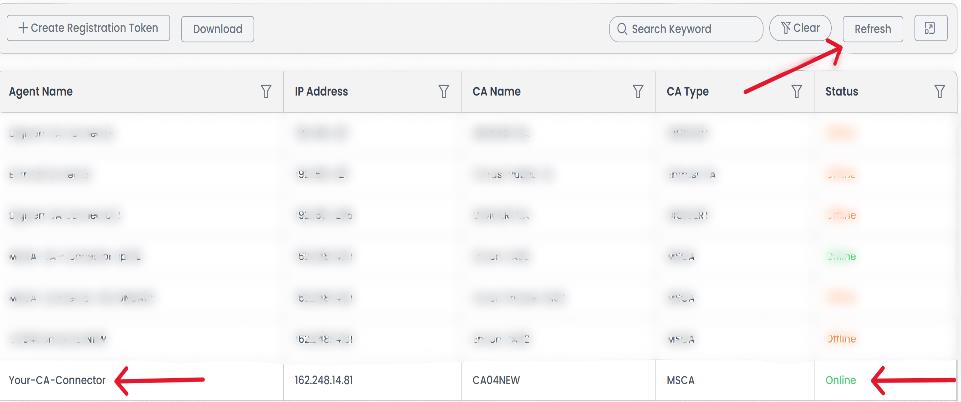
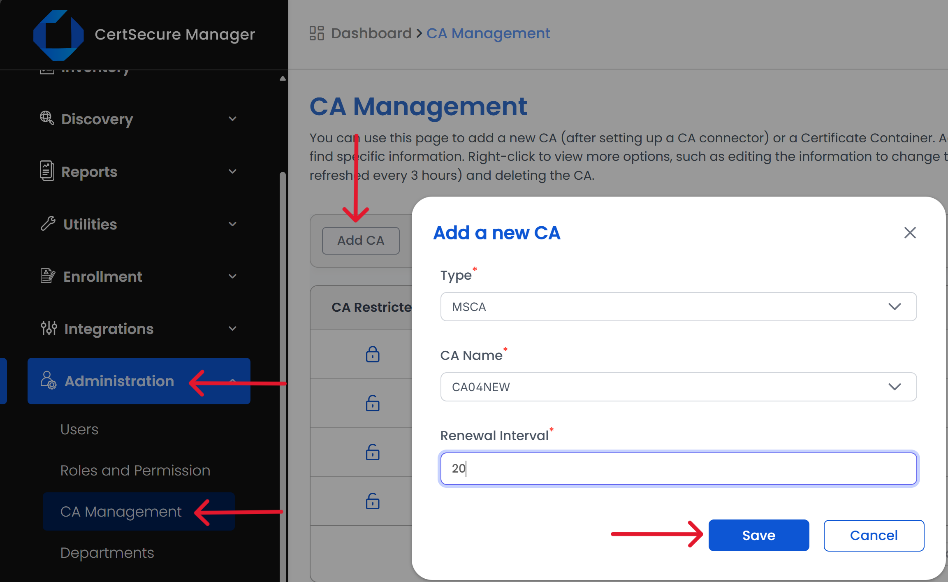
- In CertSecure UI:
- Go to Administration > CA Management → Click Add CA
- Choose CA Type: MSCA
- Enter CA Name (e.g., CA04NEW as entered earlier)
- Set Renewal Interval (e.g., 5 = sync every 5 mins) → Click Save
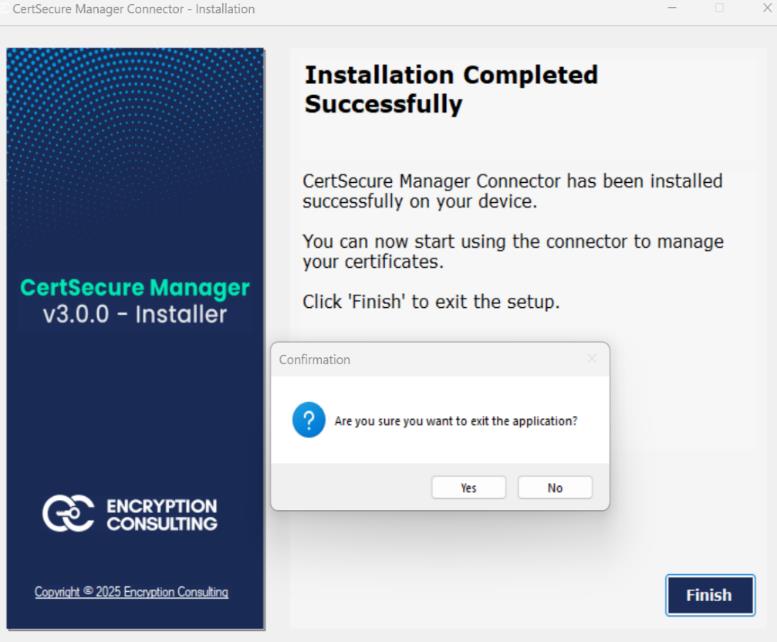
- On installer → Click Finish → Click Yes on confirmation → Exit application.