TeamCity Integration Guide
Integrating CodeSign Secure with TeamCity automates the code signing step within your build configurations, ensuring that your software artifacts are securely signed before they are released or deployed, without manual intervention.
Set up CodeSign Secure KSP
The Encryption Consulting Key Storage Provider (KSP) for Windows is a software component that extends the Microsoft Cryptography API: Next Generation (CNG) framework. Its primary purpose is to enable Windows applications, such as signtool.exe, to interact seamlessly with the cryptographic keys and certificates stored within an HSM.
Steps:
-
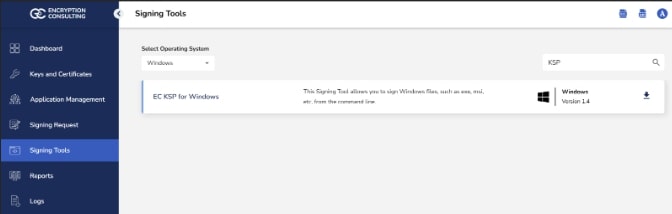
Download the EC KSP
-
Log in to the CodeSign Secure portal and navigate to the Signing Tools section to download “EC KSP for Windows.”
- Extract the zip file to get the “Setup.msi” file.
-
-
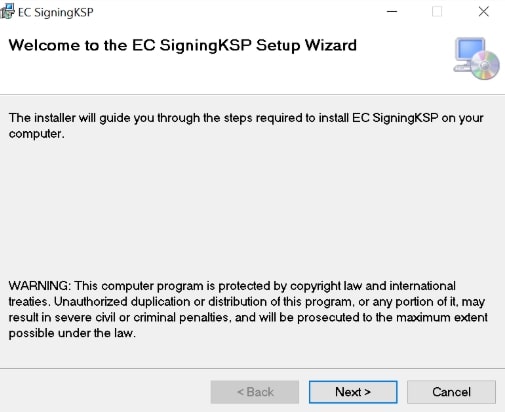
Install the EC KSP
-
Run the “Setup.msi” installer with Administrator privileges.
-
Follow the on-screen prompts of the installation wizard.
- Accept the End-User License Agreement.
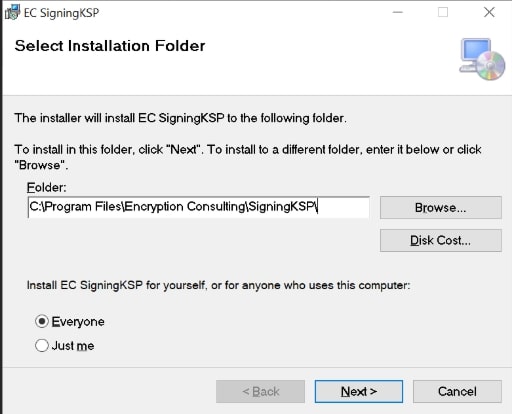
- Choose the installation directory (the default is C:\Program Files\Encryption Consulting\SigningKSP).
- Choose whether you want to install the KSP for Everyone or just for the current user
-
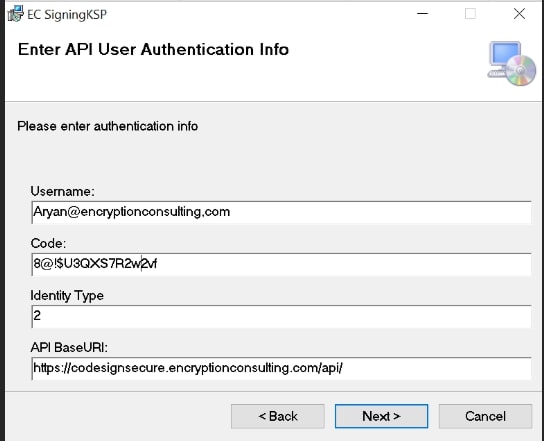
Enter the prompted details such as:
- Username: The username/email that you use to log in to the CodeSign Secure portal.
- Code: The secret code that you set at the time of setting up the CodeSign Secure solution.
- IdentityType: Keep this field as default (2)
- CodeSign Secure URL: The URL to access the portal (Remember to add “/api/” at the end of the URL)
-
Click Next and confirm the installation.
-
-
Configure the Registry Editor settings
-
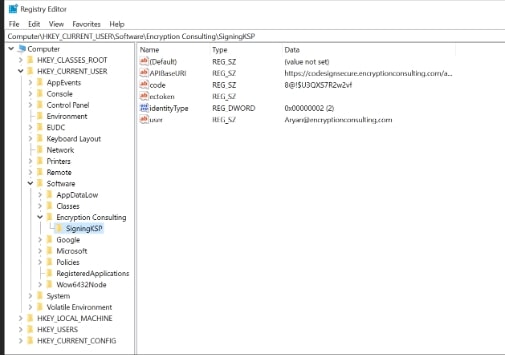
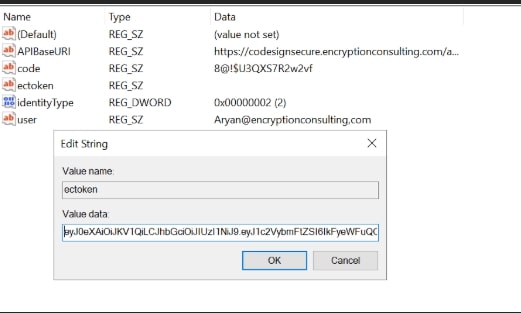
Open the Registry Editor and navigate to HKEY_CURRENT_USER>Software>Encryption Consulting>SigningKSP directory.
-
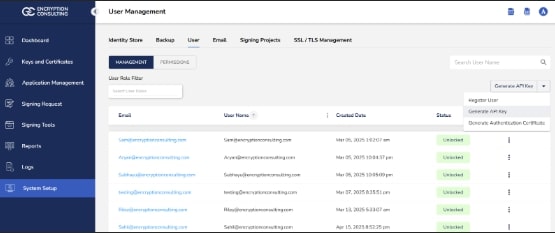
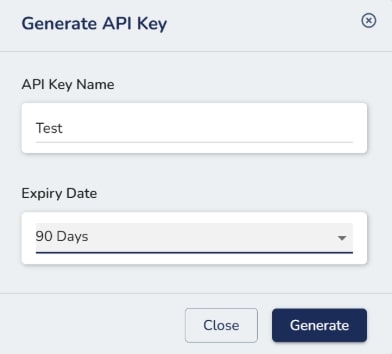
Now open the CodeSign Secure portal and navigate to System Setup>User. Select the drop-down from the right side to “Generate API Key”.
-
Create a token for your account by providing a name and the validity period. Remember to copy the token as it will be shown only once.
-
Add this token to the “ectoken” field in the Registry Editor.
-
Set up P12 Authentication Certificate
Setting up a P12 Certificate involves configuring your environment variables to authenticate your client machine with Encryption Consulting’s CodeSign Secure.
Steps:
-
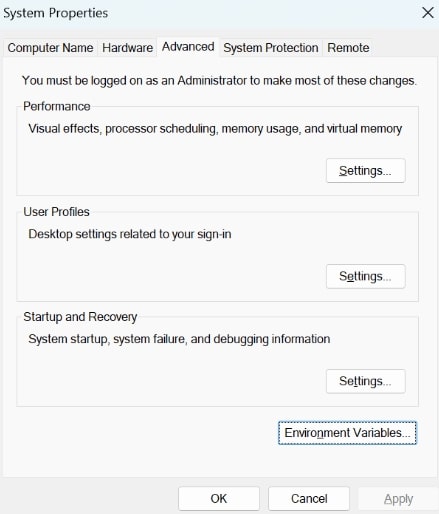
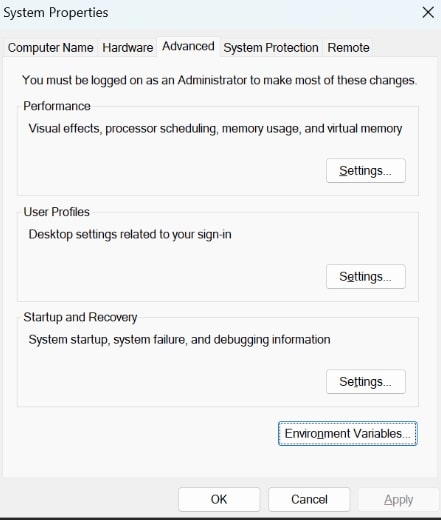
Configure the Environment Variables
-
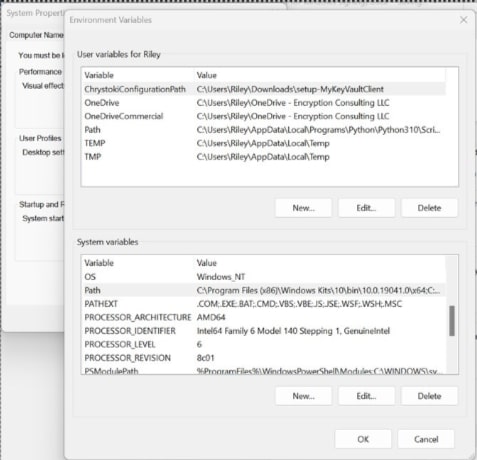
Open the Environment Variables from your Start Menu
-
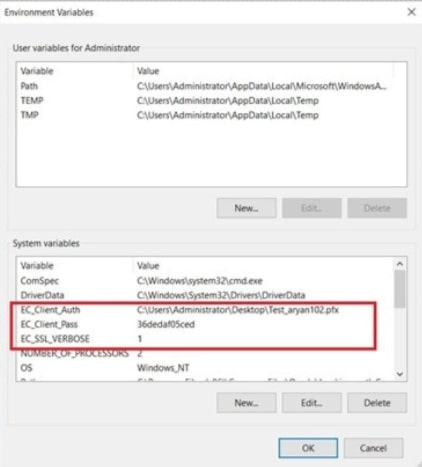
Add new system variables by clicking on the New button. Provide the following variable name and its corresponding details.
- EC_Client_Auth: Corresponds to the path of your SSL Authentication certificate, which can be created from CodeSignSecure
- EC_Client_Pass: Corresponds to the password of your certificate, which is provided at the time of creation of the certificate.
- EC_SSL_VERBOSE: Corresponds to the setting to either enable (1) or disable (0) the debugging output for EC KSP.
-
Set up Signtool for Signing
Setting up signtool for code signing involves ensuring that the Signtool.exe utility is available on your machine and configured to correctly interact with Encryption Consulting's cryptographic provider that provides access to your code signing certificate’s private key.
Steps:
-
Download and Install Windows SDK
-
Using the following download link, download the Windows Software Development Kit with the following tools selected: developer.microsoft.com/en-us/windows/downloads/windows-10-sdk/

-
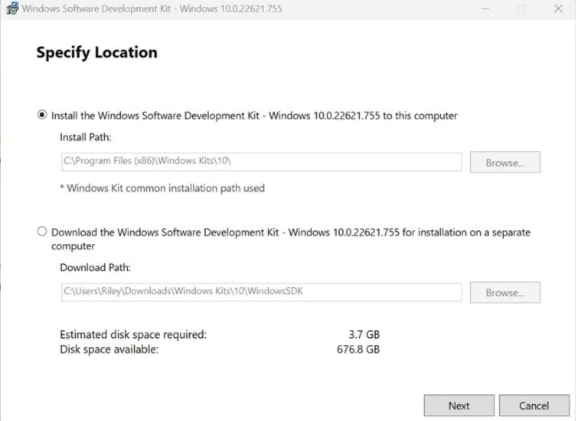
Open the installer once downloaded and select “Next” on the first screen to keep the default settings.
-
Follow the on-screen prompts of the installation wizard.
- Accept the Windows Kit Privacy.
- Accept the End-User License Agreement.
-
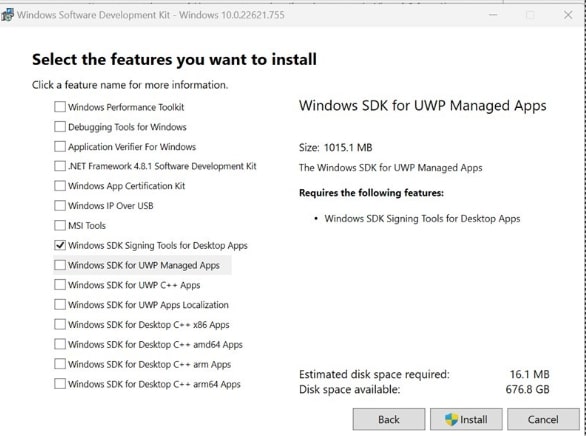
Deselect everything except “Windows SDK Signing Tools for Desktop Apps” and select “Install”.
-
Go to the following path where the tools should have been downloaded to: “C:\Program Files (x86)\Windows Kits\10\bin”. Select the desired version directory and check whether the “signtool.exe” file is present.
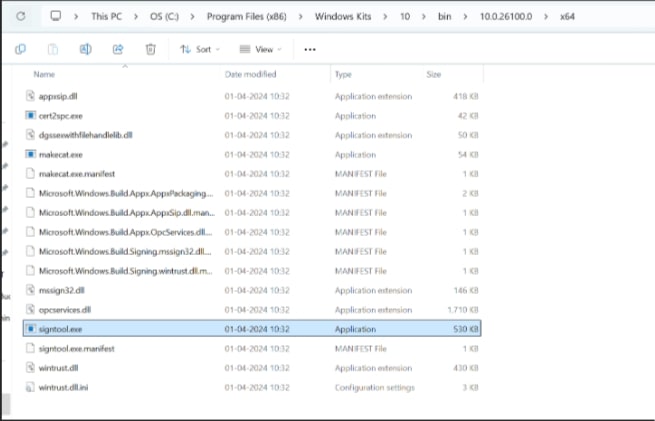
- Ensure you are in the x64 directory and copy this directory path.
-
-
Add Path to Signtool.exe in Environment Variables
-
Open the Environment Variables from the Start Menu.
-
Scroll down through the system variables on the bottom table until you find PATH in the variable names.
-
Double click on PATH in system variables and select New on the left of the screen. Paste your copied directory path of “signtool.exe” into the new selection.
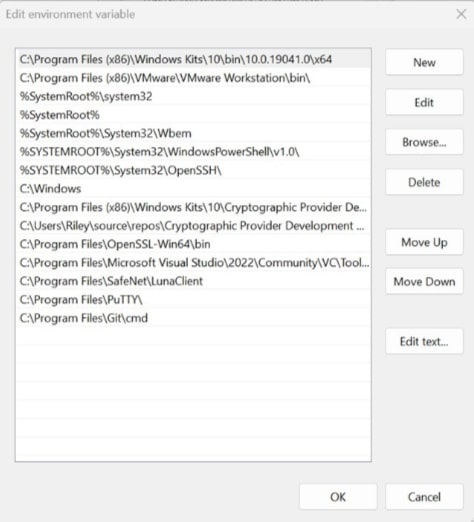
- Select OK at the bottom to exit the Environment Variables page.
-
Set up TeamCity
Setting up TeamCity involves preparing your TeamCity environment, specifically its build agents and build configurations, to perform automated code signing using Encryption Consulting’s CodeSign Secure and KSP.
Steps:
-
Download and Install the TeamCity Application
-
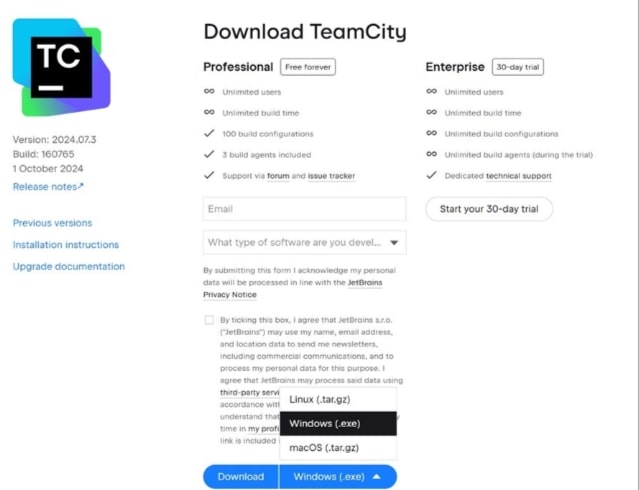
You can either download the free TeamCity application or a paid Enterprise version using the link. There are three OS choices for the application: Linux, Windows, and macOS. We’ll be working on the Windows executable file.
-
Run the application to install the TeamCity server in your environment.

-
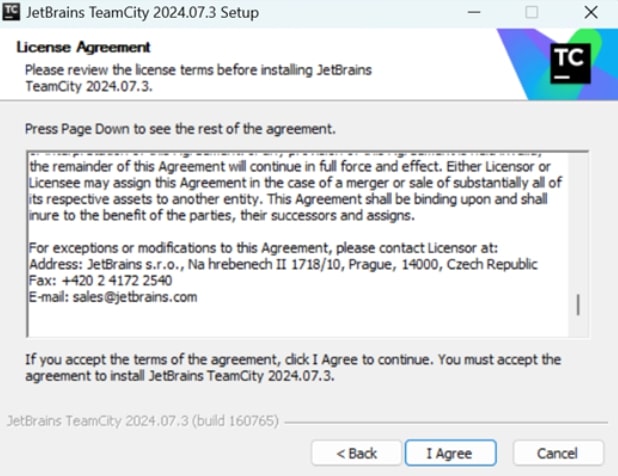
Accept the terms and conditions and click “I Agree”.
-
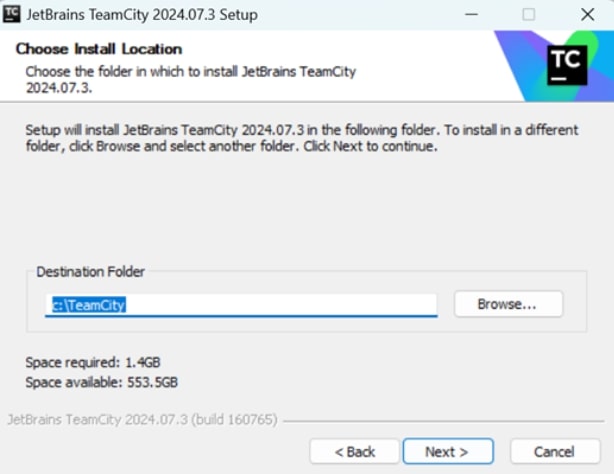
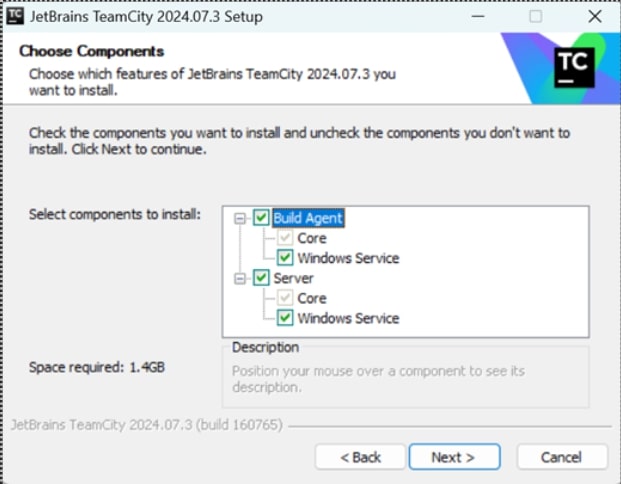
Keep the default settings for easier integration and management of the server.
-
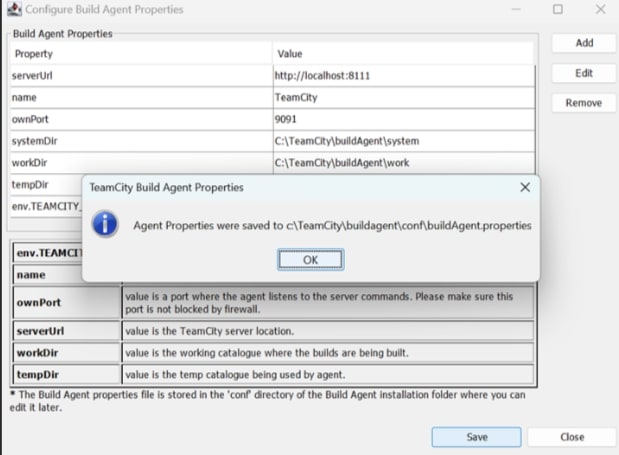
Click Save and then OK to proceed to the next step of account creation.
-
Select the option to run the TeamCity Server and TeamCity Agent under the user account and click Next. It will ask you to login as the current user of your system.

-
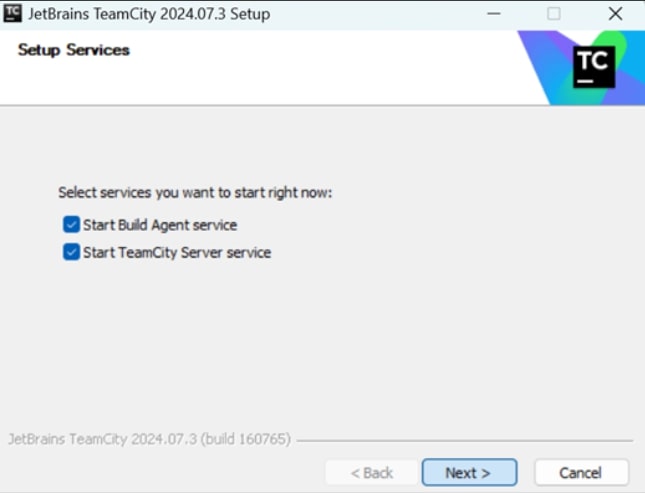
Select both the options to start the build agent service and the TeamCity server service. Click Next.
-
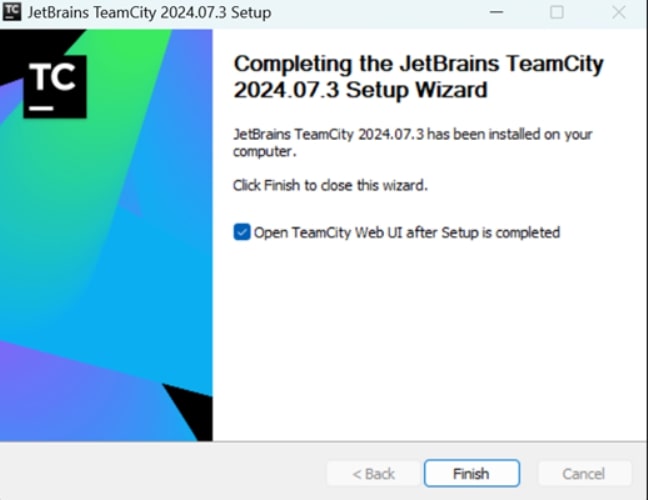
Click Finish. This will take you the Web UI of the TeamCity where you can create your projects and set the configurations policies.
-
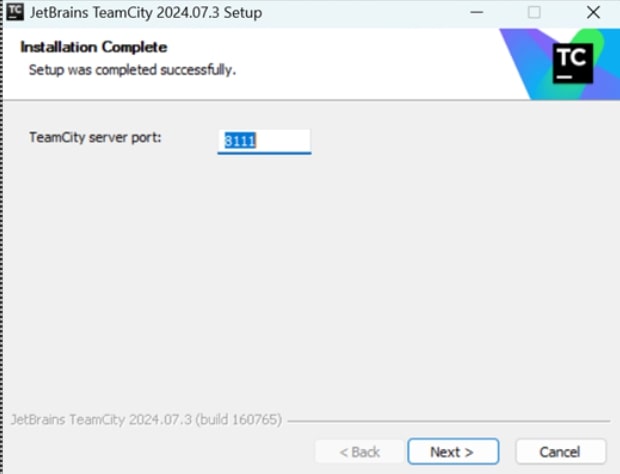
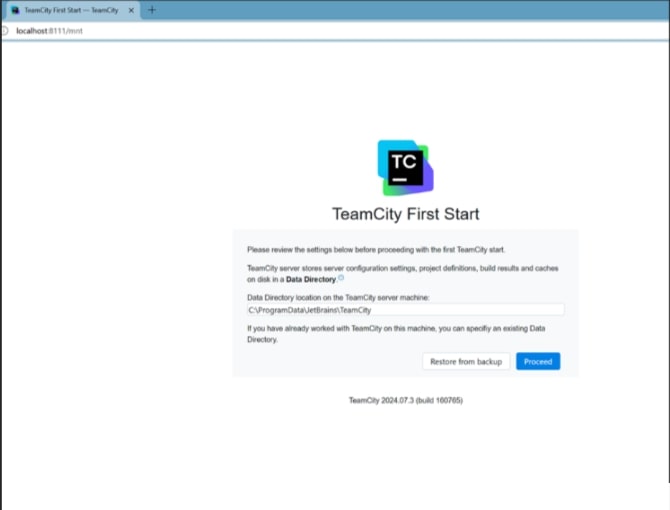
The Web UI runs on localhost on port 8111 (default). Click Proceed to set the location of data directory for TeamCity server. Access TeamCity from a browser by going to http://localhost:8111
-
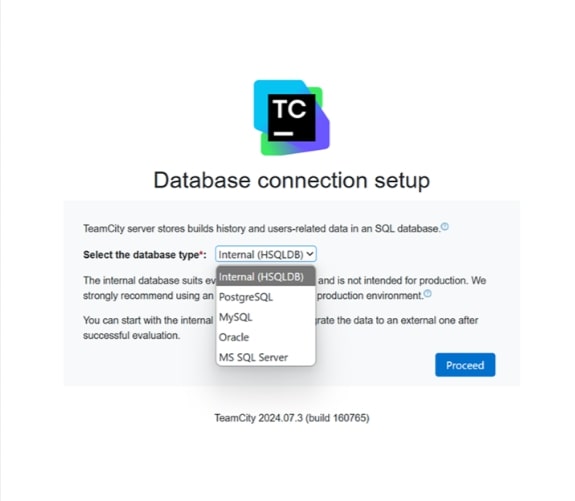
Select the appropriate database which will store the build history and your account related information. We will be choosing HSQLDB database for this project.
-
Accept the license agreement and click Continue.

-
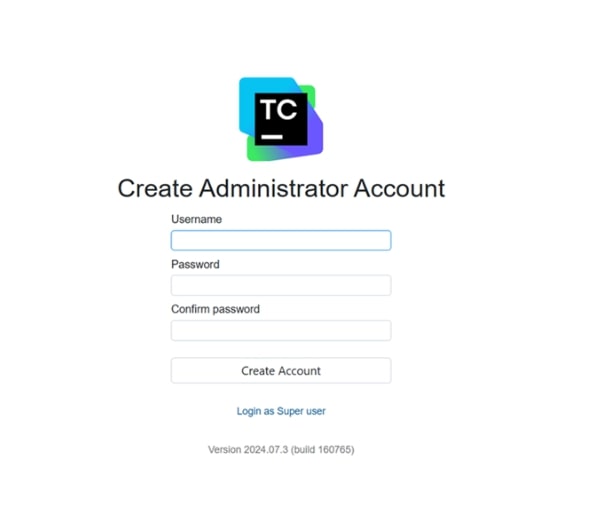
Now create a login account for your CI/CD pipeline and projects.
-
-
Create a new Project
-
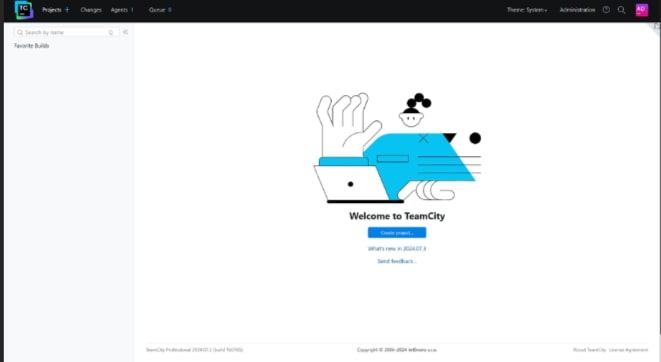
After successful login, it will take you to the TeamCity Dashboard. Now you can begin with creating your first project. Click on “Create project”.
-
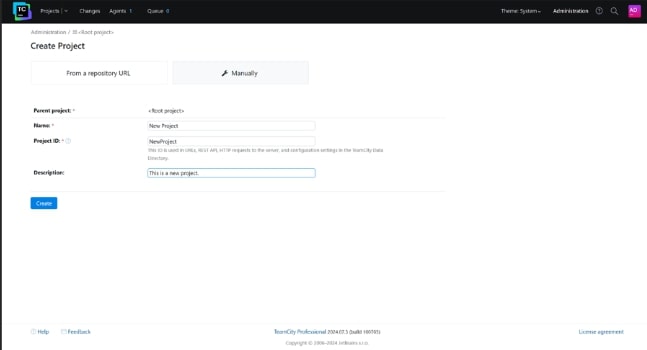
There are two choices when you create a project on TeamCity. It can be done either using a repository account or manually. Let’s first see the Manual process. Enter the required details for your project.
-
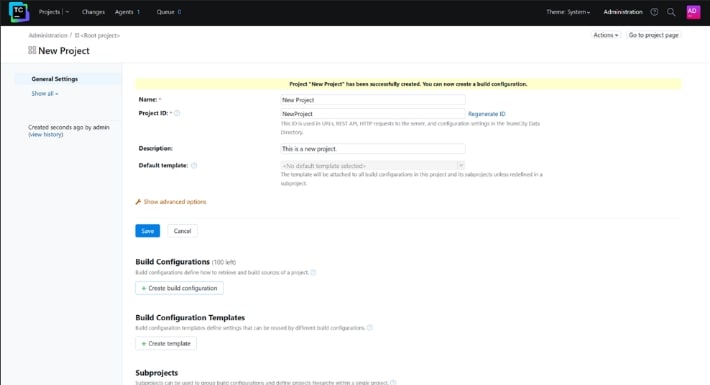
Once successfully created, it will then prompt you to create a build configuration.
-
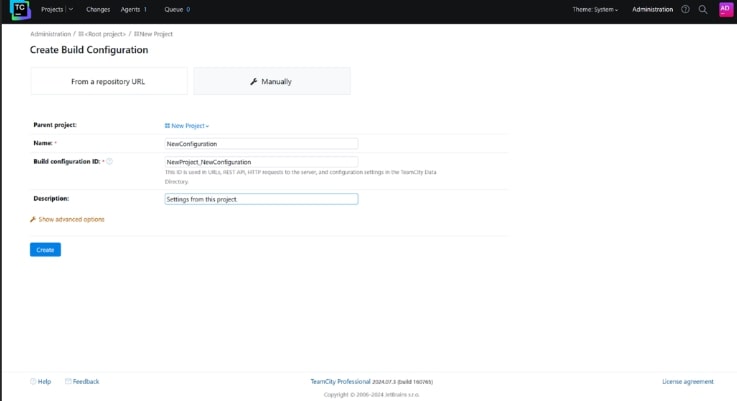
Here as well, you have two options – repository or manual process. We will again proceed with the manual process. Enter the required details and click Create.
-
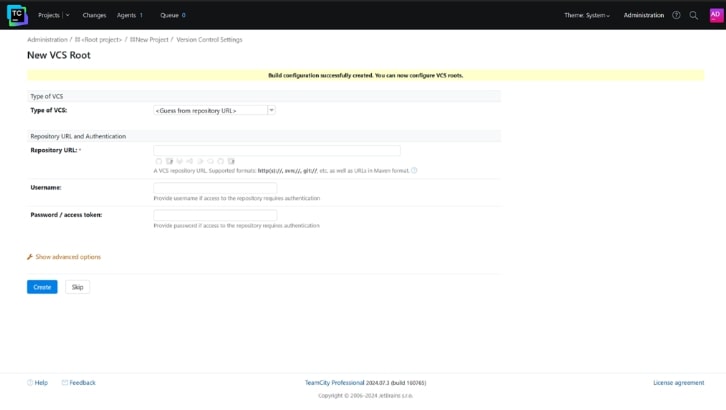
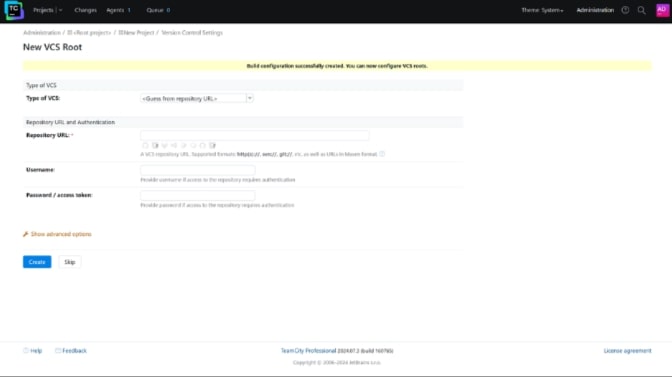
It will then ask you to enter the details for Version Control Settings. It is an optional step. We will be skipping it for this project.
-
-
Create a Pipeline in your Project
-
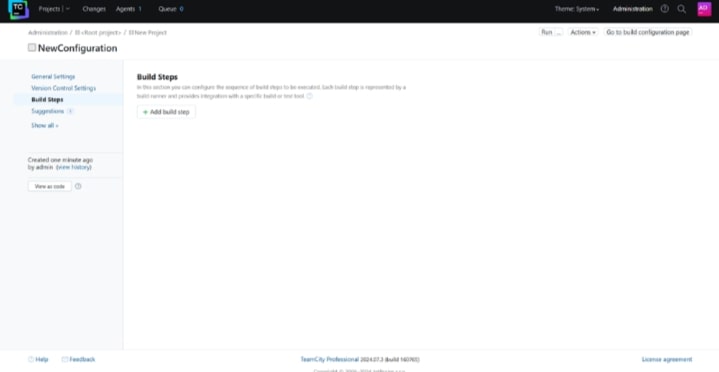
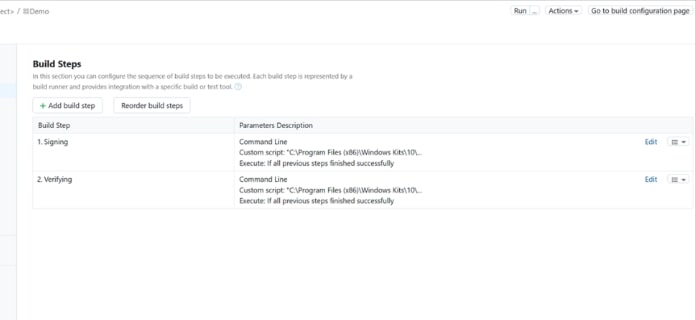
After setting up the general project and configuration settings, we can now add build steps to our pipeline. These are the processes that will actually execute and perform code signing operations.
-
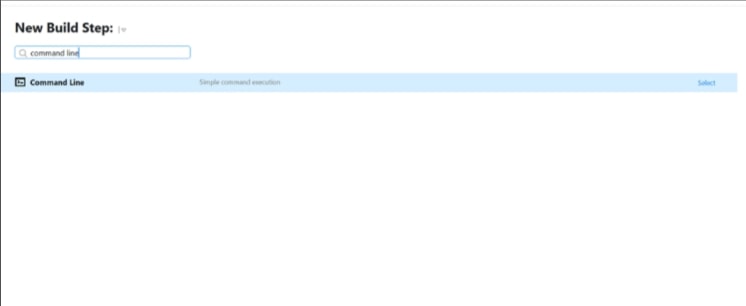
Click on the “Add Build Step” button and choose “Command Line” from the dropdown.
-
It will then ask you to enter the details for Version Control Settings. It is an optional step. We will be skipping it for this project.
- Provide the basic details such as Step name and Step ID.
-
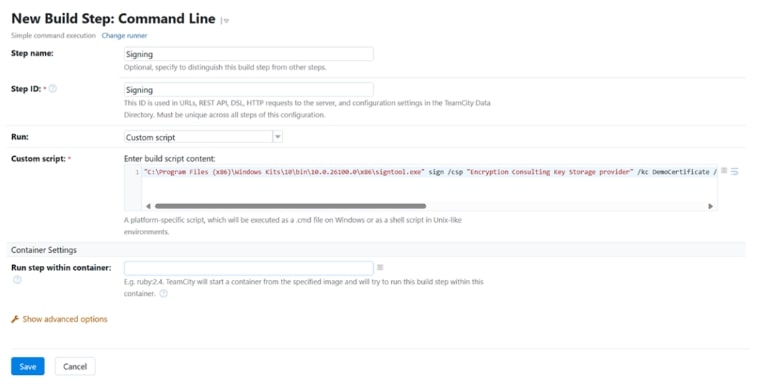
Select the Custom script code option from the drop-down of the Script field and enter the cmd script to perform the signing operation using the required details.
A sample Command Line script is provided below for your reference:
signtool sign /csp "Encryption Consulting Key Storage Provider" /kc <key name of private key associated with the certificate> /fd <the desired signing algorithm to be used when signing> /f <The location of the certificate to be used for signing> /tr <The URL of the time stamping server to be used> /td <The signing algorithm to be used with the time stamping server> <The path to the file to be signed>
The following are the flags and their meaning in the command:
- /csp: This specifies the Key Service Provider to be used. This should always be "Encryption Consulting Key Storage Provider."
- /kc: This should be the name of the private key associated with your certificate. This will likely be the same name as the certificate name.
- /fd: This is the signing algorithm to be used with the signing function. This can be SHA256, SHA384, or SHA512.
- /f: The name of the certificate to be used for signing. This should be the same name as the /kc flag.
- /tr (optional): This is the URL of the timestamping authority to be used. If /tr is not in use, and timestamping is not required, then /td should also be left out of this command.
- /td (optional): This is the signing algorithm to be used with the timestamping server. This can be SHA256, SHA384, or SHA512. This algorithm should be the same as the /fd field. If /tr is not in use, and timestamping is not required, then /td should also be left out of this command.
- <file path>: This is the name of the file to be signed. This file must be in the directory in which this command is being run.
-
The entire step should look something similar to the image below:
-
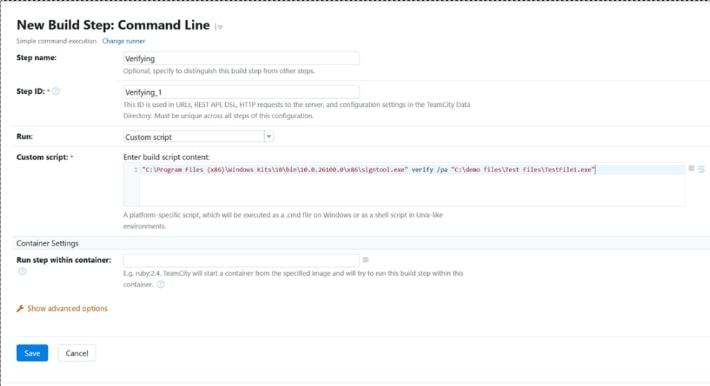
Now repeat the above process to create another build step for Verification of the signed file.
A sample Command Line script is provided below for your reference:
signtool verify <The path to the file which was signed>
-
The entire step should look something similar to the image below:
-
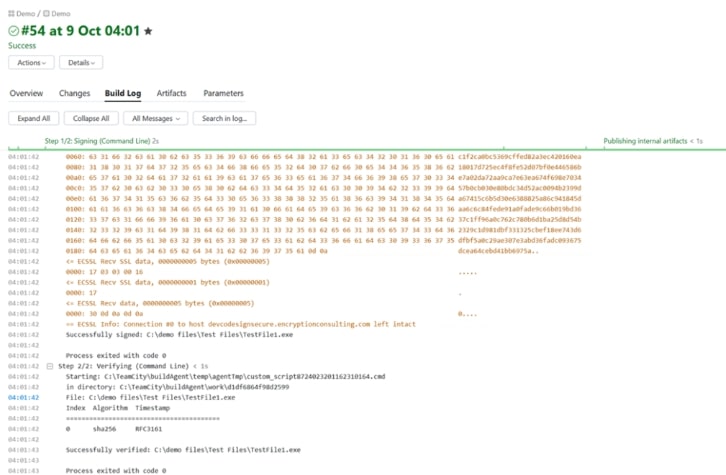
Run TeamCity Pipeline
- Now, to run the pipeline, click on "Run," which is on the top right of the project view.
-
After clicking "Run", you can see the live action of the pipeline by clicking "Agents"(top-left)->Select the agent name->Build History.
-
A successful execution of a pipeline will look like this. Here you can see that both the build steps - signing and verification - have been completed.