Bamboo Integration Guide
Steps:
- Download Bamboo
- Go to the Atlassian Bamboo download page to download the version that is suitable for your Windows system.
- Check the compatibility for your supported platform here.
- Install Bamboo for your Windows 11
- Once the Bamboo zip file is downloaded, extract it to your desired directory, for example, C:\Atlassian\
- Bamboo requires Java to run. Make sure your system hasJDK 17installed.
- After installing JDK 17, set the JAVA_HOME environment variable to the path of your JDK 17.
- Configure Bamboo
- Open the extracted folder and navigate to this path: <Bamboo installation folder>/Atlassian-bamboo/WEB-INF/classes/ and open the bamboo-init.properties file.
- In this file, insert the property “bamboo.home”, with an absolute path to your Bamboo home directory (for example, C:\Atlassian\Bamboo). Your file should look like this: bamboo.home=C:\Atlassian\Bamboo
- Open a command prompt as an Administrator in the Bamboo installation directory (C:\Atlassian)
-
Start Bamboo using the following command
bin\start-bamboo.bat
- Access Bamboo from a browser by going to http://localhost:8085
- Set up Bamboo on the web portal now
-
You will be asked for a license.
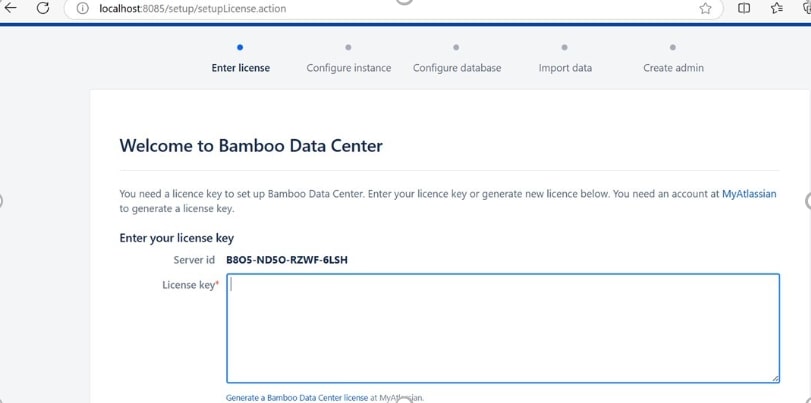
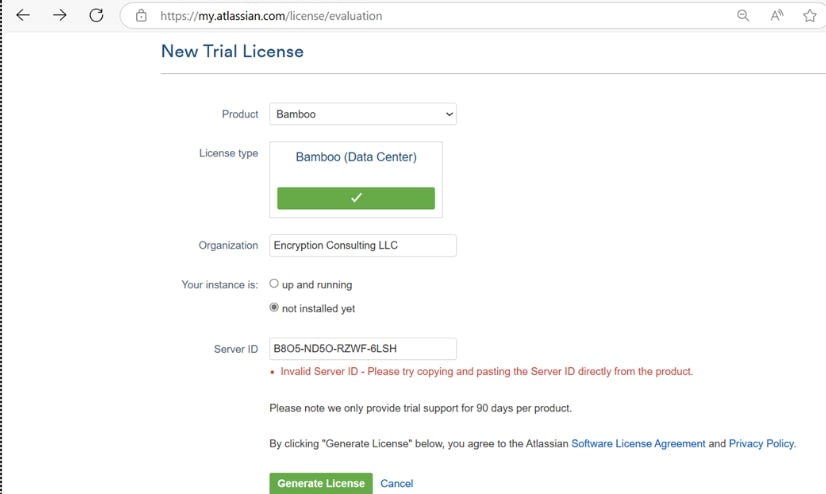
- You have to copy your Server ID.
- Go to the license evaluation site and select your product as Bamboo. After that, enter the necessary details, and then the Server ID is copied above.
-
This will generate your License.
-
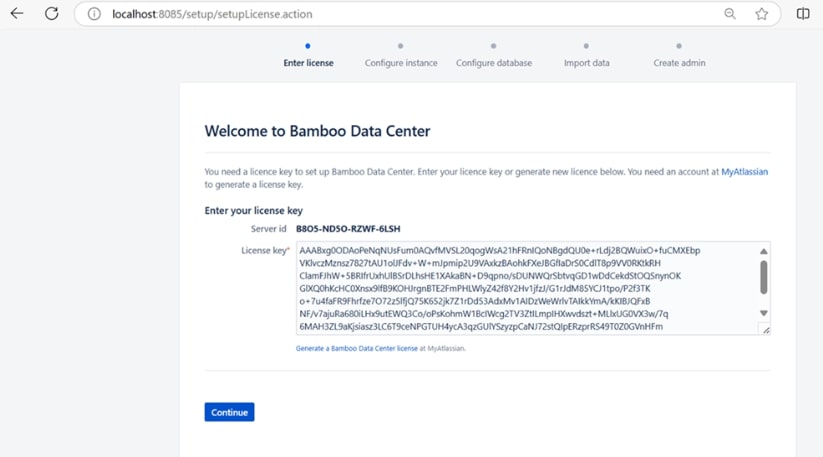
Paste this license on the Bamboo Dashboard and click on “Continue.”
-
Configure the Instance with the necessary details.
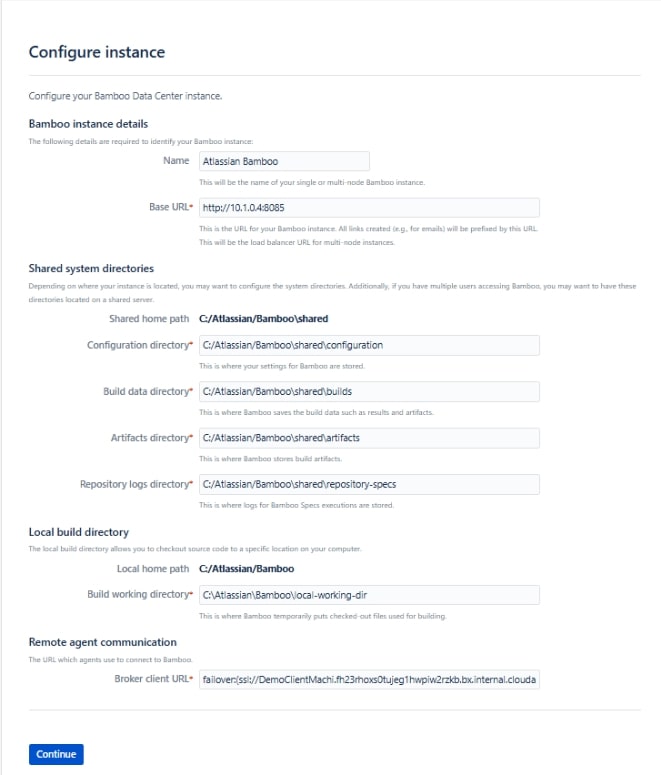
- Bamboo requires a database to store build data. You can use PostgreSQL, MySQL, or any supported database. By default, Bamboo will offer to use an embedded HSQL database, but for production use, it's better to configure an external one (like PostgreSQL or MySQL). In our case, we are using an H2-embedded database; you can follow this guide.
- After configuring the Database, complete the setup in the Web UI by configuring an Administrator Account (admin username, password, and email).
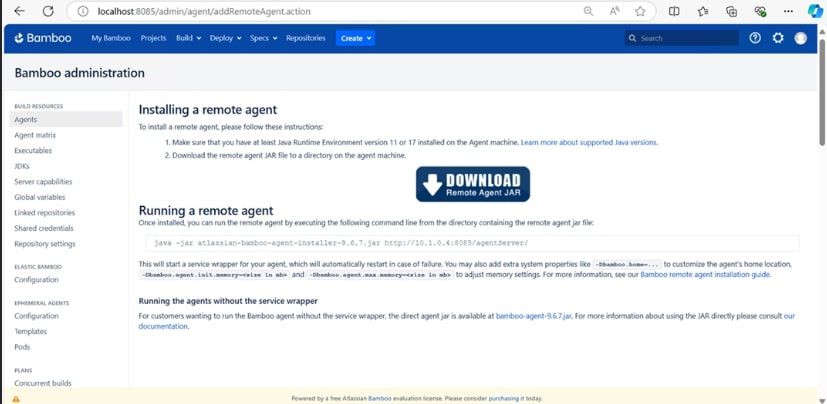
- Install Bamboo agents
- Download the Remote Agent Jar from the Agents section inside Build Resources.
-
In the Agents tab, you'll see a list of both local and remote agents that are connected to Bamboo. If you don't see any agent, click on the “Install Remote Agent” button.
-
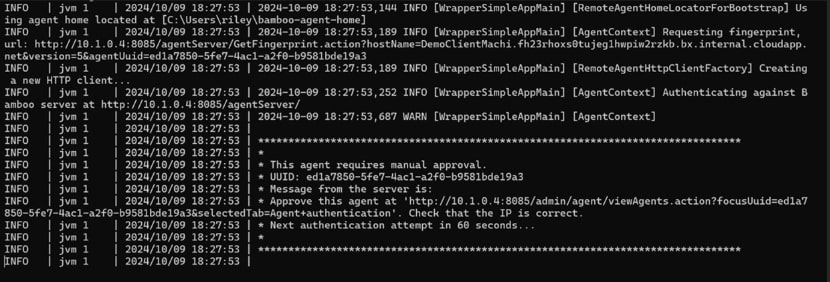
After that, you'll be prompted to approve the agent.
-
Check the agent's status and capabilities after clicking on the Agent.

- Create and configure a new Bamboo Plan
-
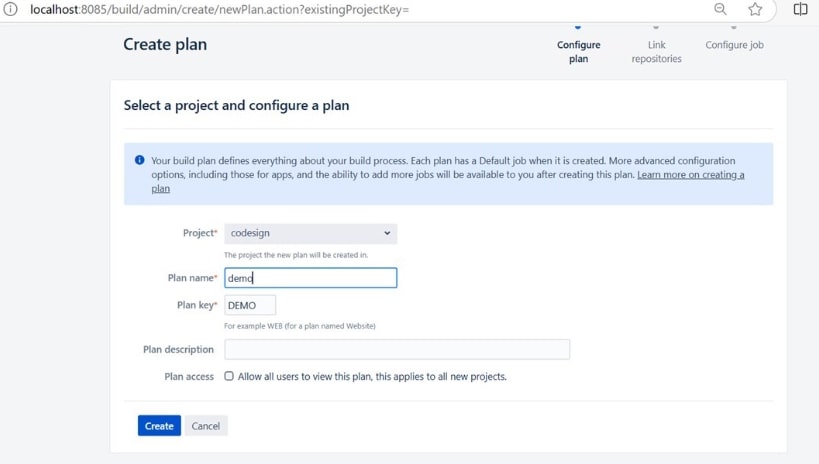
Navigate to the Dashboard and click on Create > Create Plan.

-
Configure the plan by selecting its Project name, Plan name, and Plan key (Bamboo will auto-generate this key based on the Plan name).
-
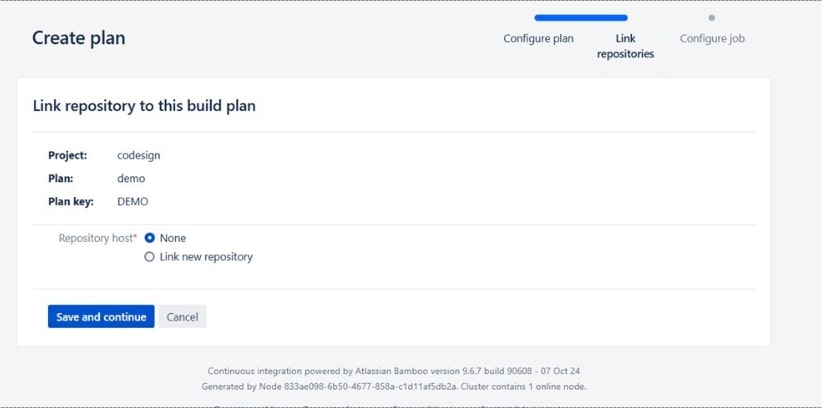
You will be required to provide a Repository Host. (We're going to sign an already compiled file, so we chose “None”).
-
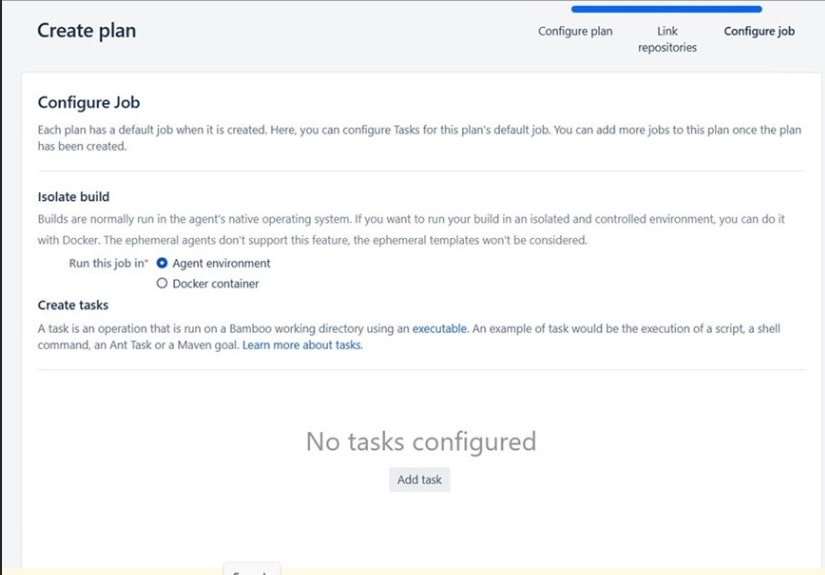
Choose the environment you want to run this Job (Agent Environment) and then click on “Add Task.”
-
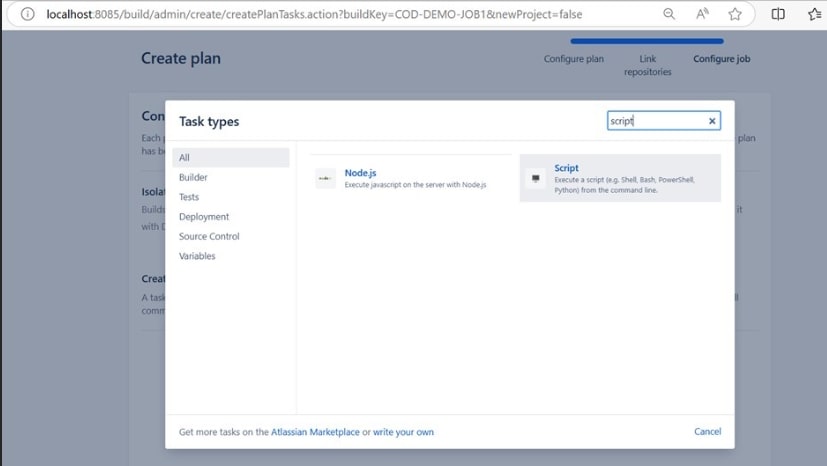
Search and select “Script” for this job.
-
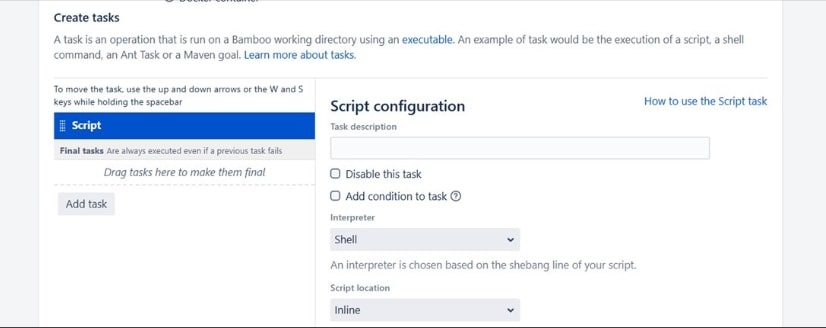
For the script location, select “Inline” and the Interpreter as “Shell” for this job.
-
In the script body, paste the signtool command you want to run
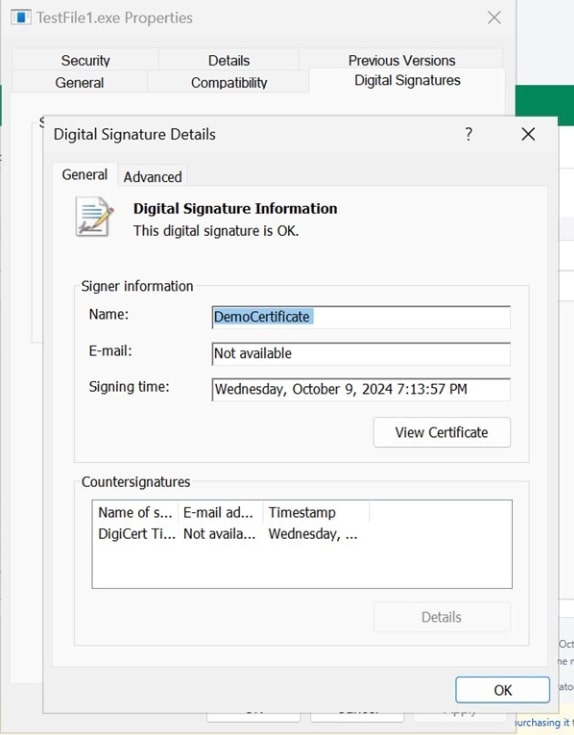
C:\Program Files (x86)\Windows Kits\10\bin\10.0.26100.0\x86\signtool.exe" sign /csp "Encryption Consulting Key Storage provider" /kc DemoCertificate /fd SHA256 /f "C:\demo files\Signing Certificates\DemoCertificate.crt" /tr http://timestamp.digicert.com /td SHA256 "C:\demo files\Test Files\TestFile1.exe
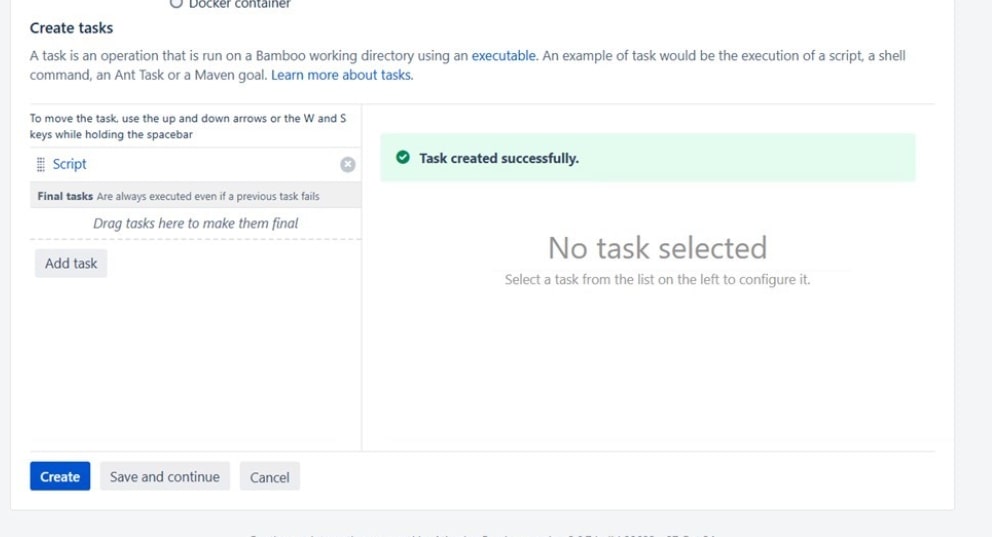
click on “Save”.

-
After the task has been created successfully, click on “Create”.
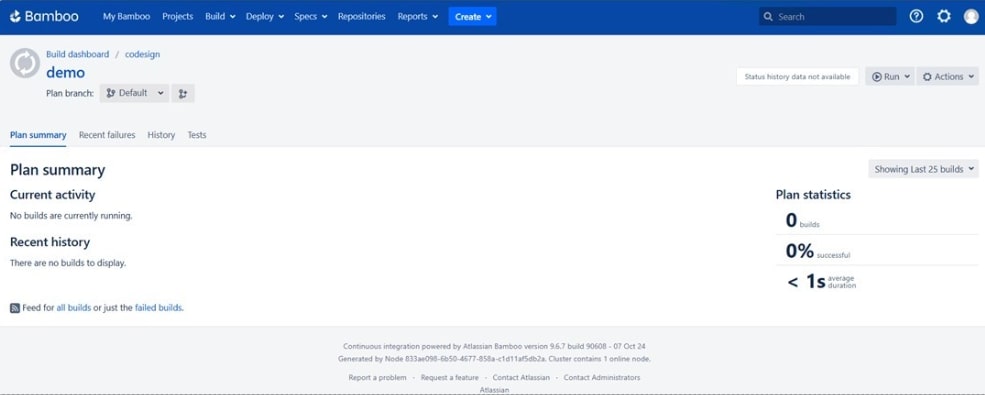
-
You can see the Plan details now.
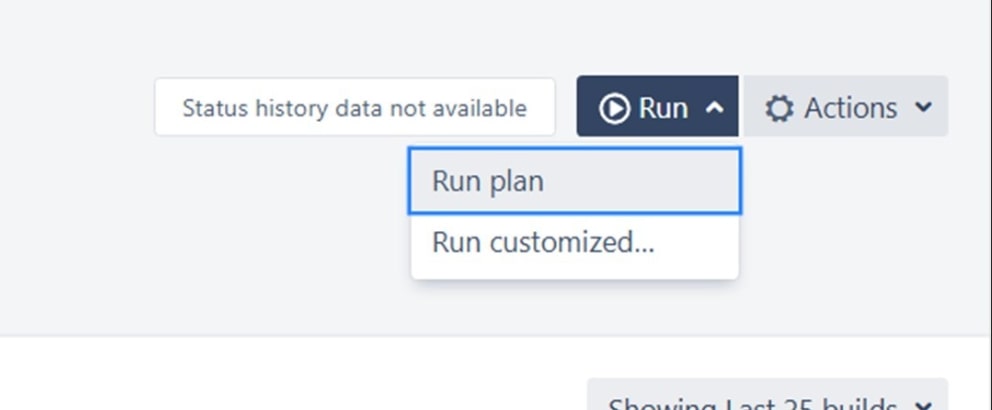
-
Then click on “Run Plan” in the Run dropdown.
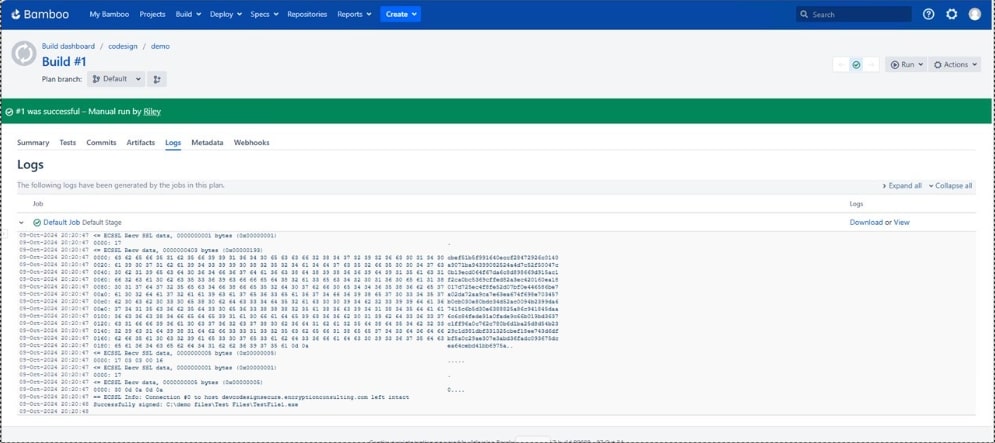
-
You can see that your job has been successful.
-
Check the signature details in the executable file's properties.