GlobalSign Connector Integration Guide
Prerequisites
Before deployment, ensure:
-
CertSecure Manager frontend and backend are fully operational.
-
You have administrative privileges on the target machine.
-
Your CertSecure Manager account has “Manage Certification Authorities” permission.
You have access to:
-
A valid GlobalSign API Credentials and mTLS Certificate with Manage Certificates permissions.
-
The CertSecure Manager backend (URL or IP).
Hardware Requirements: CPU: 4 cores, RAM: 8 GB, Storage: 32 GB
Software Requirements (OS): Windows 11 or Windows Server 2019 (or later)
Deployment Steps
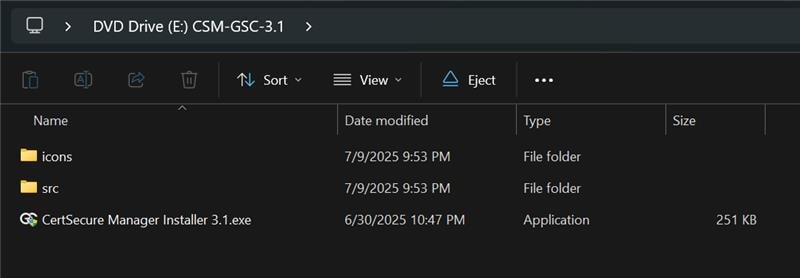
Step 1: Running the Installer
-
Mount the ISO by right-clicking and selecting Mount.
-
Open the mounted drive, find the installer, and run as Administrator.
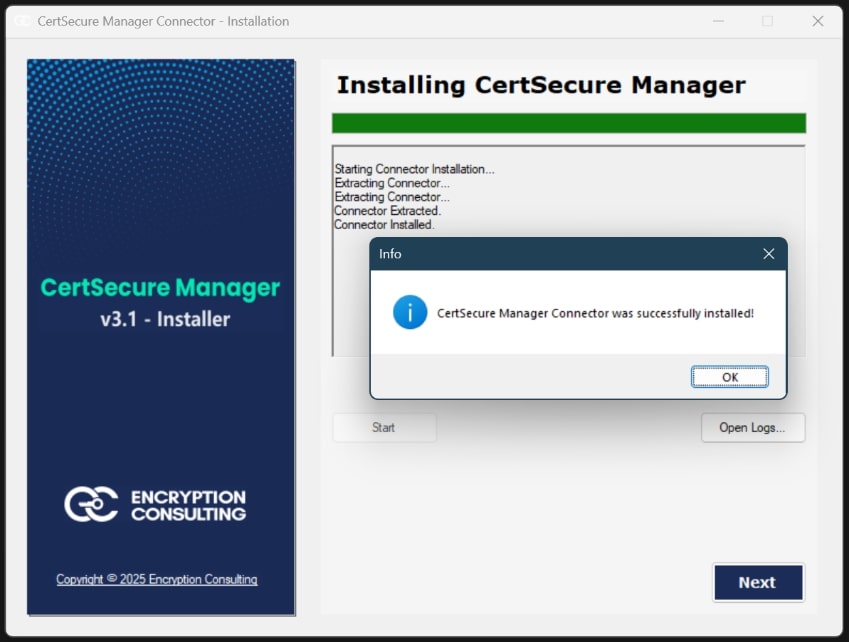
Step 2: Installation and Service Configuration
-
Click Next → Accept license → Default path: C:\Program Files (x86)\CertSecure 3.1 → Click Next, then Yes.

-
Click Start on the installation page → wait for completion. View logs if needed → Click OK, then Next.
-
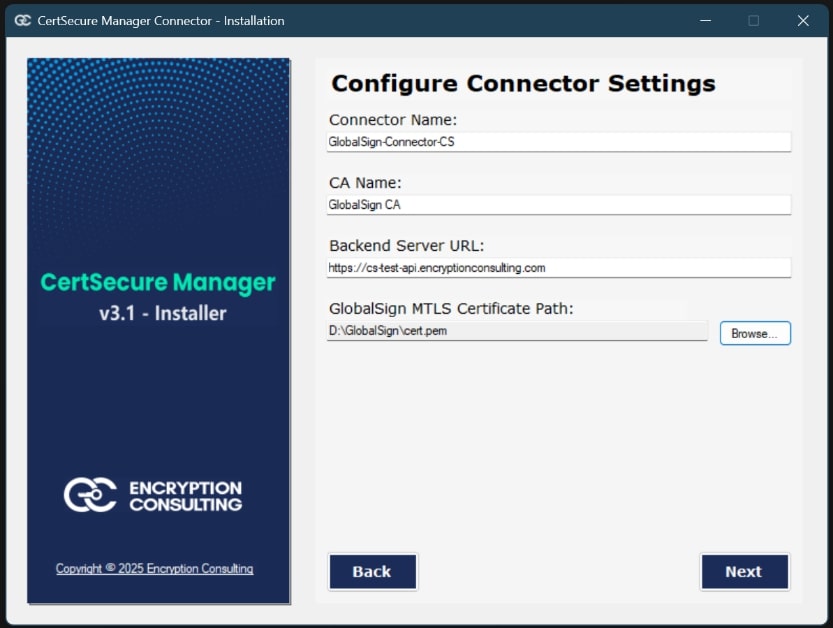
On the Configure Connector Settings page:
-
Enter Connector Name (any unique, distinguishable value).
-
Enter the CA Name as the name of the Certificate Authority mentioned in your GlobalSign Account or a value like GlobalSign CA.
Note: The CA Name is for display only; all operations rely on the GlobalSign API Credentials.
-
Enter the Backend URL of the CertSecure Manager.
-
Browse and select the GlobalSign mTLS Certificate.
-
-
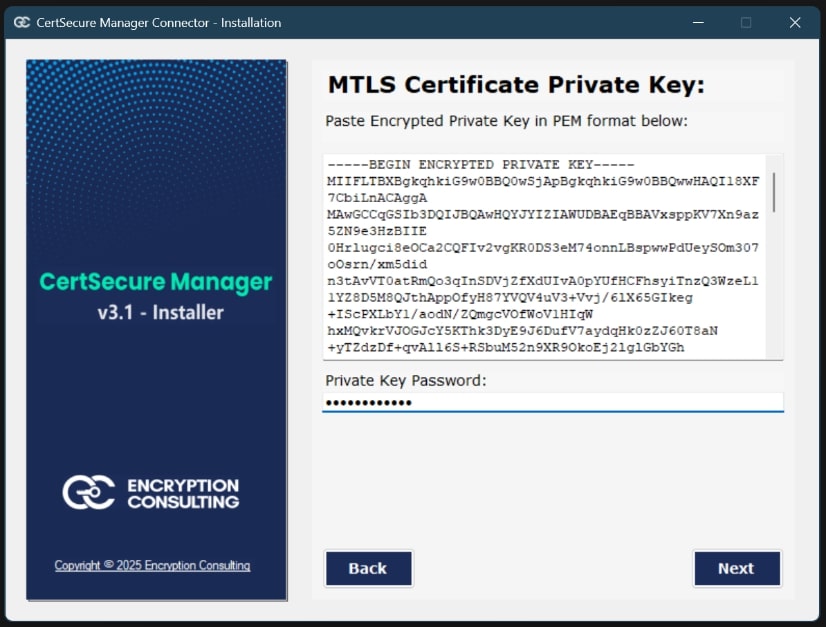
On the next page, paste the encrypted private key and the password for the mTLS Certificate.
-
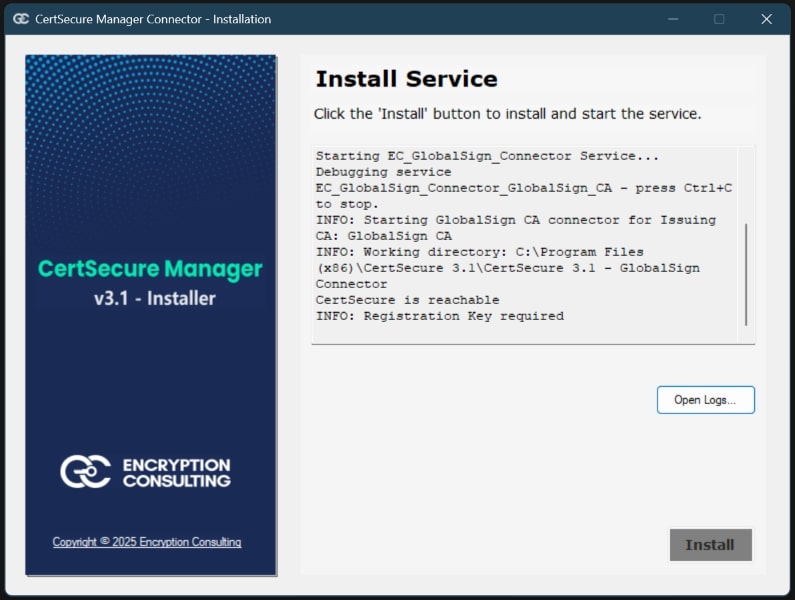
On the Install Service page
-
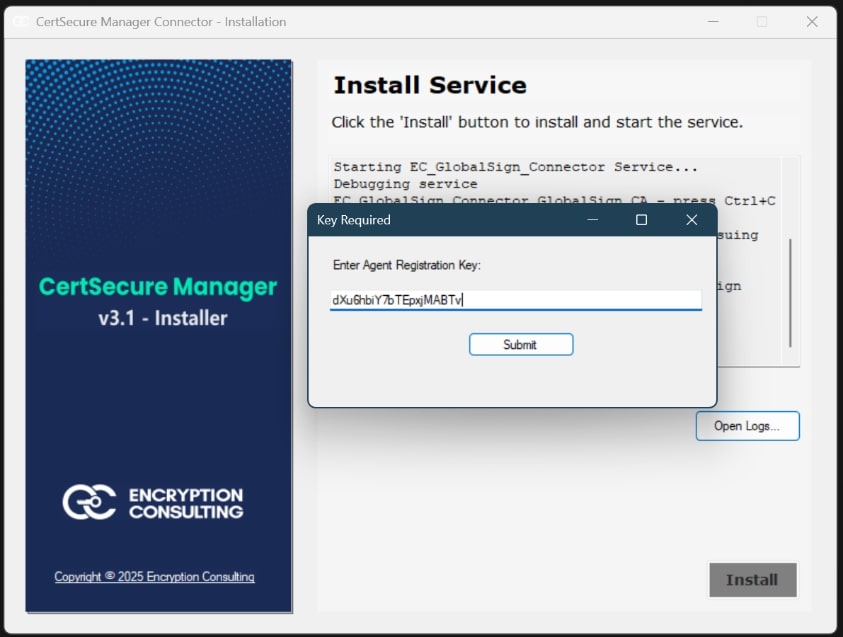
Click Install. After service installs, the installer will ask for the Registration Key.
-
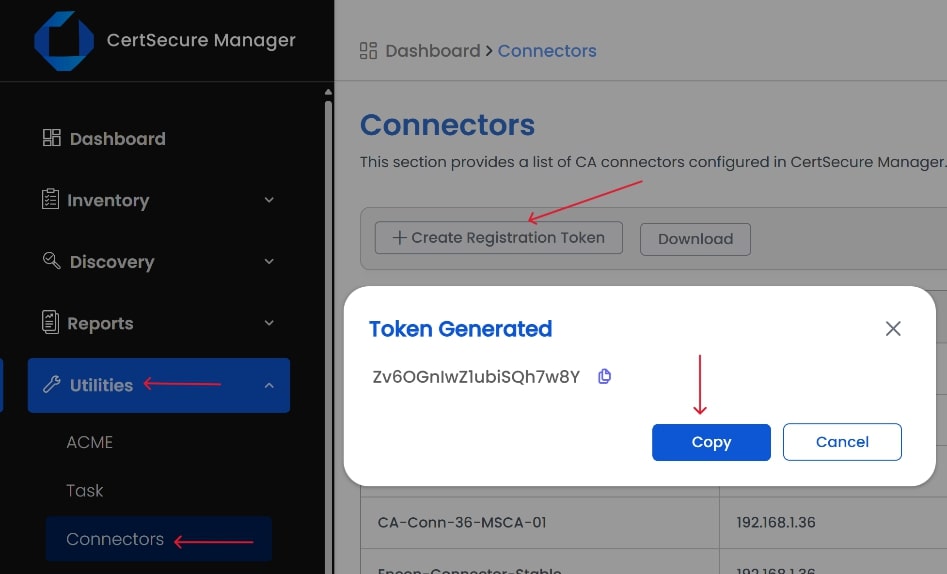
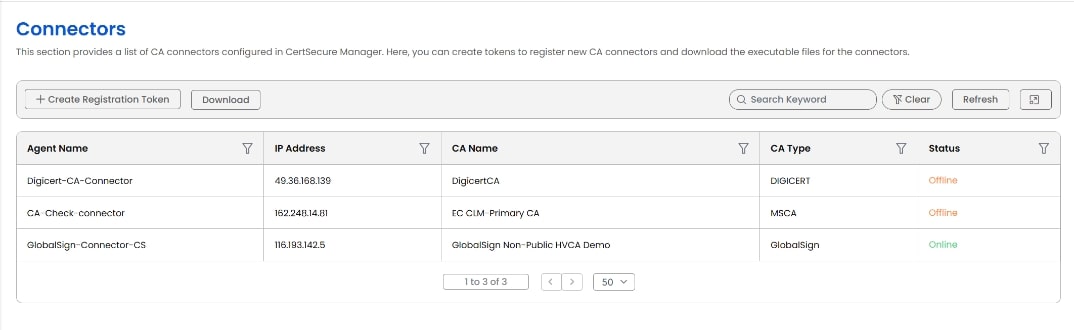
On CertSecure Manager Platform → Go to Utilities > Connectors, Click Create Registration Token.
-
Copy token → paste into prompt on installer → Click Submit.
-
-
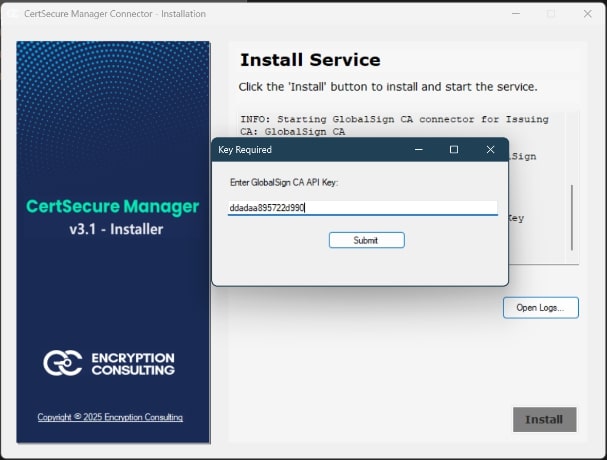
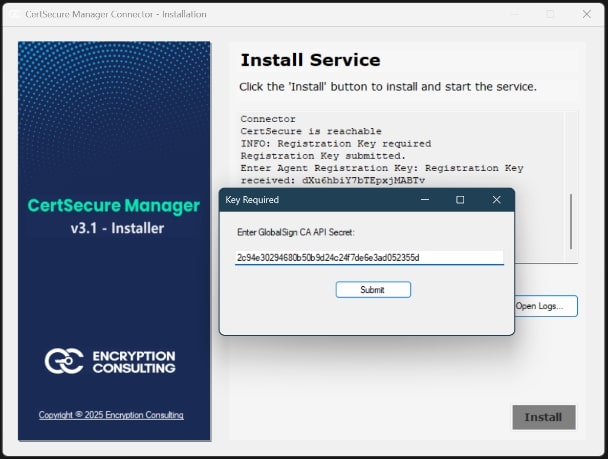
Enter GlobalSign API Credentials
-
After successful Registration, the installer will ask for the GlobalSign API Credentials that you got from the GlobalSign Atlas platform.
-
Enter the API Credentials into the prompt on the installer, and click Submit.
-
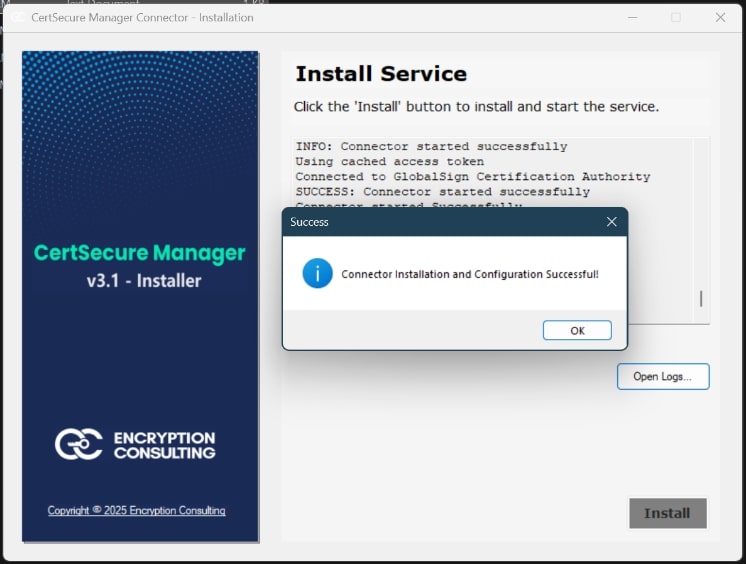
On Successful installation, click OK.
-
Click Finish.
-
Go to Utilities > Connectors, click Refresh to see the connector displayed.
-
-
In CertSecure UI:
-
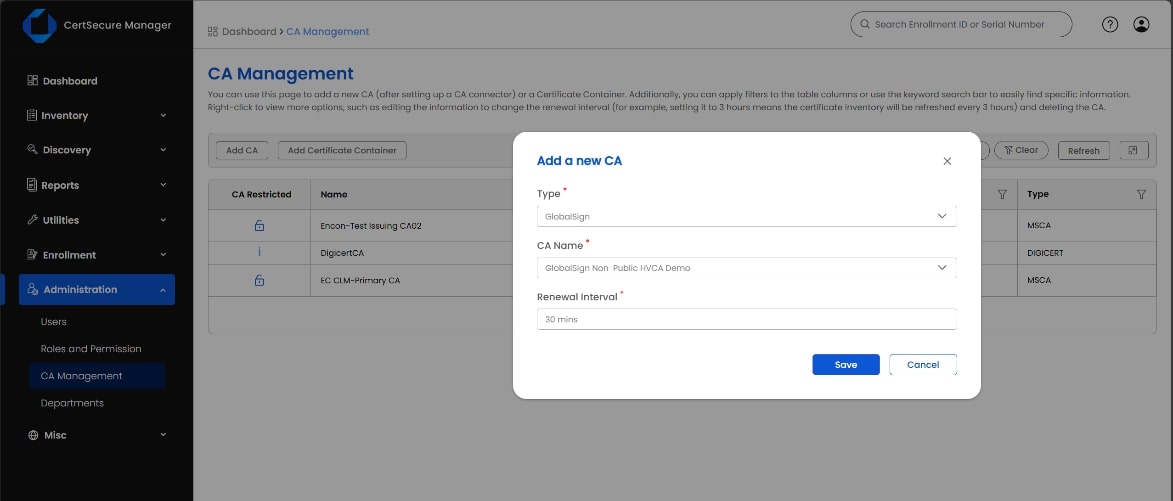
Go to Administration > CA Management, Click Add CA
-
Choose CA Type: GlobalSign
-
Select the newly added CA Name (e.g., GlobalSign CA as entered during installation)
-
Set Renewal Interval (e.g., 30 = sync every 30 mins) → Click Save.
-
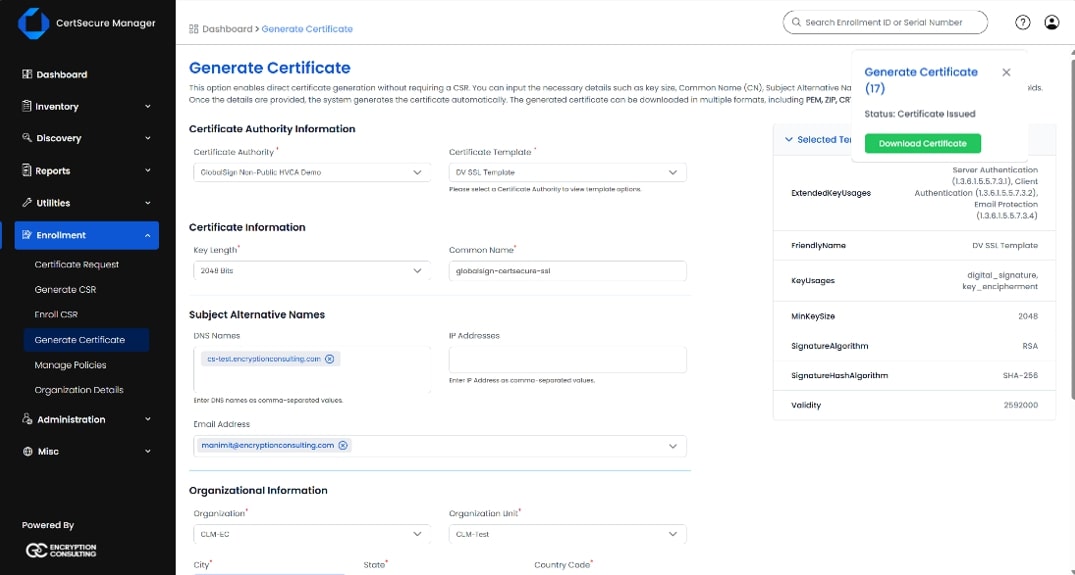
Step 3: Configuring Certificate Templates
Note: GlobalSign does not provide any certificate template or alias to be referenced for monitoring or analytics. CertSecure Manager provides you with the functionality to create Certificate Templates, binding to required CSR policies on the GlobalSign account. This helps you avoid the need to fill in the certificate request details every time manually.
-
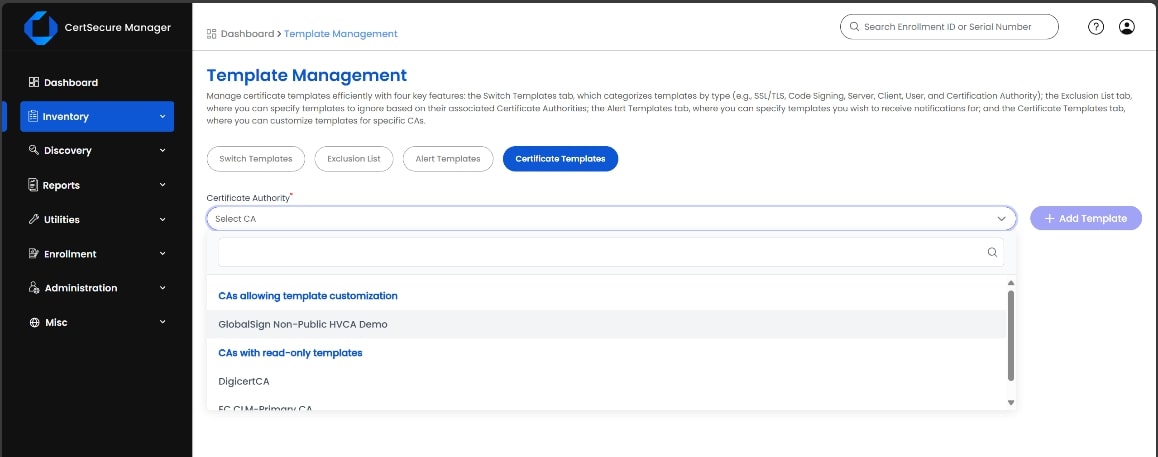
In CertSecure Manager Platform, navigate to Inventory > Template Management > Certificate Templates. (During the first time installation, it takes roughly 15-30 minutes, depending on the sync interval configured. Wait for the connector to sync the certificate request policies based on the API credentials.)
-
Click on the Certificate Authority dropdown, and under category “CAs allowing template customization”, select the GlobalSign CA.
-
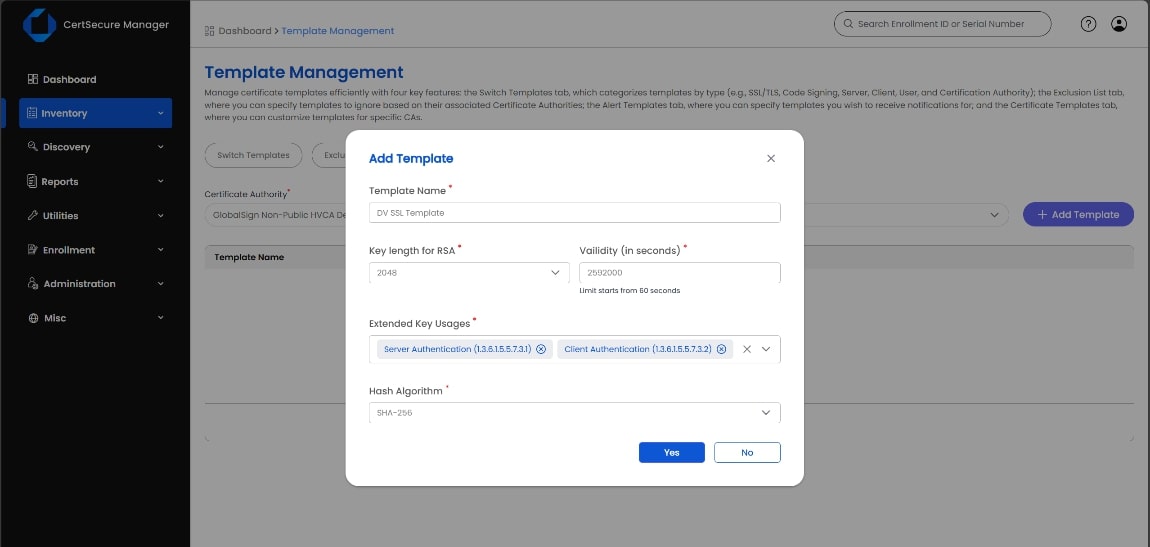
Enter the details of the Certificate Template based on the available policy from GlobalSign on your API credentials.
-
Click on Yes. This Template will now be available for certificate enrolment and reports.