Nginx Renewal Agent Integration Guide
Prerequisites
To get the Nginx Renewal Agent working smoothly with your deployed instance of CertSecure Manager, you’ll need a few key things.
-
Administrative privileges
You must be logged in as a local administrator on the target machine where you want to install the agent and the Nginx webserver is running.
-
Connectivity
CertSecure Manager must be accessible from the machine running the webserver. To validate, try visiting https://your-certsecure-backend-url/check using a browser.
Installation
After confirming the prerequisites, you can set up the renewal agent using the installer.
Configuration and Installation
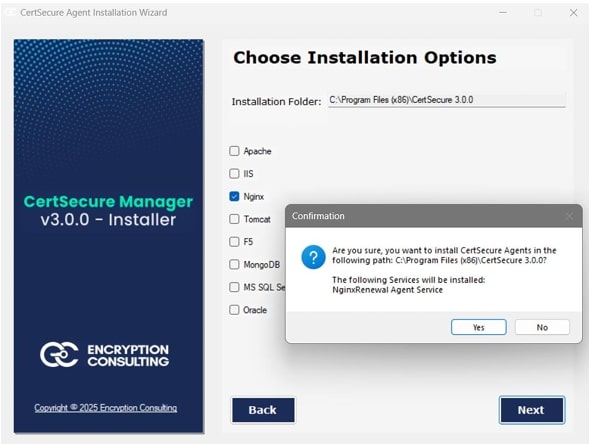
Run the Renewal agent installer as an administrator and choose the Nginx renewal agent for installation.
Steps:
-
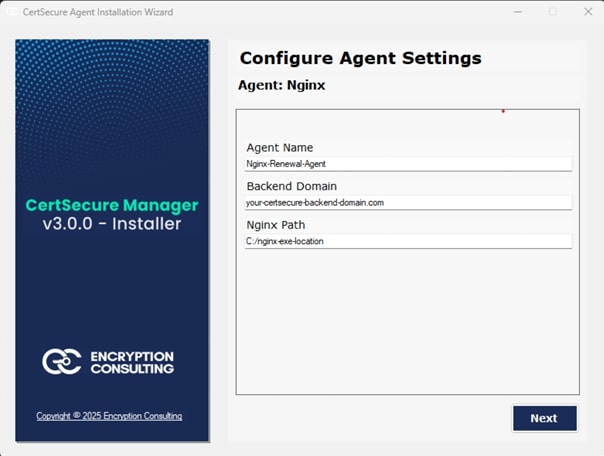
Mention the required details
- Provide a unique name for the agent.
- Provide the URL for your CertSecure Manager backend.
-
Provide the path to the folder where nginx.exe is present on your system.
-
Register and run the agent
-
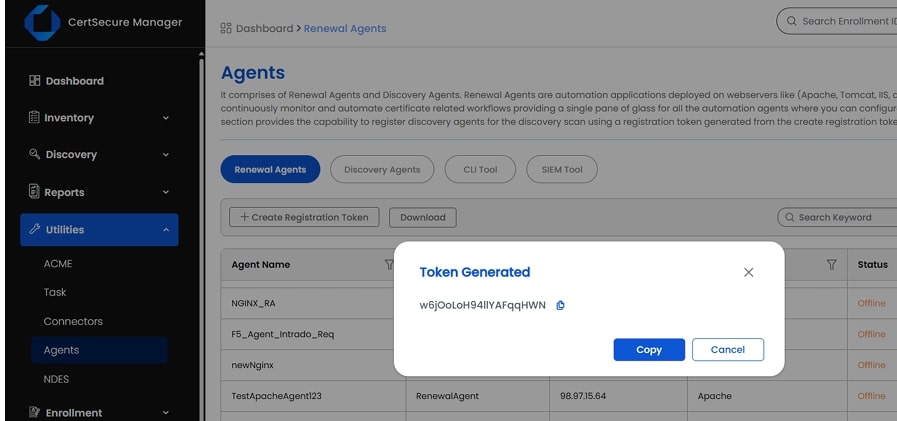
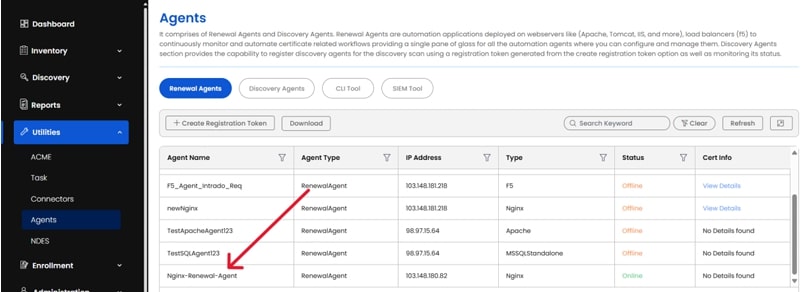
On the CertSecure Manager UI, go to Utilities ➡ Agents and then click on Create Registration token.
-
Provide the registration token when the installer prompts to do so.
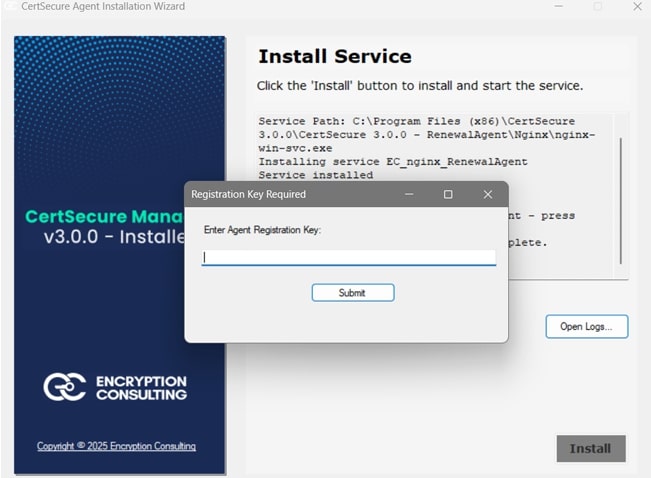
- Wait for the installer to finalise the installation and then close the installer.
-
Validation
After the installation has finished, you can validate the installation by following these steps:
-
On the CertSecure Manager UI, go to Utilities ➡ Agents. You can see a renewal agent with the name provided during installation.
-
On the target machine, run services.msc and look for EC_Nginx_Renewal_Agent, you can monitor and manage the renewal agent from here.
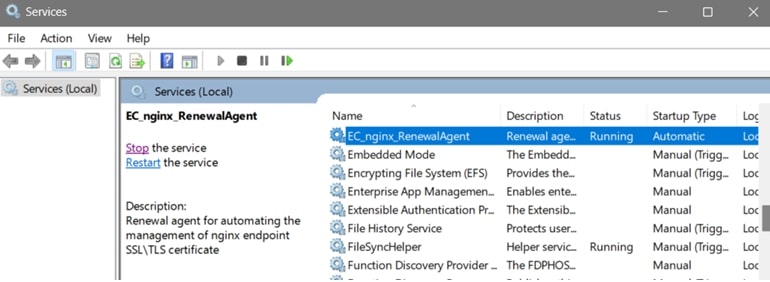
- You can also monitor the agent logs by accessing the log file at C:/CertSecure/logs