LDAPS is one of the most crucial functionalities to properly protect and secure credentials in your PKI environment. By default, LDAP communications between client and server applications are not encrypted. This means that it would be possible to use a network monitoring device or software and view the communications traveling between LDAP client and server computers. This is especially problematic when an LDAP simple bind is used because credentials (username and password) are passed over the network unencrypted. This could quickly lead to the compromise of credentials.
Prerequisites
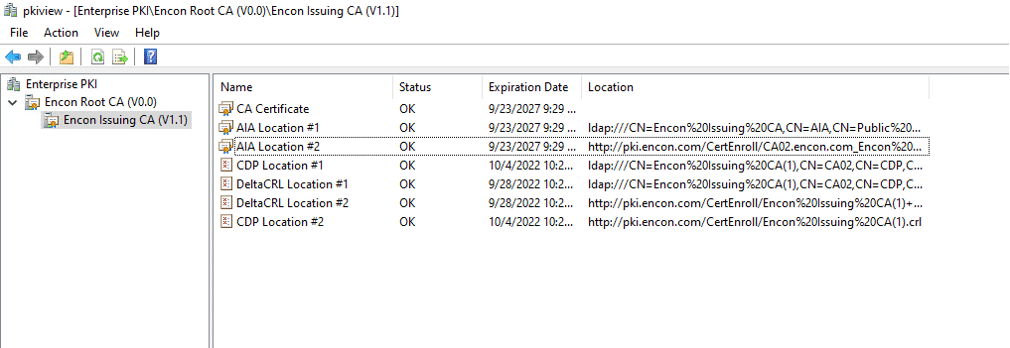
A functional Microsoft PKI should be available and configured. While viewing PKIView.msc, no errors should appear
If you need help in deploying your own PKI, you can refer to this article to build your own Two Tier PKI
Installing AD LDS
This step should be carried out on LDAP Server or on Domain Controllers which would be responsible for hosting LDAPS service.
- Open Server Manager
- From manage, open Add Roles and Features
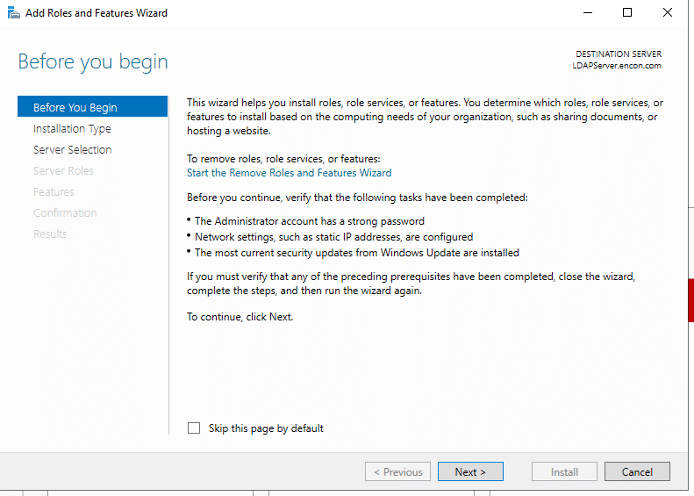
- On Before you Begin, click Next
- On Installation type, ensure Role based or feature based installation, and click Next

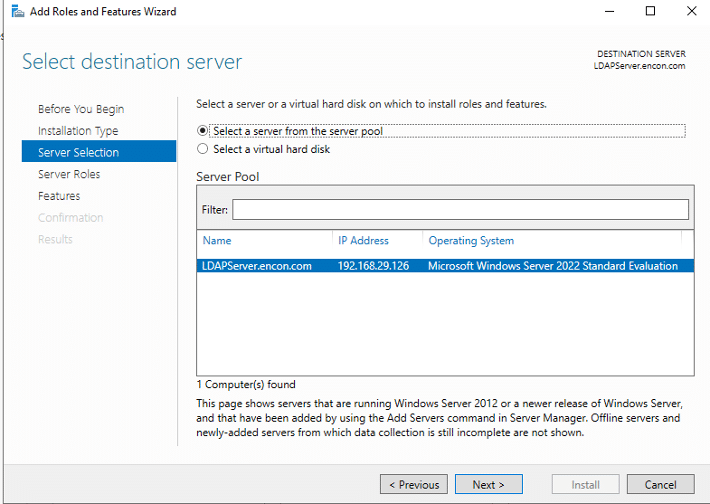
- On Server Selection, click Next.
- On Server Roles, click Active Directory Lightweight Directory Services, and click Add Features, and then click Next

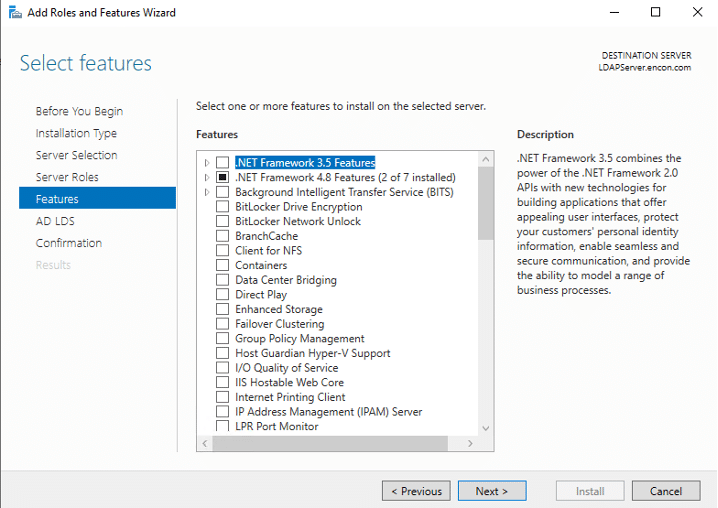
- On Features, click Next
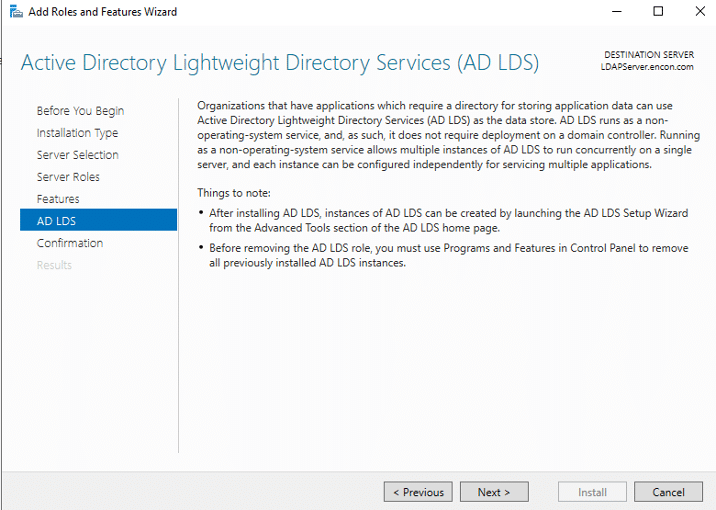
- On AD LDS, click Next
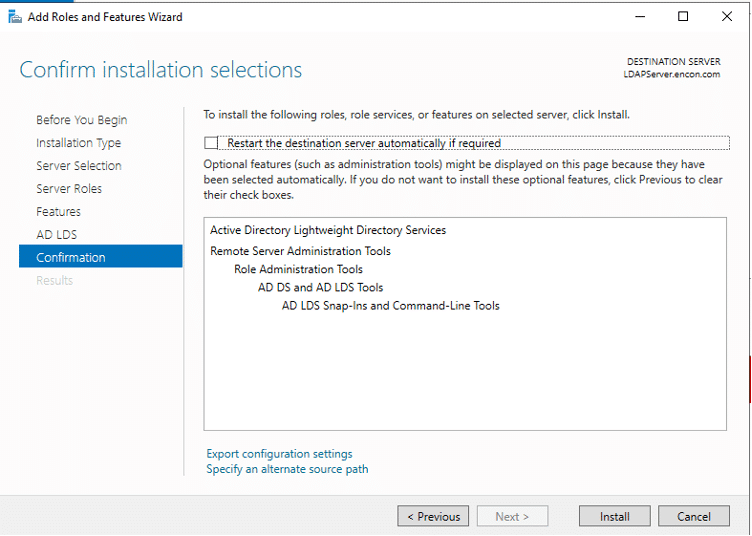
- On Confirmation, click Install
- Post Installation, AD LDS needs to be configured
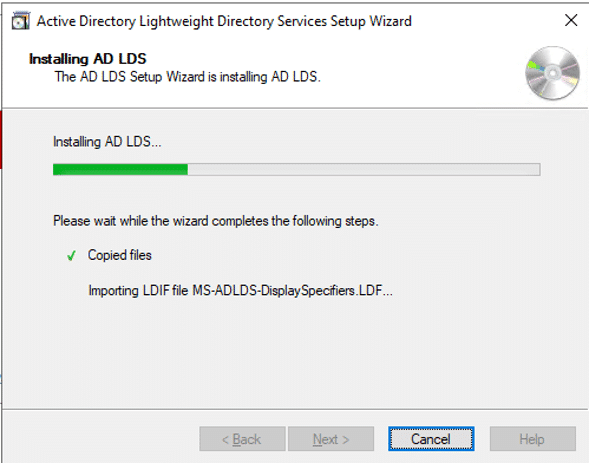
Configuring AD LDS
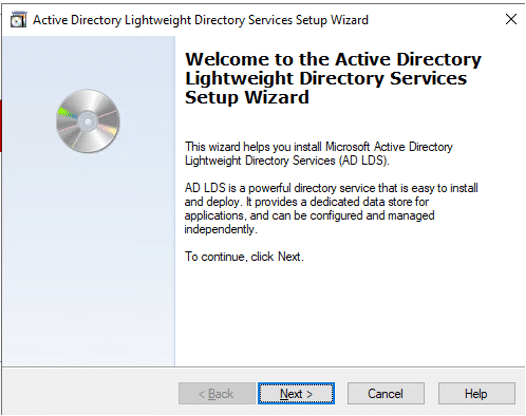
- Run AD LDS setup wizard. Click Next on first page.
- Ensure unique instance is selected, and click Next

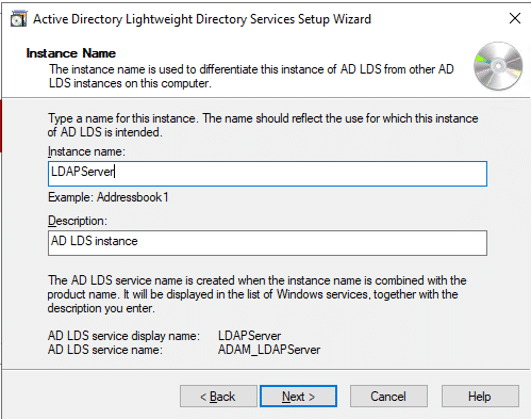
- Provide Instance name and Description, and click Next
- Leave default ports and click Next
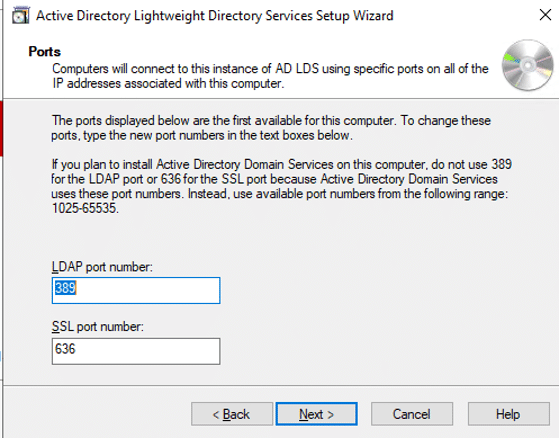
If AD LDS is installed on domain controller, then LDAP port would be 50000 and SSL port would be 50001
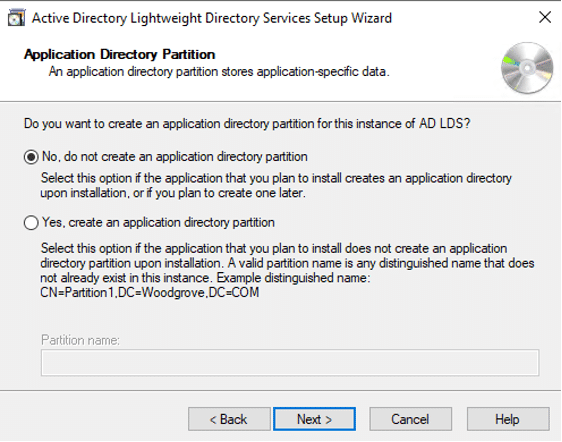
- On Application Directory Partition, click Next
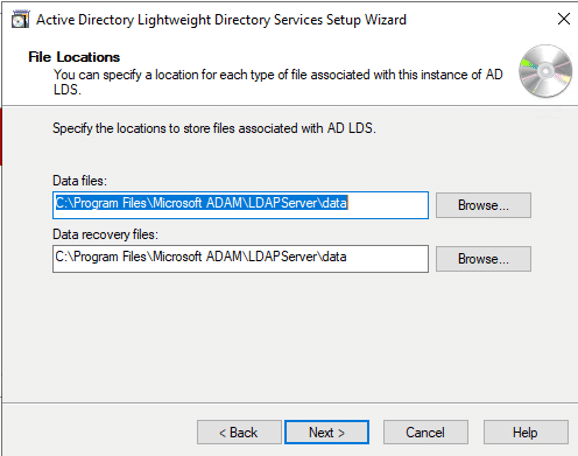
- On File locations, click Next
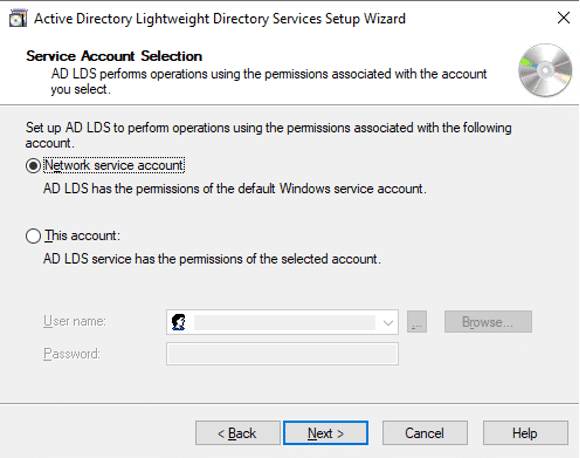
- On Service Account Selection, you may leave it on the Network service account, or choose a preferred account that can control LDAPS service
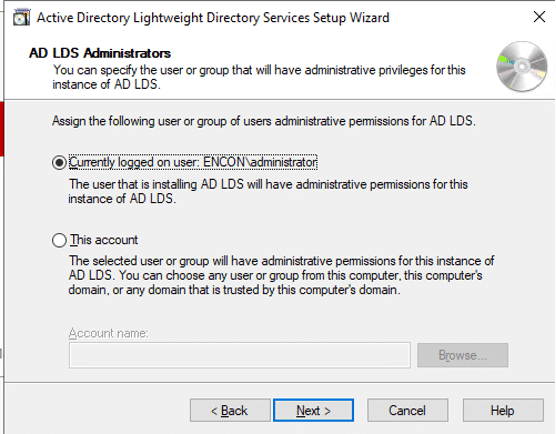
- On AD LDS administrators, leave the current admin, or choose another account from the domain
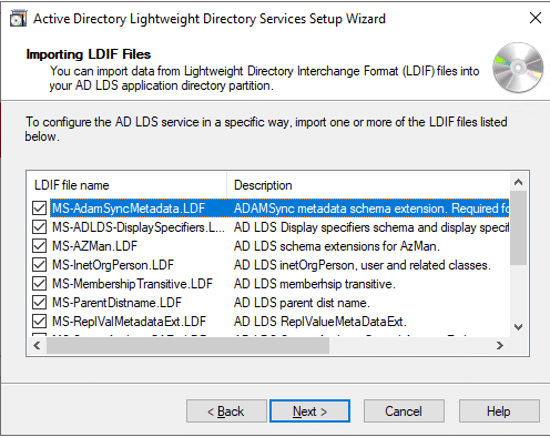
- Choose all LDF Files to be imported, and click Next
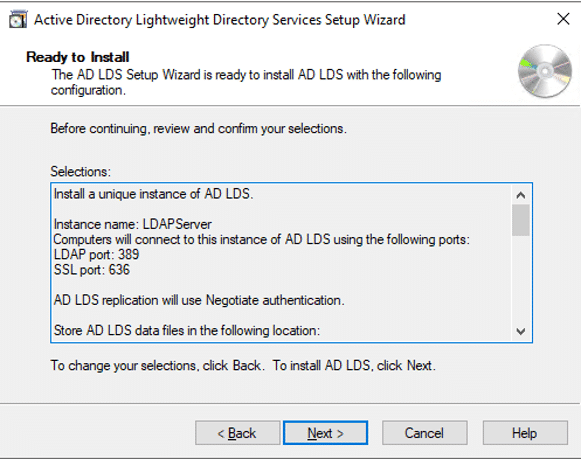
- On Ready to Install, click Next
- After Installation, click Finish
Publishing a certificate that supports Server Authentication
- Login to the Issuing CA as enterprise admin
- Ensure you are in Server Manager
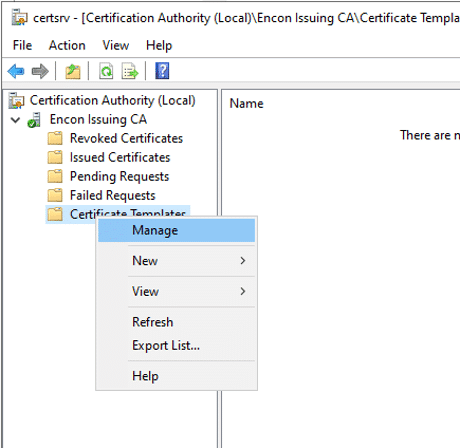
- From the Tools menu, open Certificate Authority

Expand the console tree, and right click on Certificate Templates
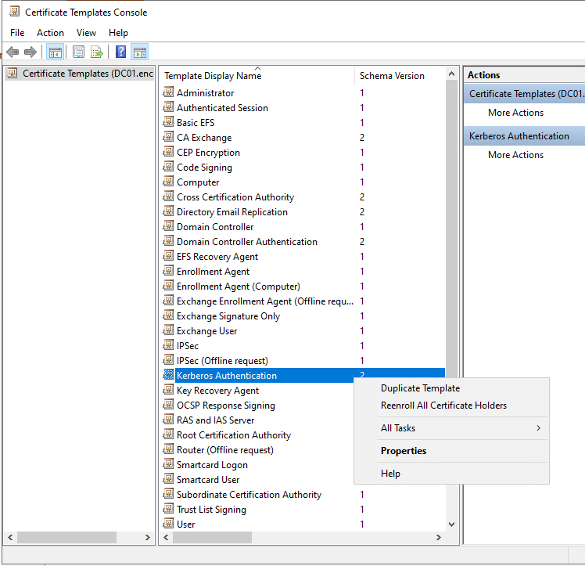
- Select Kerberos Authentication (as it provides Server Authentication). Right click and select Duplicate Template. We can now customize the template.
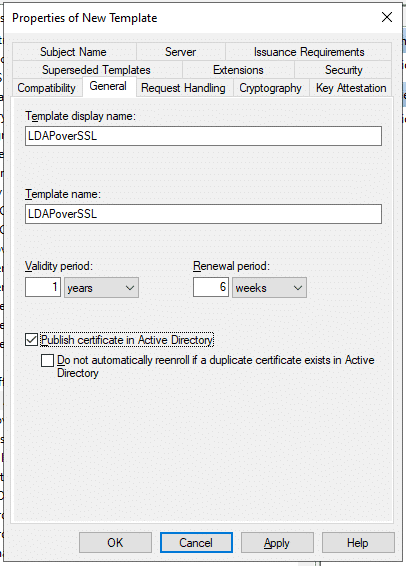
- Change Template Display Name and Template Name on General tab. Check Publish Certificate in Active Directory. This will ensure that the certificate appears when we enrol domain controllers using that template
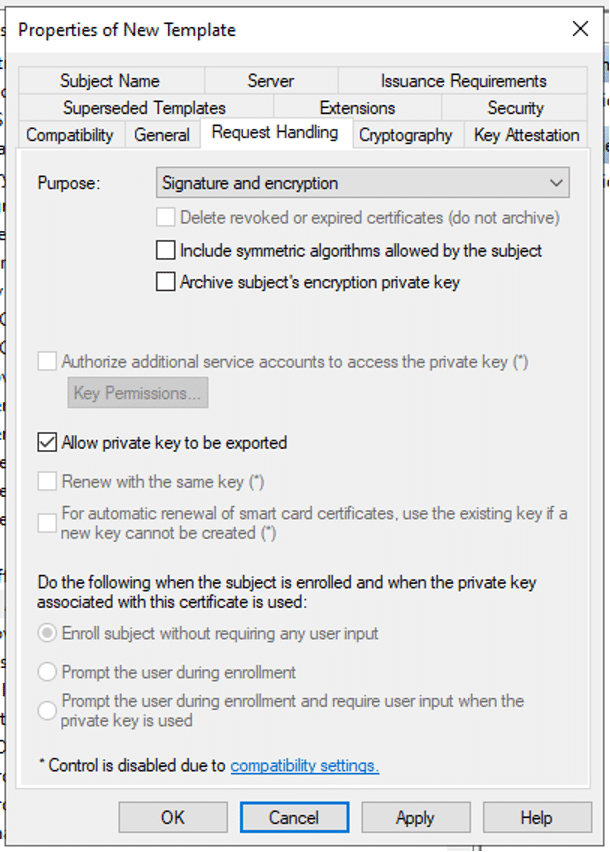
- On Request Handling, check Allow private key to be exported.
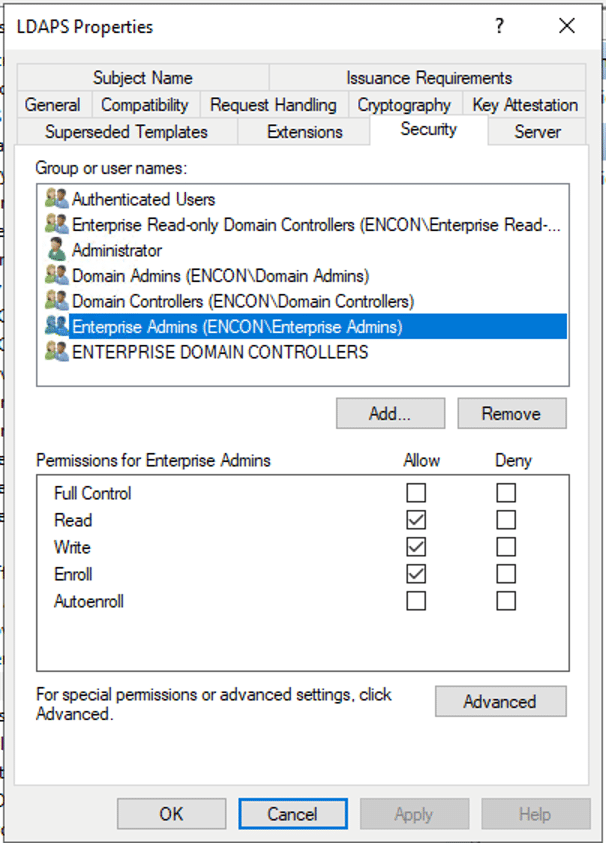
- On the Security tab, provide Enroll permissions to appropriate users
- Click Apply
Issue the Certificate on Issuing CA
- Login to the Issuing CA as enterprise admin
- Ensure you are in Server Manager
- From the Tools menu, open Certificate Authority

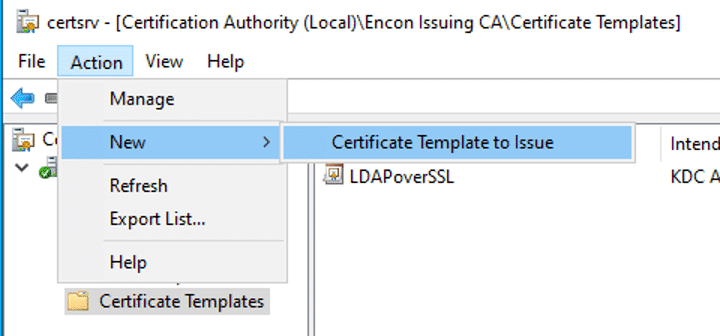
Expand the console tree, and click on Certificate Templates
On the menu bar, click Action > New > Certificate Template to Issue
- Choose the LDAPS certificate
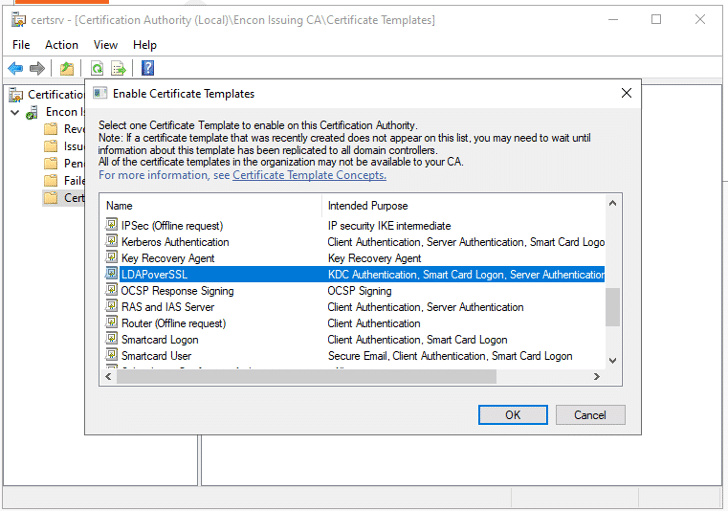
- Click OK and it should now appear in Certificate Templates
Requesting a certificate for Server Authentication
- Log into LDAP server or domain controller.
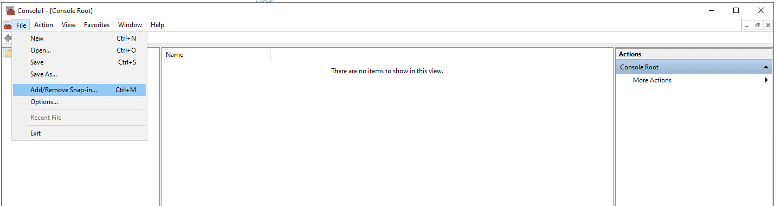
- Type win+R and run mmc
- Click File and click Add/Remove Snap-in
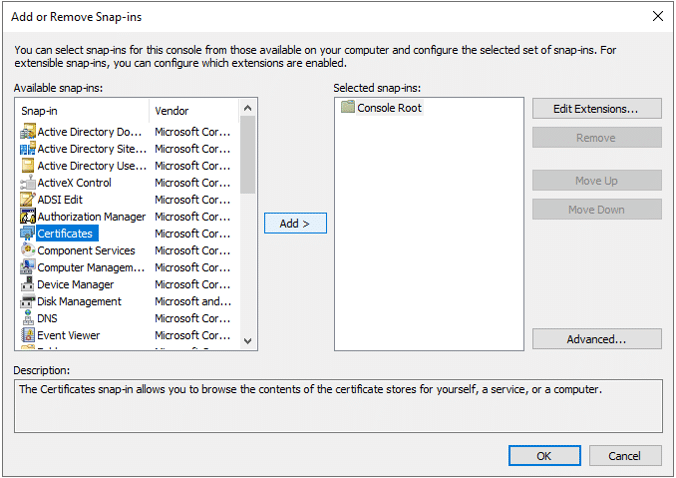
- Choose Certificates and click Add
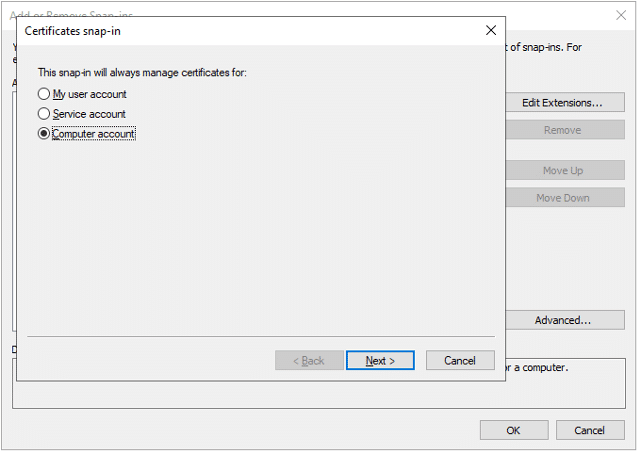
- Choose Computer account
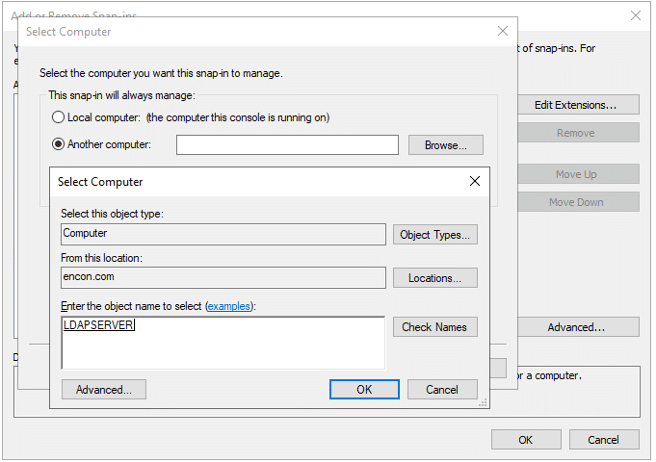
- If the steps are followed on LDAPServer where AD LDS is installed, click Local computer, or choose Another computer and choose where it would need to be installed
- Expand the console tree, and inside Personal, click Certificates
- Right click on Certificates and click All Tasks and select Request New Certificate
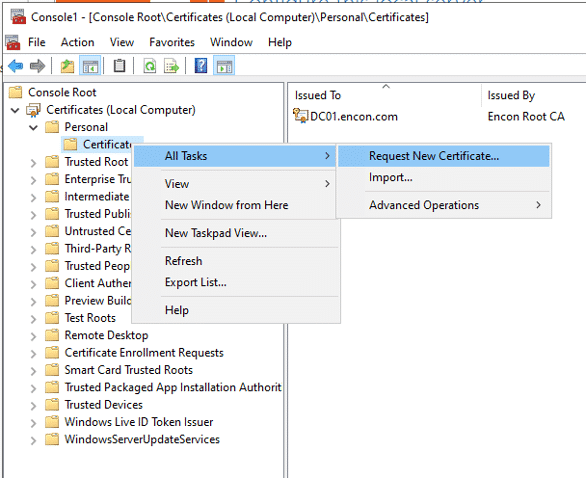
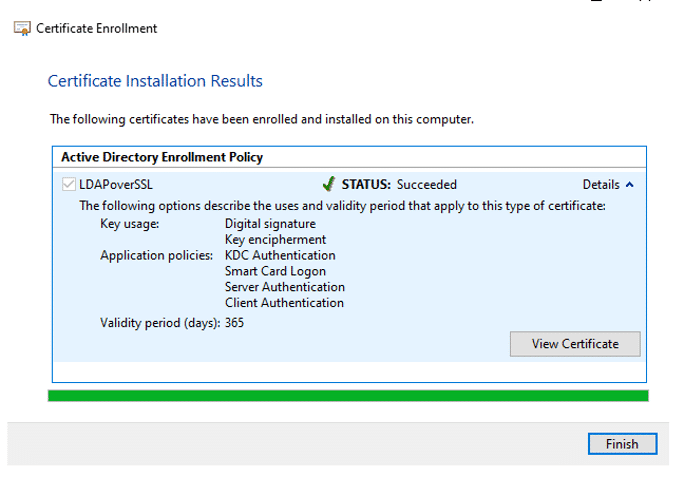
- Follow the instructions, choose LDAPS template that we issued earlier and Install.
- Once Installed click Finish
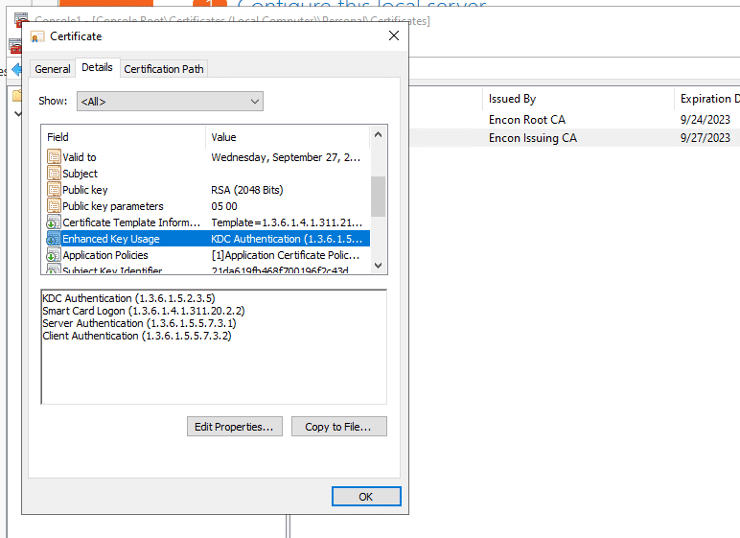
- Open the certificate, and in Details tab, navigate to Enhanced Key Usage to ensure Server Authentication is present.
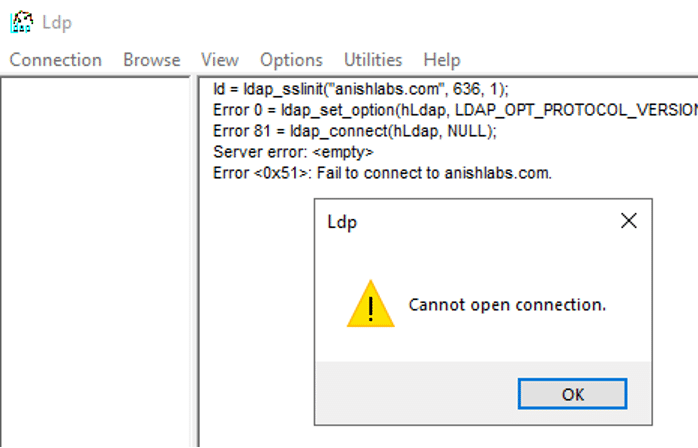
Validating LDAPS connection
- Login to LDAP Server as Enterprise admin
- Type win+R and run ldp.exe
- On the top menu, click on Connections, and then click Connect
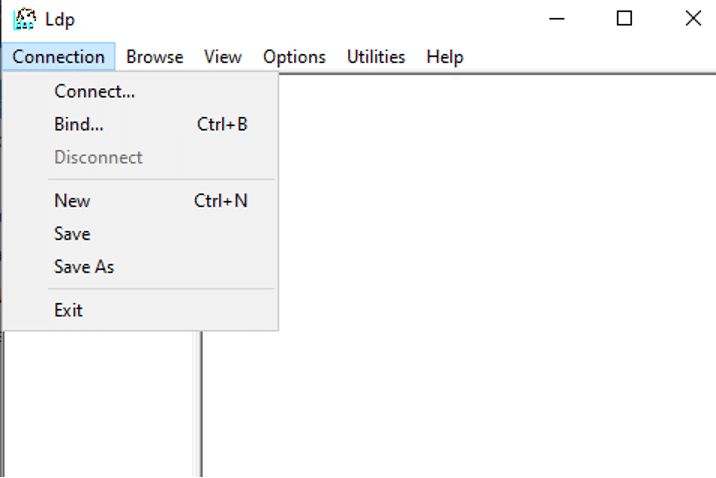
- In server, provide domain name, ensure SSL is checked and proper port is provided and click OK
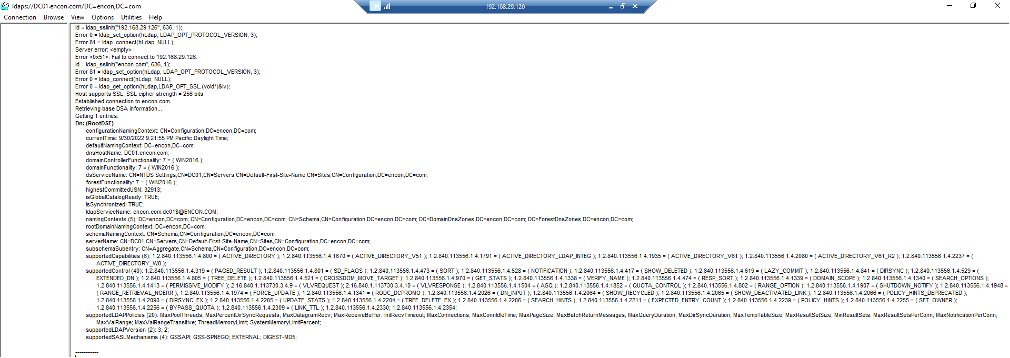
- No errors should appear. If connection was unsuccessful, the following output may appear
Conclusion
This should enable LDAPS which can be used to properly protect credentials used in your PKI environment as well as enable other applications to use LDAPS.
If you need help with your PKI environment, feel free to email us at info@encryptionconsulting.com.