Jar files, also known as Java archives, are used to arrange together several Java class files and their associated data into a single file. They play an essential role in the distribution of Java programs, allowing for effortless distribution and operation across several platforms. Signing Jar files to ensure their validity and integrity is an important aspect of distributing Java programs. This is especially critical when it comes to protecting web-based applications and assuring the dependability of third-party libraries. The JarSigner tool is provided by the Java Development Kit (JDK) for this purpose.
The JarSigner creates a signature file for the initial Jar file. This signature file includes the cryptographic hashes of all the contents of the Jar file. The tool then uses a digital signature algorithm to construct a second signature file (RSA). These two signature files, along with the initial files, are kept in the Jar file. The JarSigner extracts the initial Jar file and its related signature files during the verification process. The hash values for the initial Jar file are then calculated and compared to the values recorded in the signature file. The Jar file is regarded as legitimate and trustworthy if the hash values match. Otherwise, the Jar file is considered invalid and cannot be run.
The addition of a digital signature facilitates the verification of the origin and identity of Jar files. Cryptographic algorithms play an important role in ensuring robust protection by implementing advanced mathematical techniques in the signing process. Various methods exist for signing Jar files. Below, a concise overview of distinct approaches is provided.
Sign Jar Files using the JarSigner Tool
This section details how to sign jar files using the JarSigner tool. Java must be installed for it to work. Download and install Java from https://www.oracle.com/java/technologies/downloads. There are different ways to use JarSigner: with the CodeSign Secure KSP, command prompt, through the Eclipse IDE, or through a Jenkins Pipeline.
With CodeSign Secure KSP
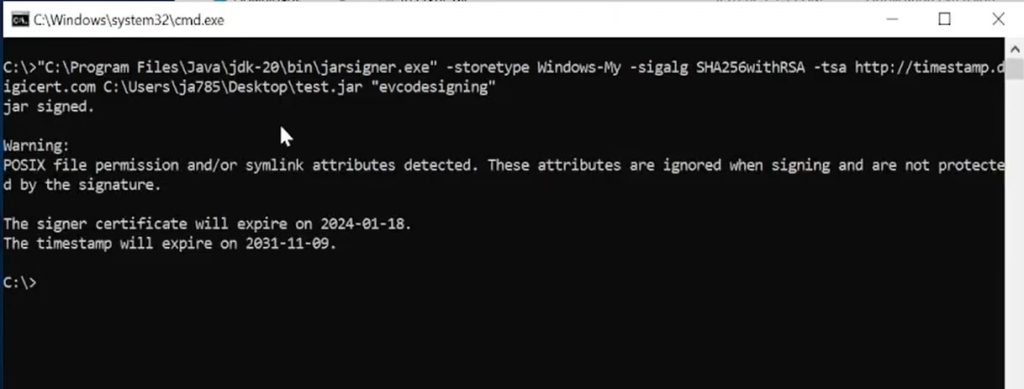
- Navigate to Java’s jdk installation and go inside the bin folder (usually located at C:\Program Files\Java\jdk-20\bin). There you will find JarSigner application “Jasigner.exe”.
- You can drag the application to command line to get its path or simply navigate to that folder using the cmd.
- In cmd, we will first specify our store type, we are doing so by using -storetype Windows-My. This is where our KSP comes into play.
- Specify signing algorithm with: sigalg SHA256withRSA. You can use whichever signing algorithm you choose.
- Specify Time Stamp Server: –tsa http://timestamp.digicert.com
- Specify the Jar File you wish to sign.
- Specify the Key Alias of the certificate.
Altogether the command somewhat looks like the following. This needs to be executed from the directory where JarSigner Application is located.
-storetype Windows-My -sigalg SHA256withRSA -tsa http://timestamp.digicert.com C:\Users\ja785\Desktop\test.jar “evcodesigning”
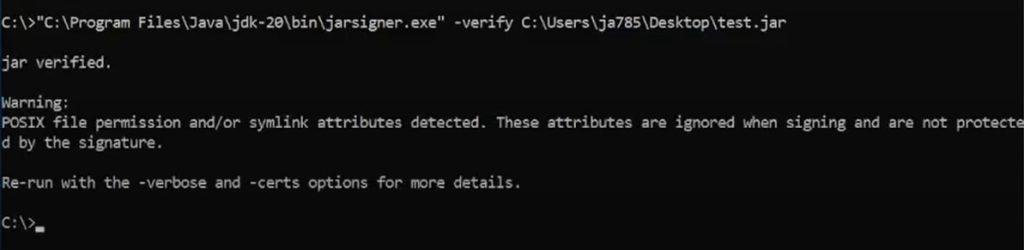
We can run Jar Signer verifier to check if the Jar files has been signed or not.
It is done in the same directory as that of signer and with the command below.
-verify <file_path>
With Command Prompt
Below is a list of the available command parameters and a brief explanation of their functions.
| -s or –sign | Jar file to be signed. |
| -v or –verify | Jar file to be verified. |
| -c or –cert-path | Certificate file path. |
| -u or –user | User name. A user name on Encryption Consulting server. |
| -k or –key | Key for signing/verification provided by Encryption Consulting server. |
| -a or –algorithm | Algorithm to be used for signing/verification. One of the below options needs to be used: SHA-256 SHA-384 SHA-512 |
| -o or –output | Output file to path as the signed file. |
| -h or –help | Help |
| –version | Display version number |
| –verbose | Display debugging logs |
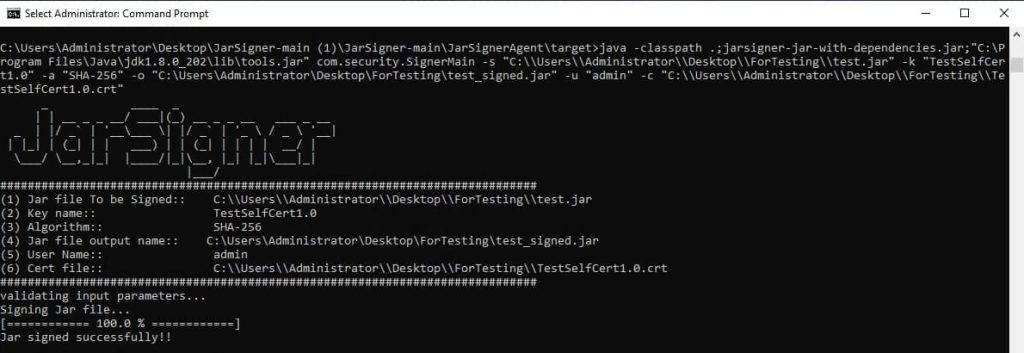
To sign a jar file using JarSigner, first open an administrator command prompt and input this command:
cd C:\Users\Administrator\Desktop\JarSigner-main (1)\JarSigner-main\JarSignerAgent\target
The command to sign is as follows, remember the content in <brackets> are example inputs, you will need to specify the specific file names and paths:
java -classpath .;jarsigner-jar-with-dependencies.jar;”C:\Program Files\Java\jdk1.8.0_202\lib\tools.jar” com.security.SignerMain -s “
The expected output is as follows:
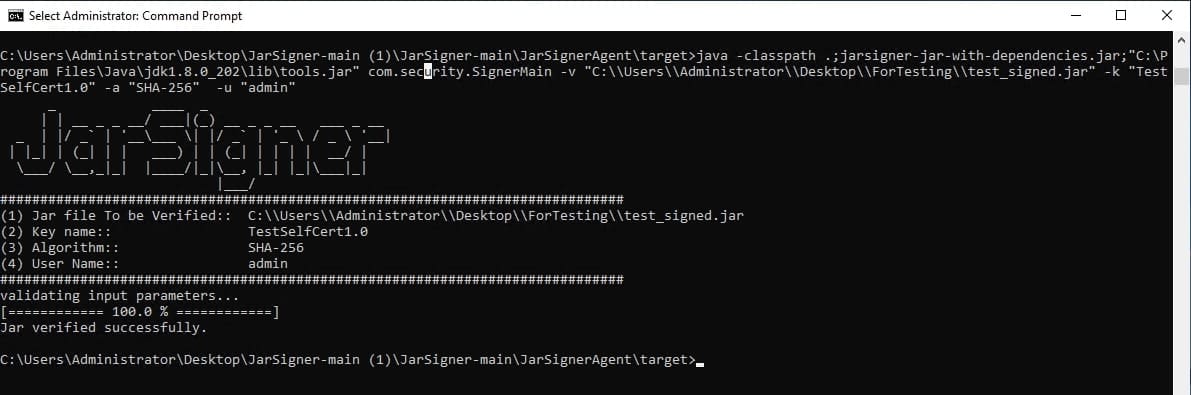
To verify a jar file using JarSigner, input this command:
java -classpath .;jarsigner-jar-with-dependencies.jar;”C:\Program Files\Java\jdk1.8.0_202\lib\tools.jar” com.security.SignerMain -v “
The expected output is as follows:
With Eclipse (Maven Project)
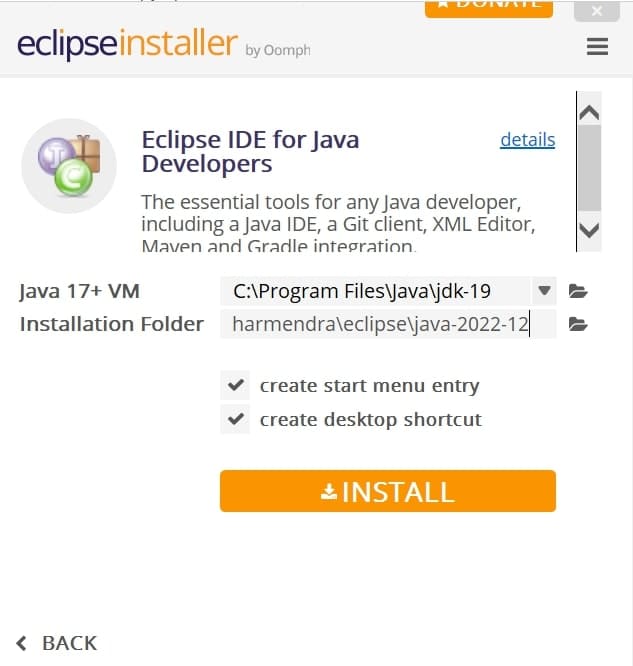
To sign a jar file using the Eclipse IDE, first you would need to install Eclipse.
- When greeted by the installation wizard, select Eclipse IDE for Java Developers, and click install.
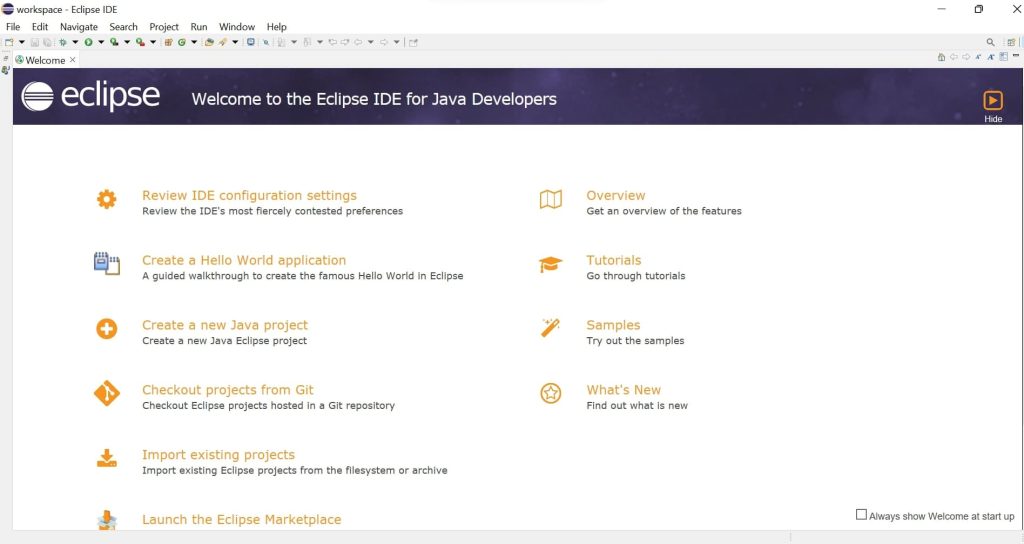
- Make sure the CodeSignerAgent.zip file is unzipped. Then on the Eclipse UI, click on import at the top left of the window.
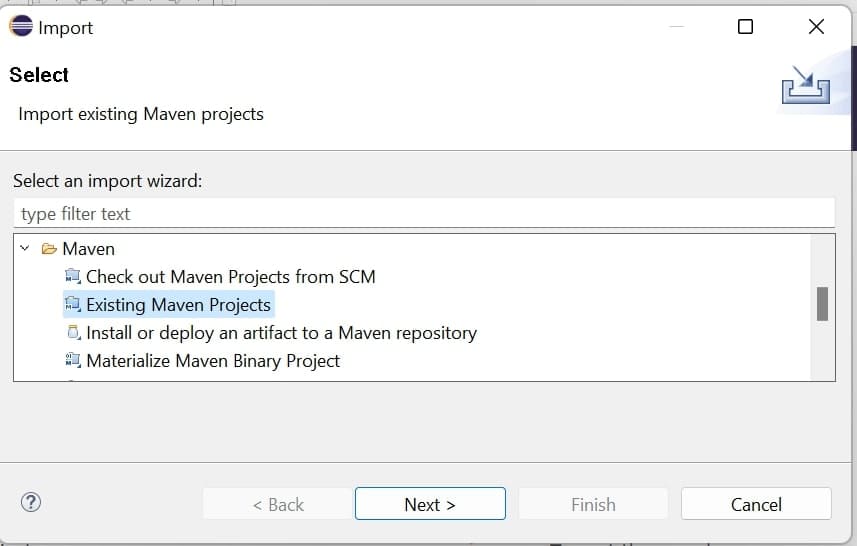
- Then select Import existing Maven projects.
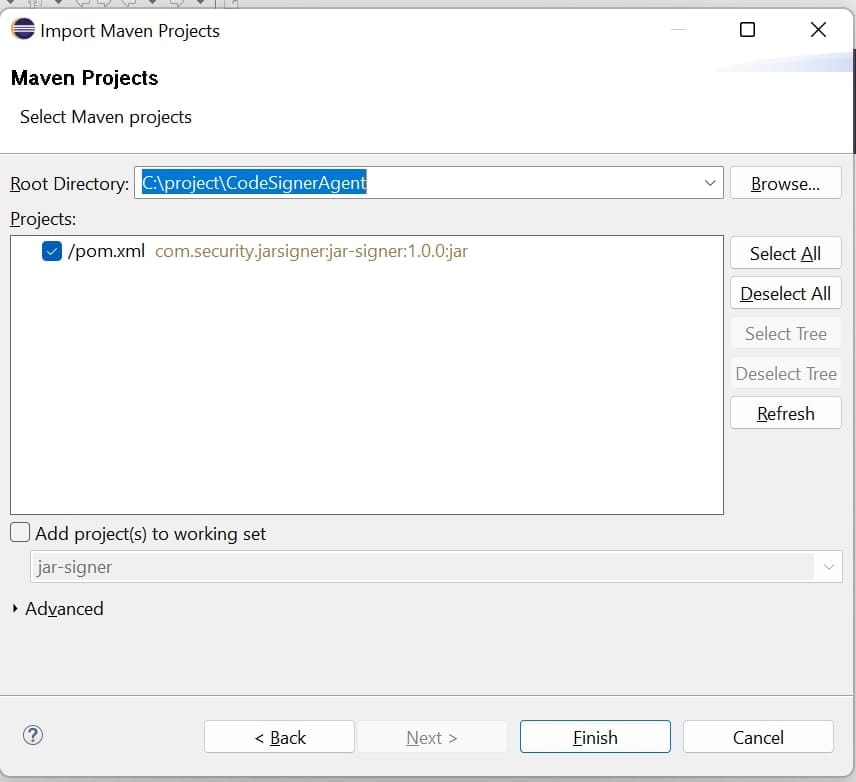
- Then select CodeSignerAgent directory in browser as shown below:
- Then Create a JDK library on clicking project library. Select JDK 1.8 as library path. Please install JDK1.8 if not available.
Reference: https://www.oracle.com/in/java/technologies/javase/javase8-archive-downloads.html
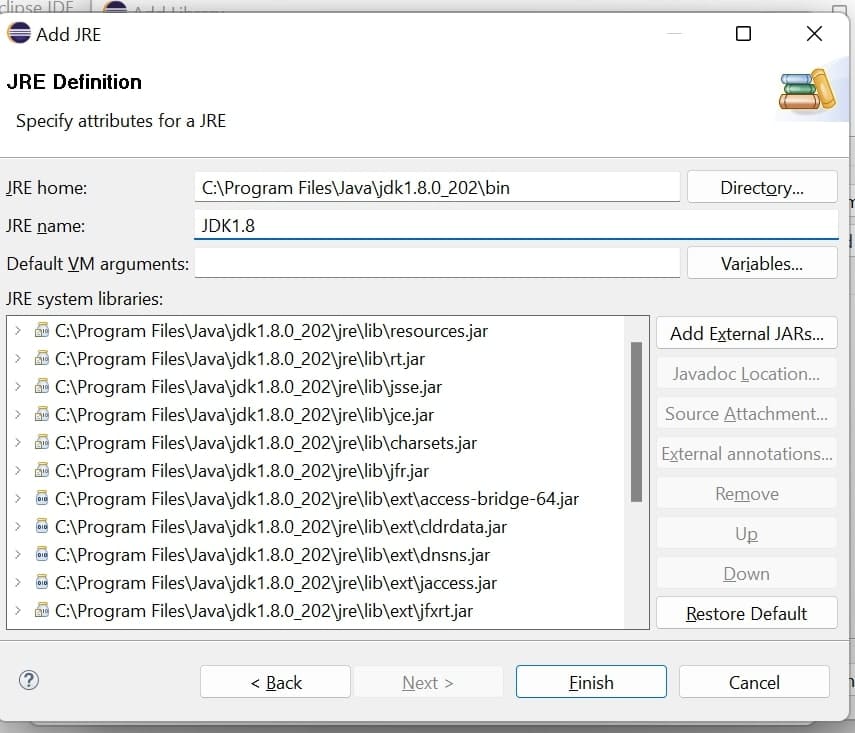
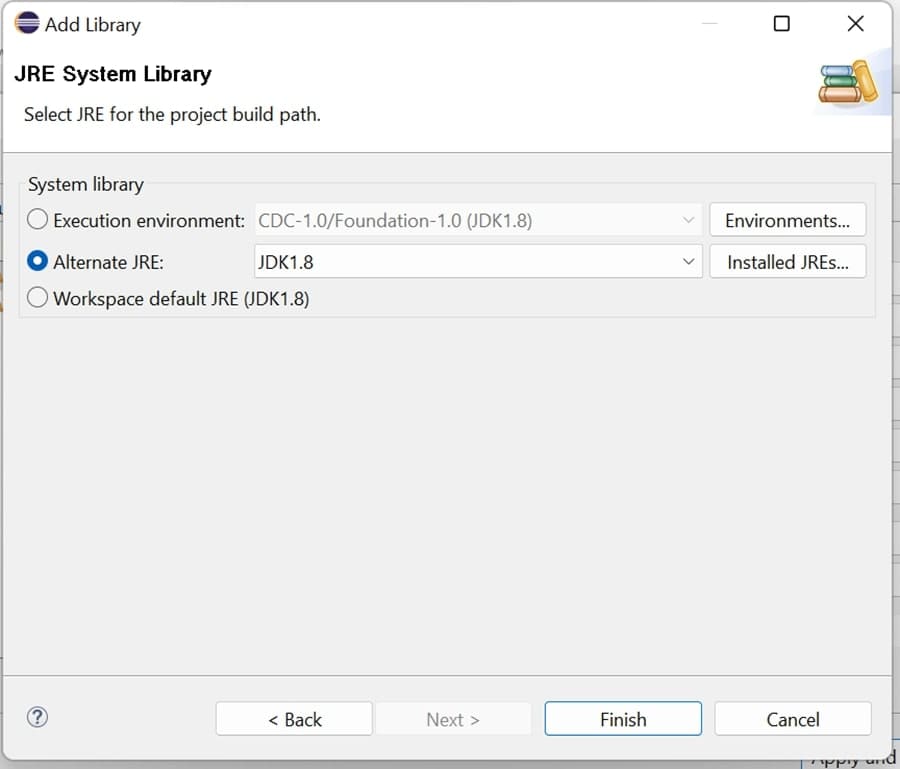
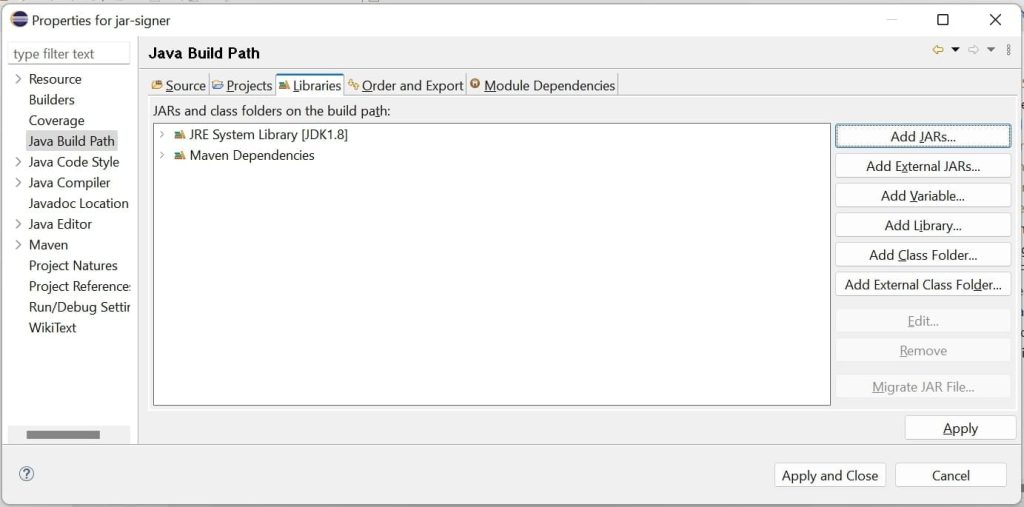
- Add this JDK library in project library. Remove JRE library.
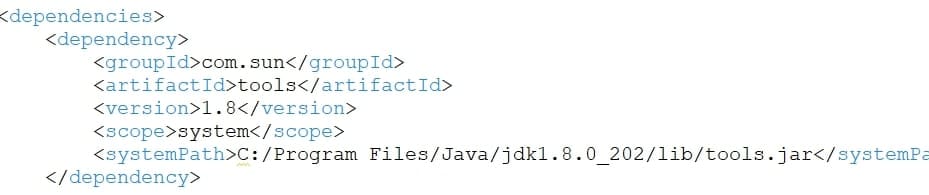
- Then open the project pom.xml file and change JDK 1.8 path as per your machine.
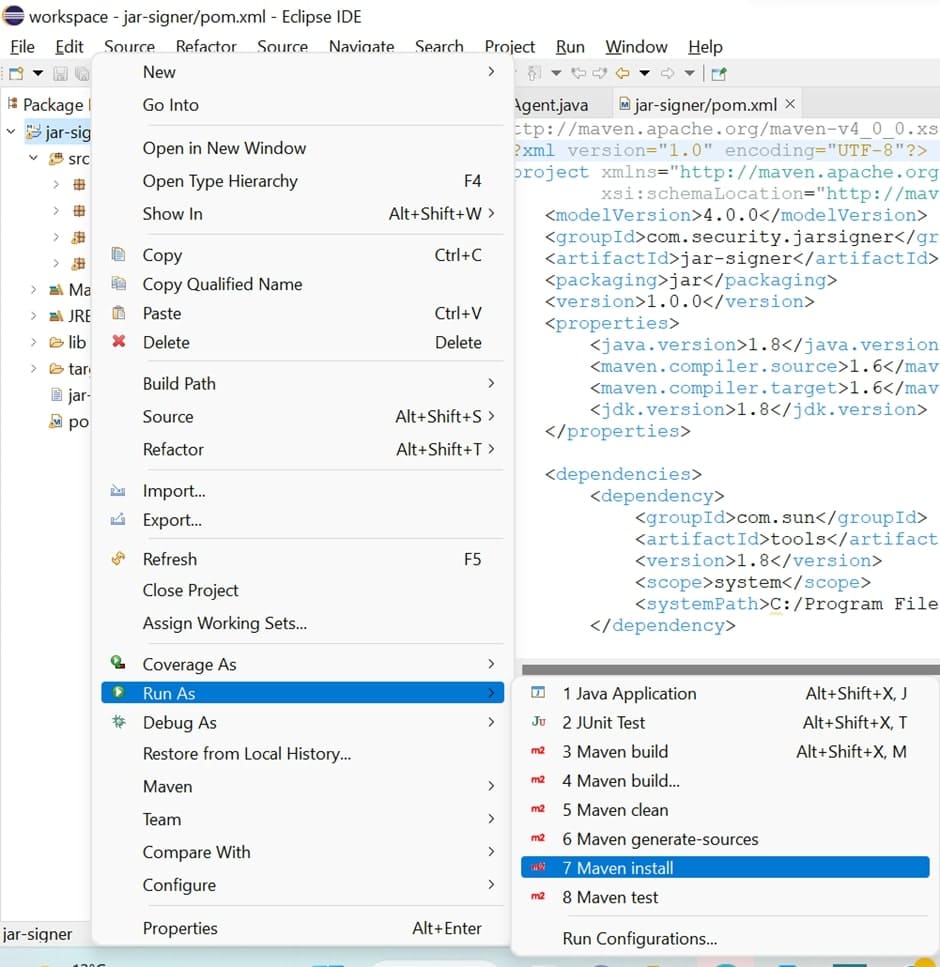
- Then right click on the project and select Run As: Maven Install
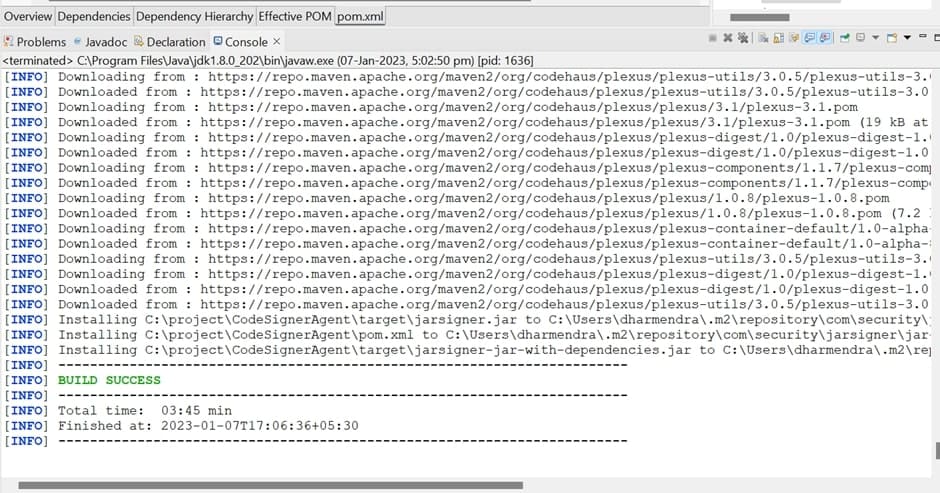
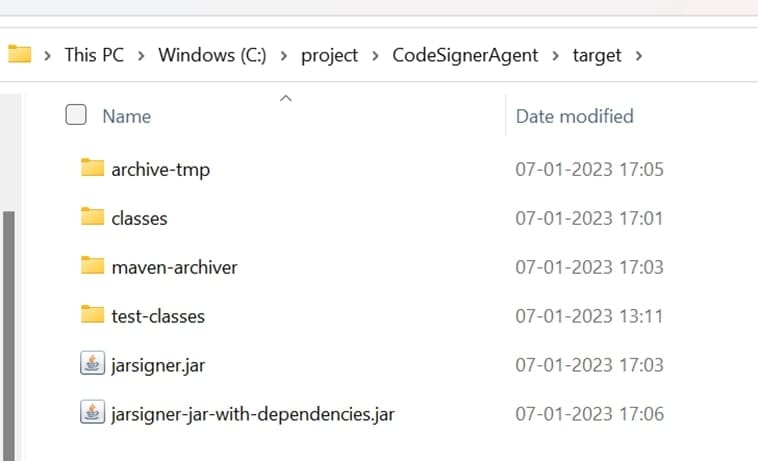
- Build success will be shown below, and in the target folder of the project, JarSigner.jar will be created.
Jenkins Pipeline
Using JarSigner in a Pipeline can be useful to test potential updates and new builds. The JarSigner project is pre-configured on the Jenkins dashboard.
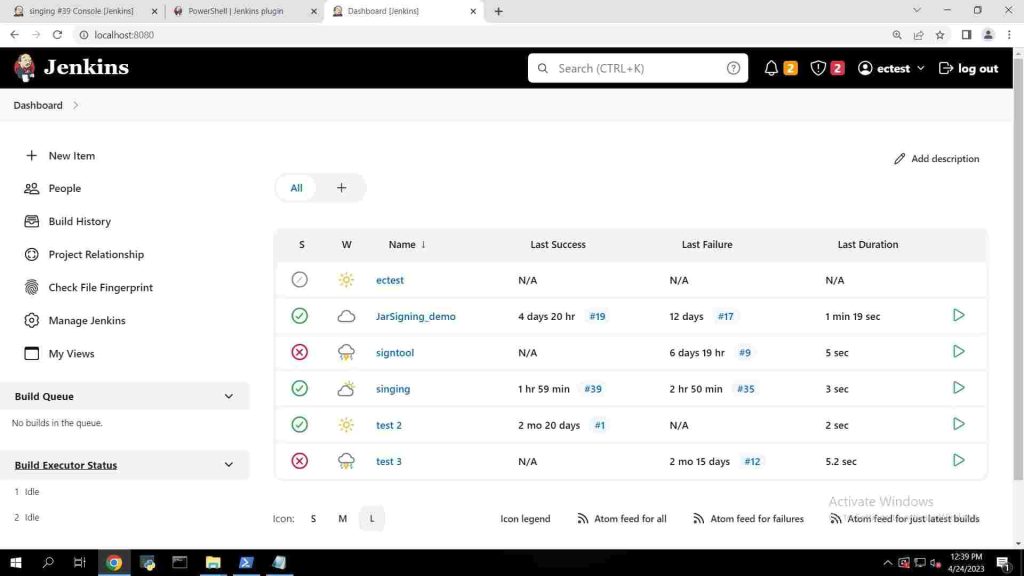
To login, open a web browser (preferably Google Chrome), and type http://localhost:8080/ to access the Jenkins dashboard.
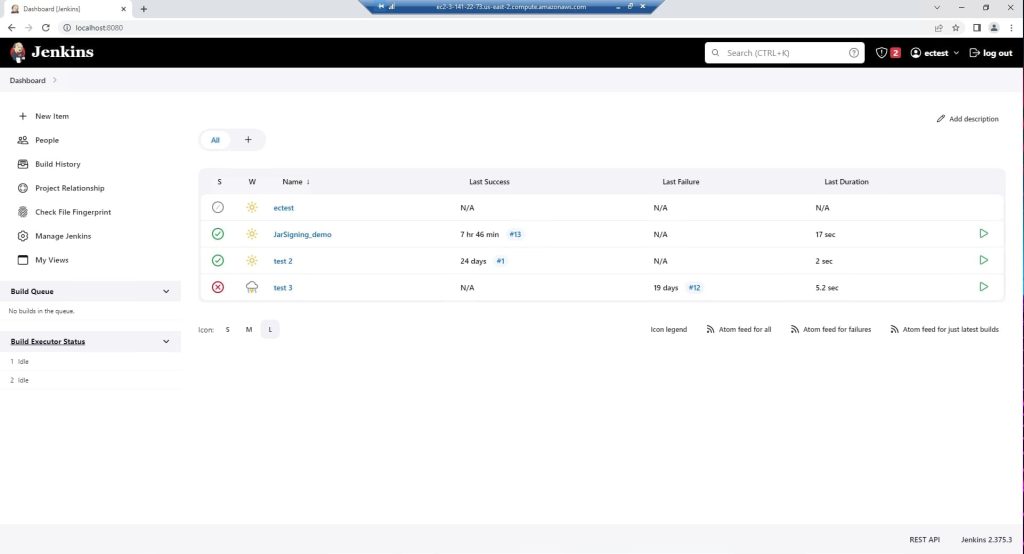
Here you can see all the builds and some general information about them.
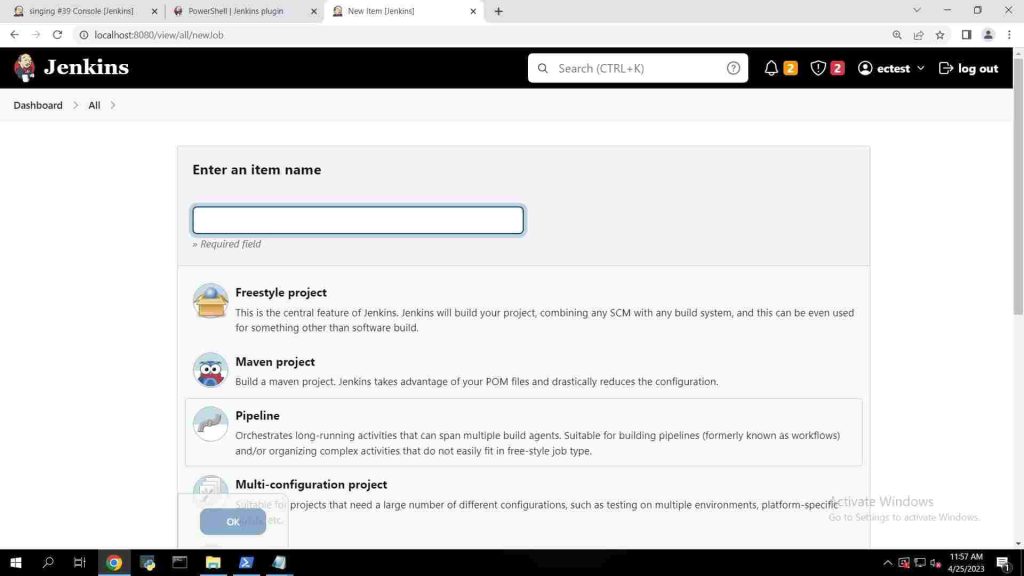
In the Jenkins Dashboard follow the steps below:
- From Dashboard click on New Item.
- Enter any item name and click on Freestyle Project and click ok.
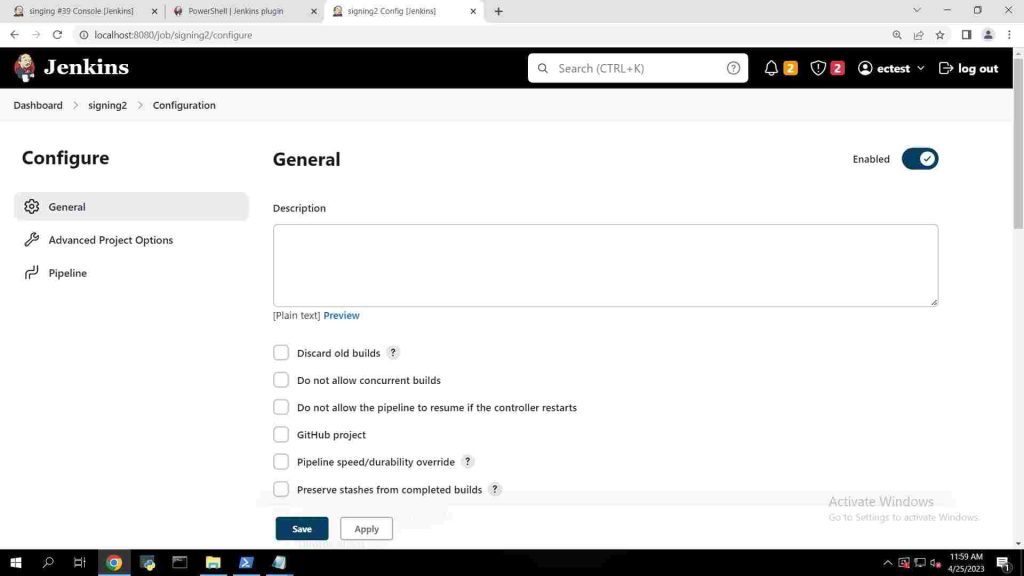
- In the configuration page, under General put up a description as you wish.
This is where the JarSigner code is executed, through adding a Build Step that Executes a Windows Batch Command we can call the JarSigner code and execute it through the Jenkins pipeline.
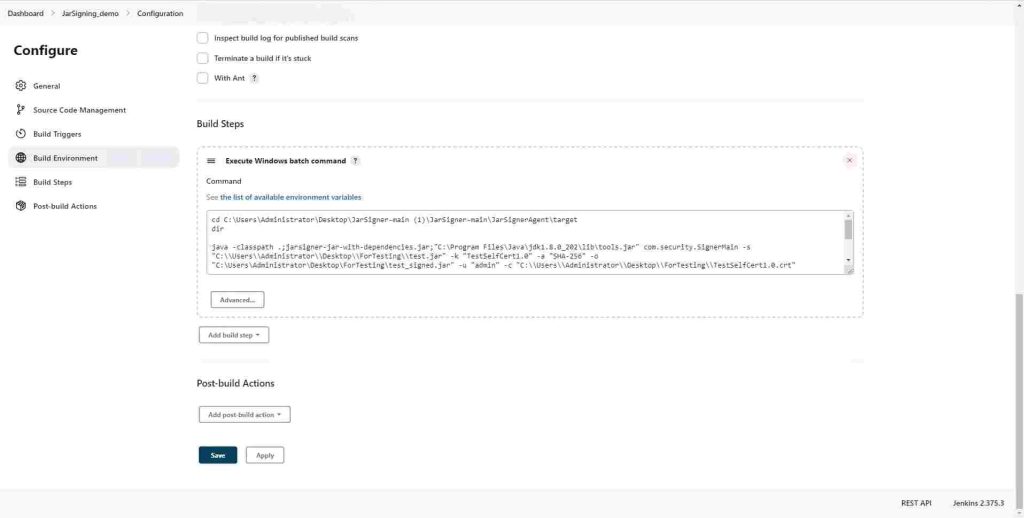
Save any changes by clicking on Save at the bottom.
Once saved click on build now and you’ll see a build number running in your screen. For more information about the build steps and general build settings, you can click on Configure next to the Build Now button.

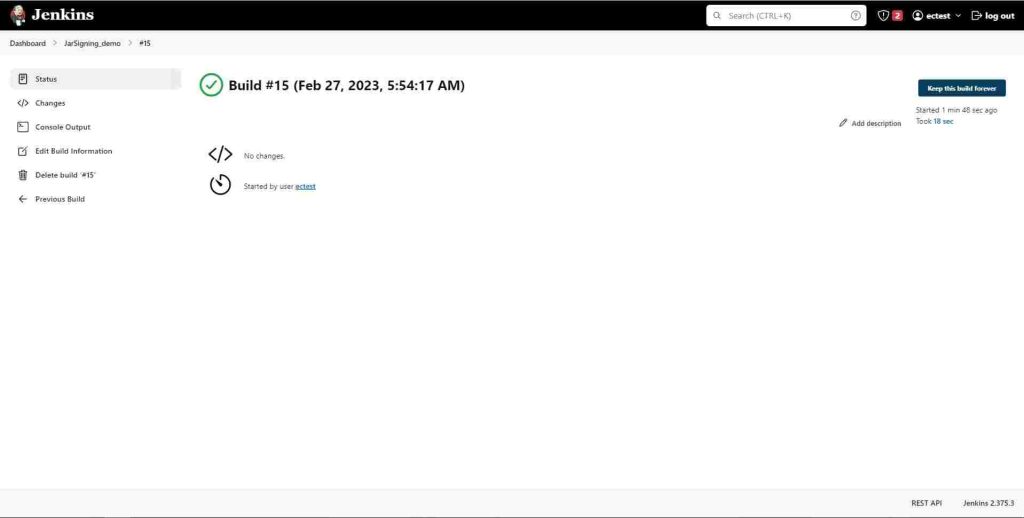
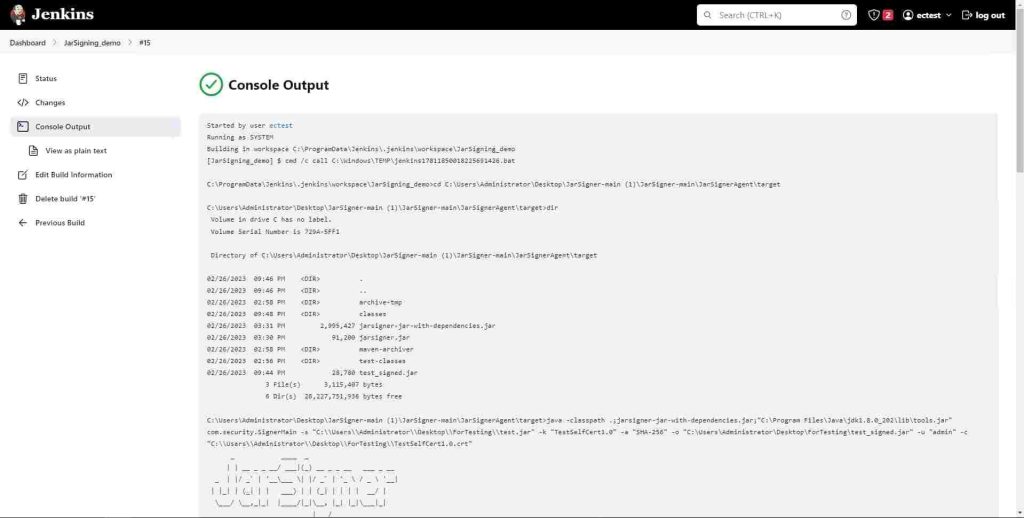
On the left side at the bottom of the button list, click on the upward facing arrow on Build History to reveal the most recent builds of the project. Select the most recent one and you will see the build information page. To see the output of the build, click on the Console Output button on the left side of the screen.
You can view the console output in a plain text format as well by clicking View as plain text below the Console Output button. As shown below, this build executes the JarSigner.
Conclusion
In conclusion, understanding the concepts of signing Jar files and the usage of the ‘jar signer’ tool is essential for Java developers and users alike. By leveraging this functionality, one can enhance the security and reliability of their applications, safeguarding them against potential tampering and ensuring the trustworthiness of third-party libraries. As the security of web-based applications continues to be a priority, familiarizing oneself with the process of signing Jar files will prove invaluable for staying ahead in this rapidly evolving landscape.
Encryption Consulting understands the need to sign files and applications in this digital age. Our code signing platform, CodeSign Secure, demonstrates our dedication to security. We provide signature generation with Hardware Security Modules, along with client-side hashing and virus scanning. We are committed to your security, and we are here to equip you with the information and tools you need to secure the things that are most important to you. Visit www.encryptionconsulting.com to learn more about any of our products or to book a CodeSign Secure Demo.