
Appx/MSIX Signing (SignTool) Integration Guide
CodeSign Secure can sign Windows application packages — both .appx and .msix — using Microsoft’s Signtool together with Encryption Consulting’s Key Storage Provider (KSP). Because the private key never leaves the HSM and every signing operation is recorded centrally, you get strong key custody and a complete audit trail without changing how your build team already packages applications.
Unlike a plain .exe or .dll, an application package carries its publisher identity inside its manifest. Windows will only install a package whose signing certificate subject matches the Publisher declared in AppxManifest.xml. For that reason, signing an Appx or Msix package is a multi-stage process: the package must first be unpacked, its manifest aligned with the signing certificate, and the package repacked before Signtool is run against it.
In this guide, we will walk through the complete workflow — from installing the Encryption Consulting KSP through to verifying the signature on the finished package. The example below uses an .appx file; the identical steps apply to .msix packages.
Set up CodeSign Secure KSP
The Encryption Consulting Key Storage Provider (KSP) for Windows is a software component that extends the Microsoft Cryptography API: Next Generation (CNG) framework. Its primary purpose is to enable Windows applications, such as signtool.exe, to interact seamlessly with the cryptographic keys and certificates stored within an HSM.
Step 1: Download the EC KSP
- Log in to the CodeSign Secure portal and navigate to the Signing Tools section to download “Encryption Consulting CNG-SigningKSP” (also listed as “EC KSP for Windows”).
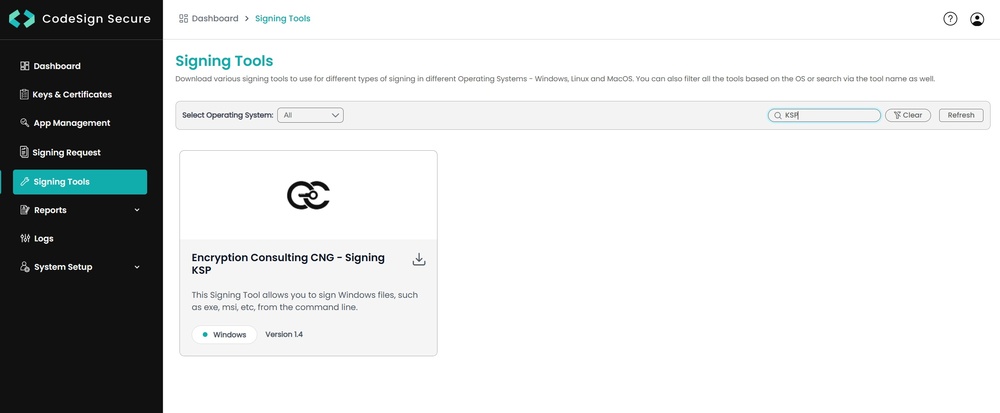
- Extract the zip file to get the “Setup.msi” file.
Step 2: Install the EC KSP
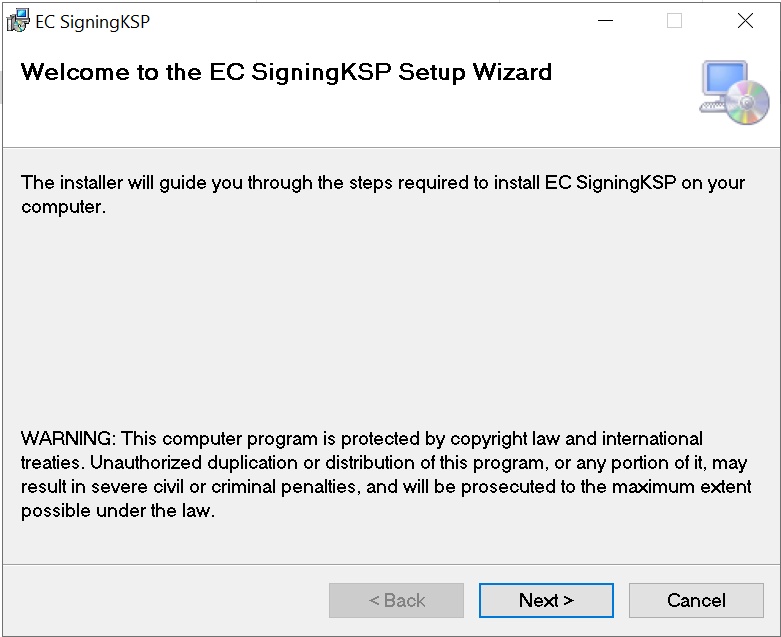
- Run the “Setup.msi” installer with Administrator privileges.
-
Follow the on-screen prompts of the installation wizard.
- Accept the End-User License Agreement.
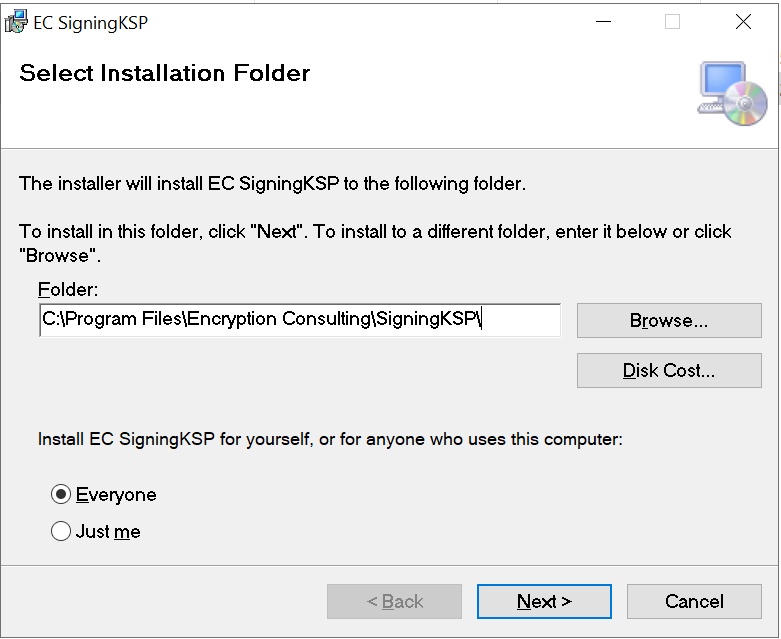
- Choose the installation directory (the default is C:\Program Files\Encryption Consulting\SigningKSP).
- Choose whether you want to install the KSP for Everyone or just for the current user.
-
Enter the prompted details such as:
- Username: The username/email that you use to log in to the CodeSign Secure portal.
- Code: The secret code that you set at the time of setting up the CodeSign Secure solution (this is the code defined in your conf.ini configuration file).
- IdentityType: Keep this field as default (2). If your deployment authenticates against a local identity store, set this to 1 as described in the product documentation.
- CodeSign Secure URL: The URL to access the portal (remember to add “/api/” at the end of the URL). Leave the API BaseURL unchanged if it is already populated correctly.
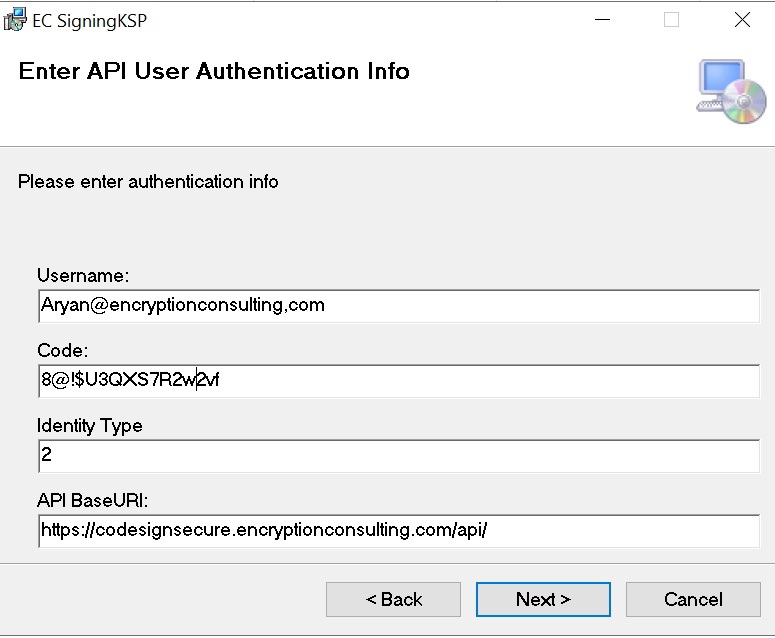
- Click Next and confirm the installation. When Windows asks whether you want to allow this program to make changes to your PC, click Yes.
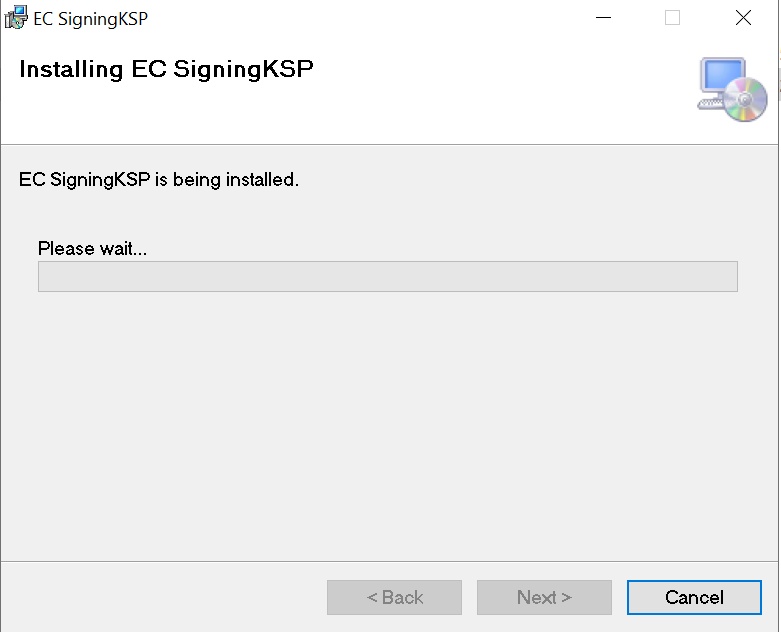
Step 3: Configure the Registry Editor settings
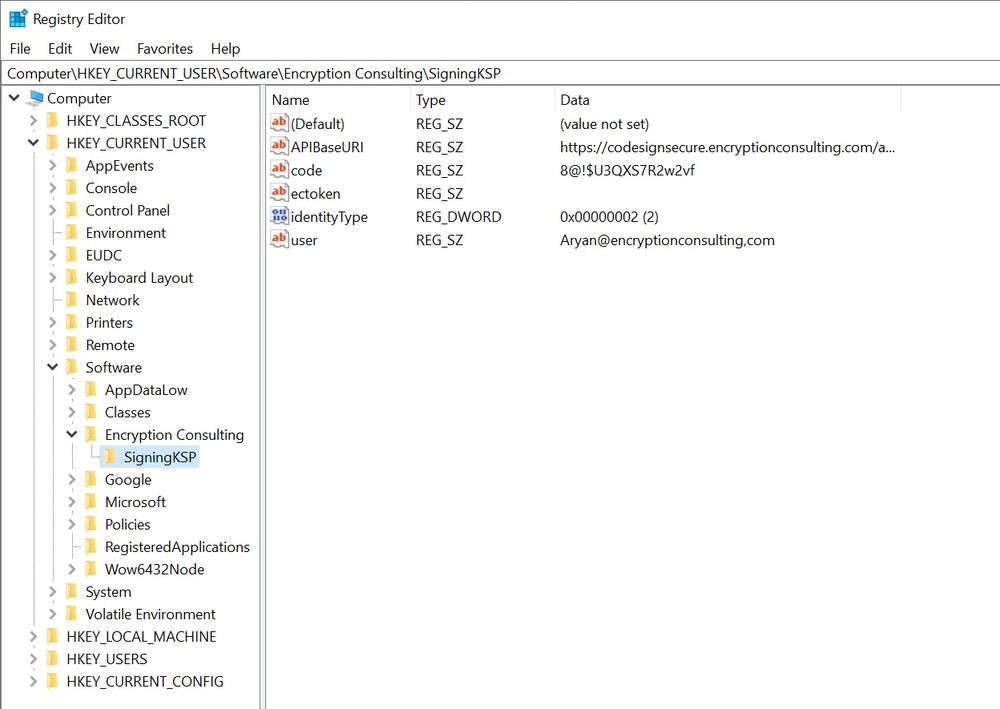
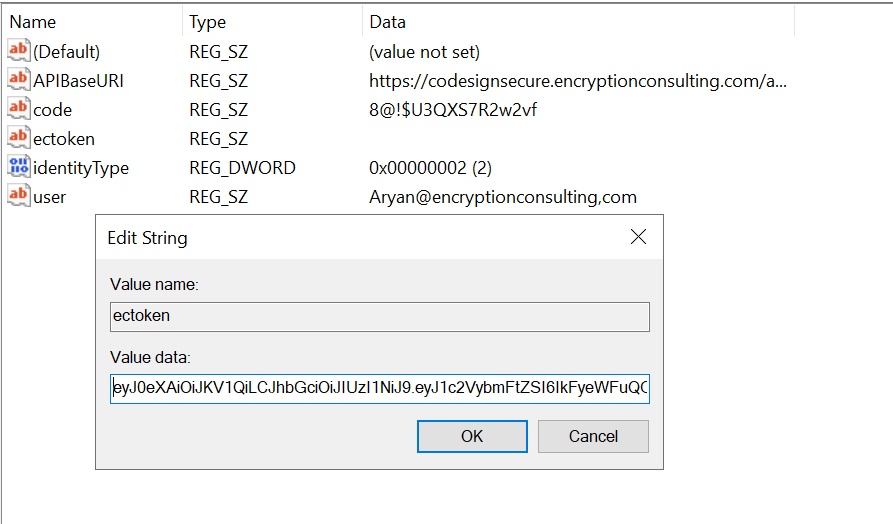
- Open the Registry Editor from the Start menu and navigate to HKEY_CURRENT_USER > Software > Encryption Consulting > SigningKSP.
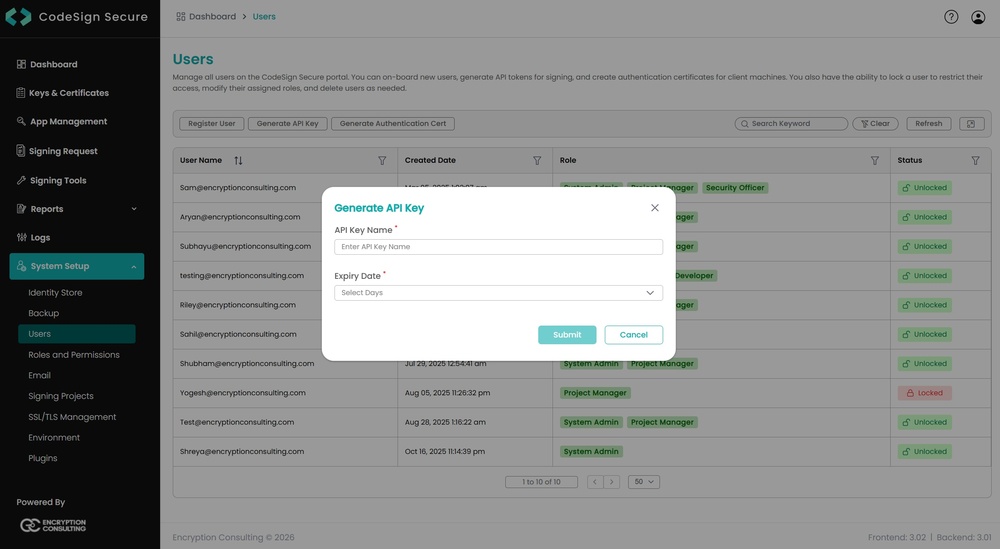
- Now open the CodeSign Secure portal and navigate to System Setup > User. Select the “Generate API Key” option.
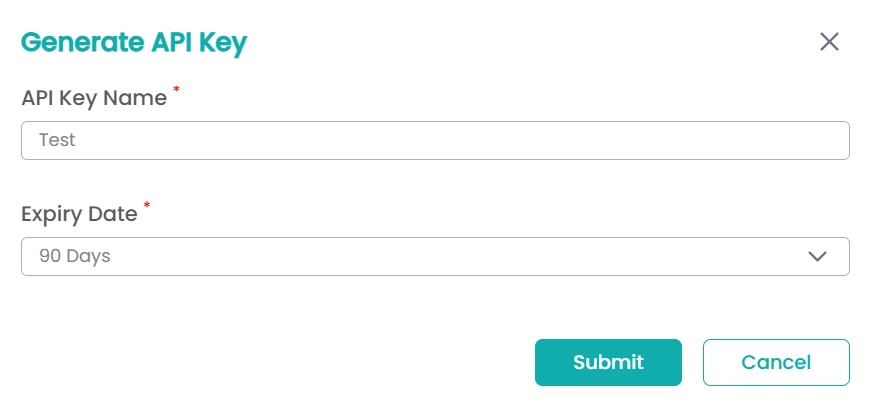
- Create a token for your account by providing a name and the validity period. Remember to copy the token as it will be shown only once.
- Add this token to the “ectoken” field in the Registry Editor.
Set up P12 Authentication Certificate
Setting up a P12 Certificate involves configuring your environment variables to authenticate your client machine with Encryption Consulting’s CodeSign Secure.
Step 1: Create a Machine Authentication Certificate
- Open the CodeSign Secure portal and navigate to System Setup > User. Select the “Generate Authentication Cert” option.
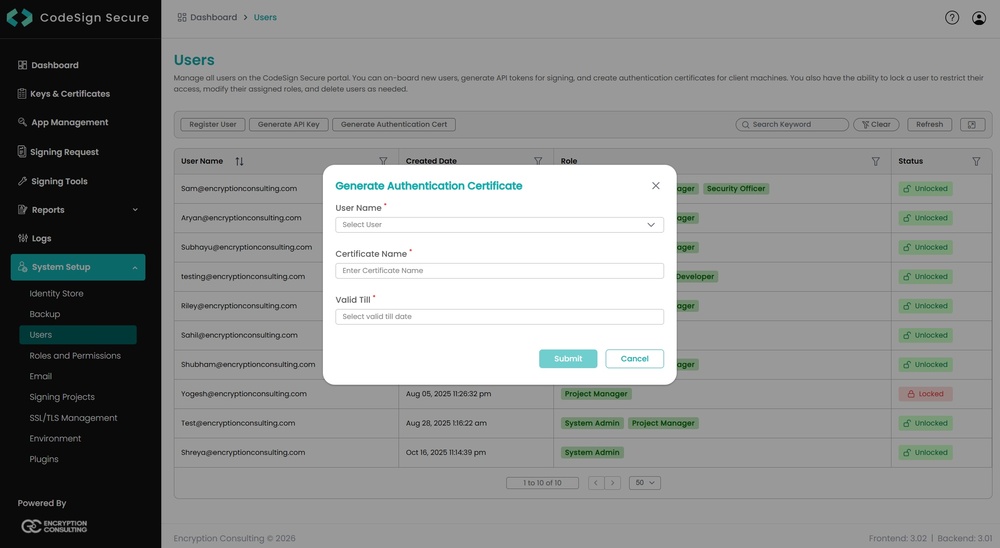
- Select the user name from the drop down and enter the details like certificate name and its expiry date.
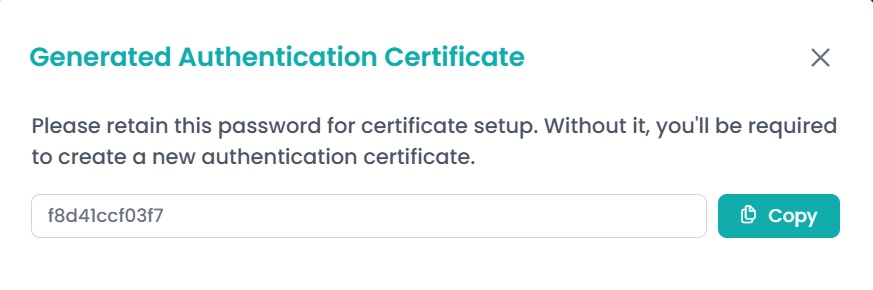
- It will then provide you with a .pfx certificate file and also display the password to the certificate file.
NOTE: This password will be displayed only once. So you must copy and store it safely to perform the authentication with the CodeSign Secure server.
Step 2: Configure the Environment Variables
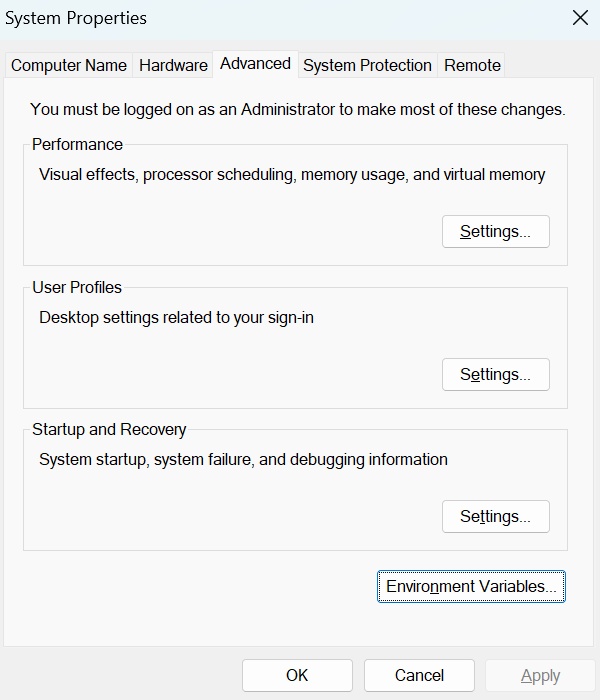
- Open the Environment Variables from your Start Menu.
-
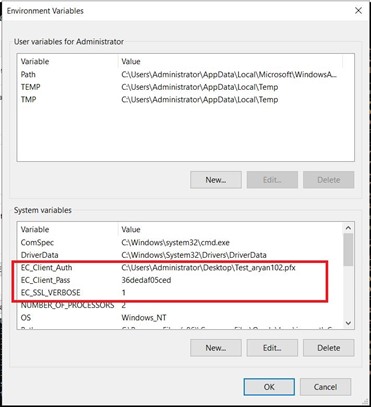
Add new system variables by clicking on the New button. Provide the following variable name and its corresponding details.
- EC_Client_Auth: Corresponds to the path of your SSL Authentication certificate, which can be created from CodeSign Secure.
- EC_Client_Pass: Corresponds to the password of your certificate, which is provided at the time of creation of the certificate.
- EC_SSL_VERBOSE: Corresponds to the setting to either enable (1) or disable (0) the debugging output for EC KSP.
Set up Windows SDK, Signtool, and MakeAppx
Appx and Msix signing relies on two utilities that ship with the Microsoft Windows SDK: signtool.exe, which performs the signing, and makeappx.exe, which unpacks and repacks the application package. Both must be present on the machine before you begin.
Step 1: Download and Install Windows SDK
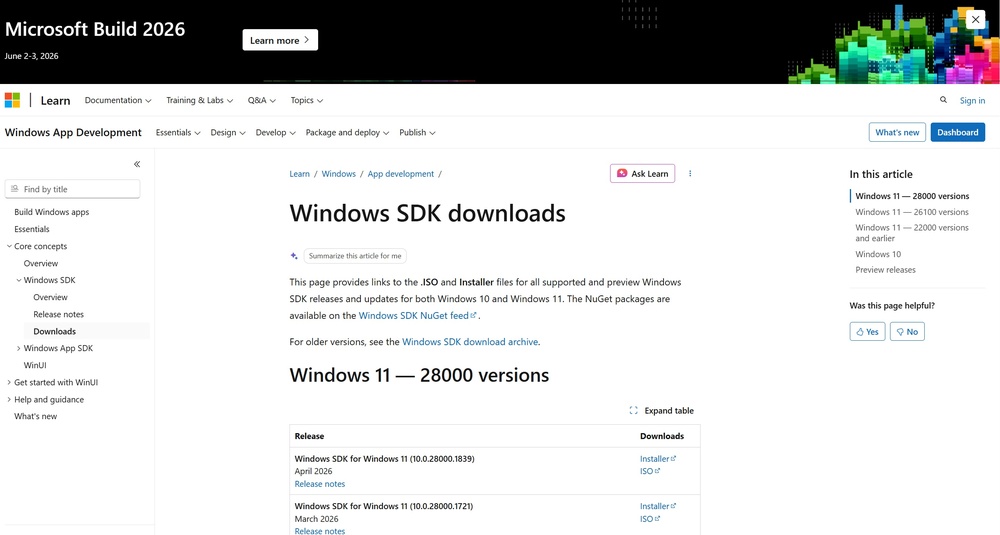
- Using the following download link, download the Windows Software Development Kit: Windows SDK downloads – Windows apps | Microsoft Learn
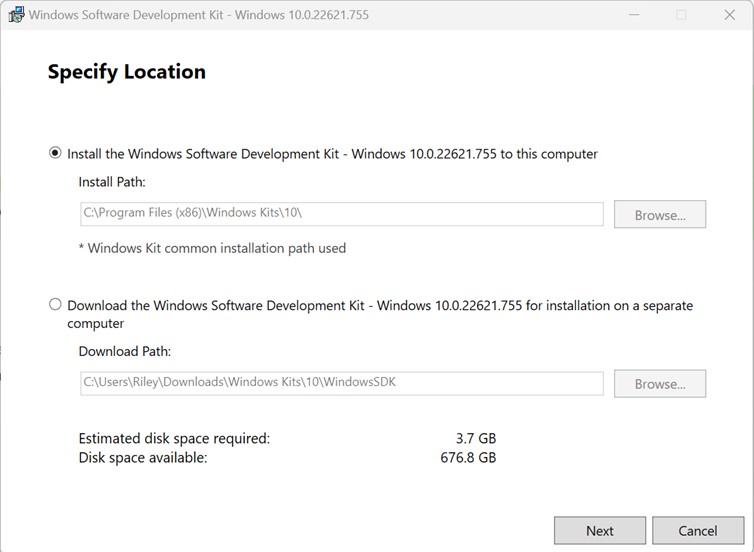
- Open the installer once downloaded and select “Next” on the first screen to keep the default settings.
-
Follow the on-screen prompts of the installation wizard.
- Accept the Windows Kits Privacy notice.
- Accept the End-User License Agreement.
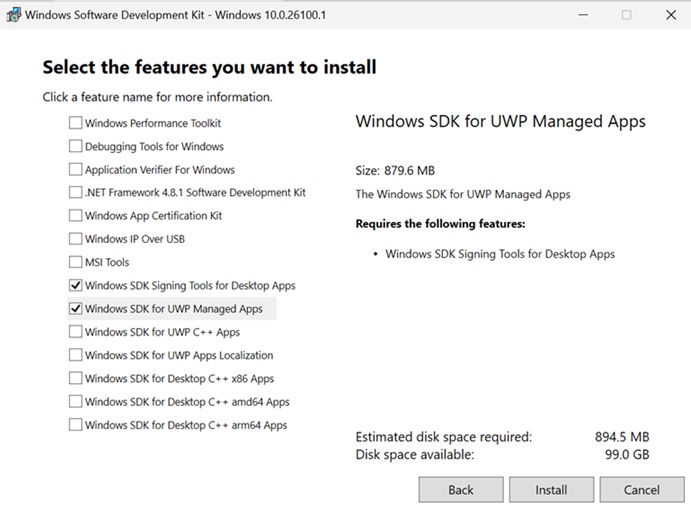
- Select “Windows SDK Signing Tools for Desktop Apps” and “Windows SDK for UWP Managed Apps” and select “Install”.
- Go to the following path where the tools should have been downloaded to: “C:\Program Files (x86)\Windows Kits\10\bin”. Select the desired version directory and check whether the “signtool.exe” file is present.
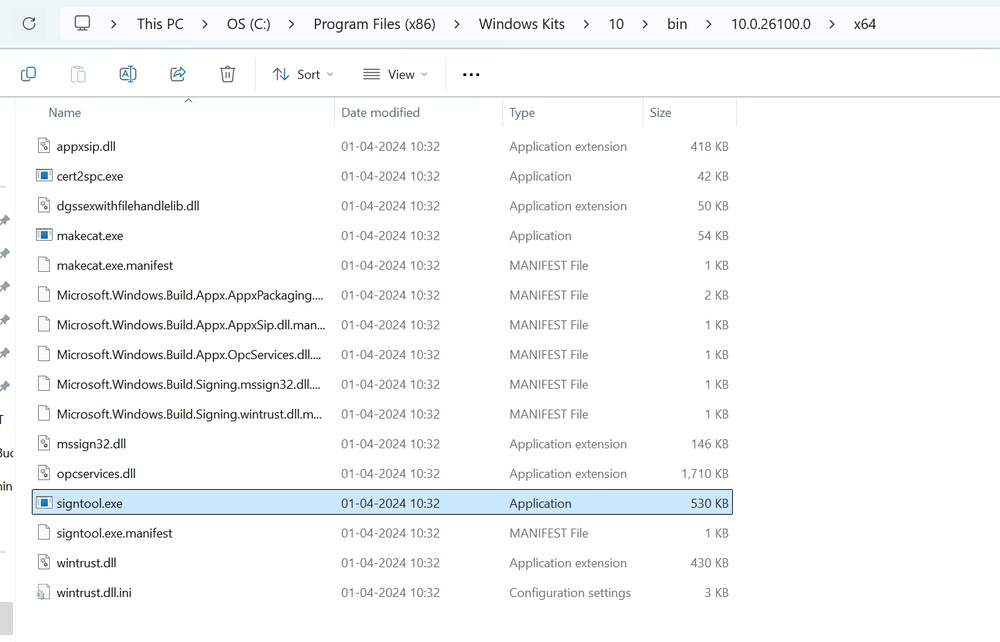
- Ensure you are in the x64 directory and copy this directory path.
Step 2: Verify that MakeAppx is Available
The Windows SDK includes an executable named “makeappx.exe” located in the following directory:
C:\Program Files (x86)\Windows Kits\10\bin\<build number>\<architecture>\makeappx.exe
Confirm that makeappx.exe is present in the same version and architecture directory as signtool.exe.
Step 3: Add Path to Signtool.exe in Environment Variables
- Open the Environment Variables from the Start Menu.
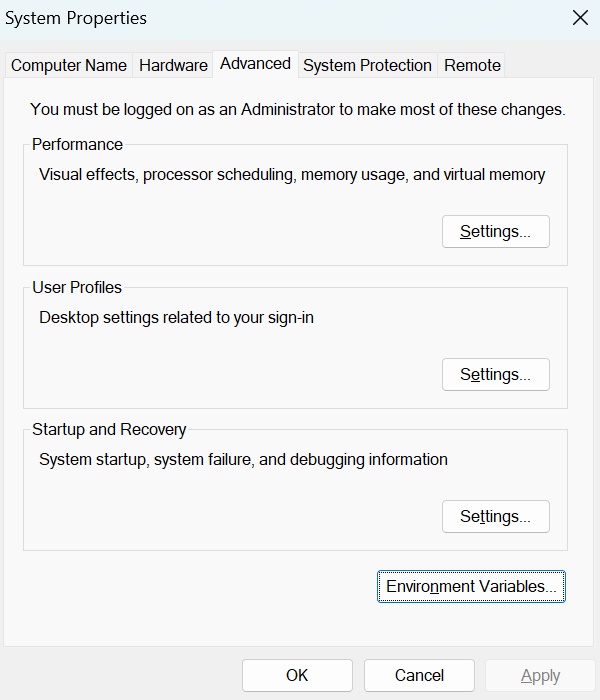
- Scroll down through the system variables in the bottom table until you find PATH in the variable names.
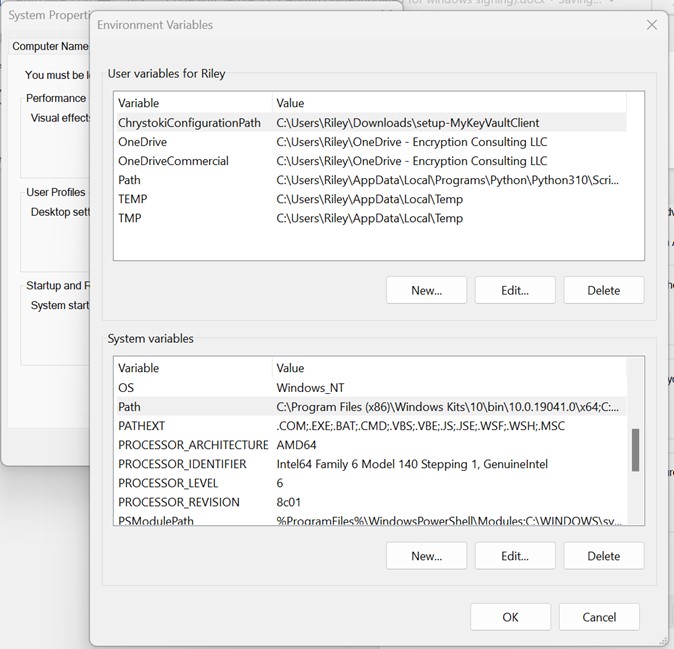
- Double-click on PATH in System Variables and select New on the left of the screen. Paste your copied directory path of “signtool.exe” into the new selection.
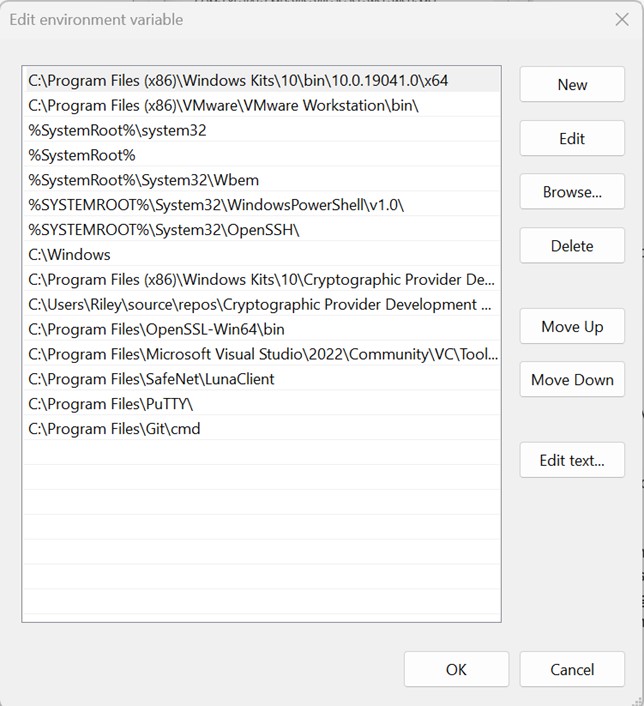
- Select OK at the bottom of each page to exit the Environment Variables page.
Unpack the Appx or Msix Package
The manifest inside the package must be edited before signing, so the package is first expanded into a working directory. Here we are using the example of an Appx file; similar steps can be followed for Msix files as well.
Step 1: Run the MakeAppx Unpack Command
Open a Command Prompt as an administrator and run the following command:
"C:\Program Files (x86)\Windows Kits\10\bin\<build number>\<architecture>\makeappx.exe" unpack
/p "<the path to your .appx file>"
/d "<your desired new target directory>"
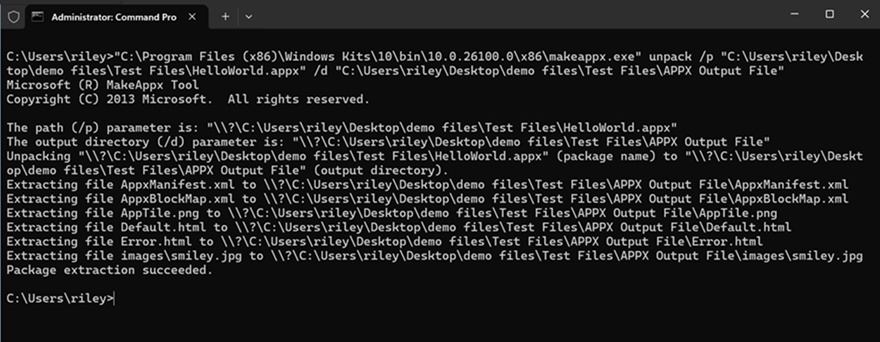
The command extracts the package contents, including AppxManifest.xml, into the target directory you specified with /d.
Prepare the Signing Certificate
Signtool expects the public certificate supplied with the /f flag to be in PEM format when signing with the Encryption Consulting KSP, and you will also need to read the certificate’s subject to update the package manifest.
Step 1: Obtain and Rename the Certificate
- Download the public certificate you wish to use for signing from the Keys and Certificates section of the CodeSign Secure portal.
- The certificate must have the .pem extension. You can change the extension by renaming the certificate.
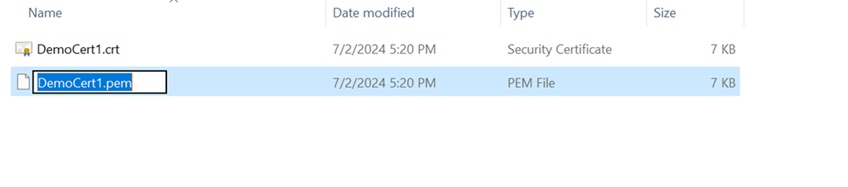
NOTE: Keep this certificate somewhere convenient — you will reference the same file both when editing the manifest and when running the signtool command.
Update the AppxManifest.xml
Windows validates that the package publisher declared in the manifest matches the subject of the signing certificate. If the two do not match exactly, signing or installation will fail. Two lines in the manifest must be modified.
Step 1: Open the Manifest File
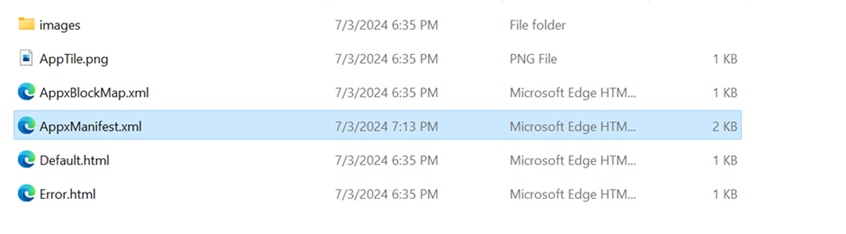
Navigate to the target directory specified in the previous unpack command and find the file AppxManifest.xml. Open it in a text editor. Inside, two lines must be modified — Publisher and PublisherDisplayName.
Step 2: Read the Subject from your Certificate
- Open the .pem certificate and locate its subject line. This is the value that must be copied into the manifest.
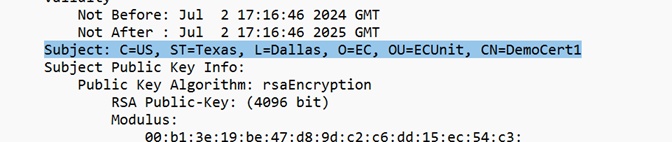
- If you cannot read the content in .pem format, open the certificate in .crt format, open the Details section, and look at the Subject field.
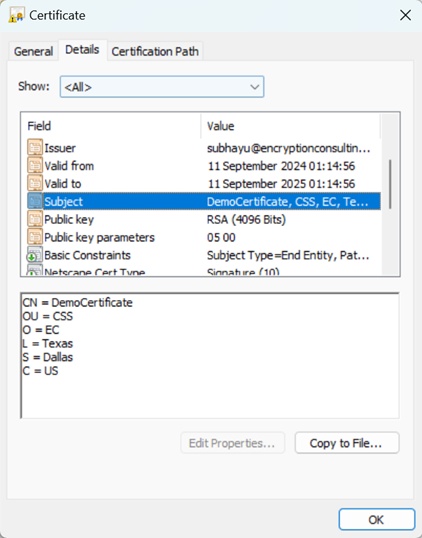
Step 3: Replace the Publisher Line
Replace the Publisher line in the AppxManifest.xml with the subject line from the .pem certificate. The final AppxManifest.xml line should look similar to the signing certificate.
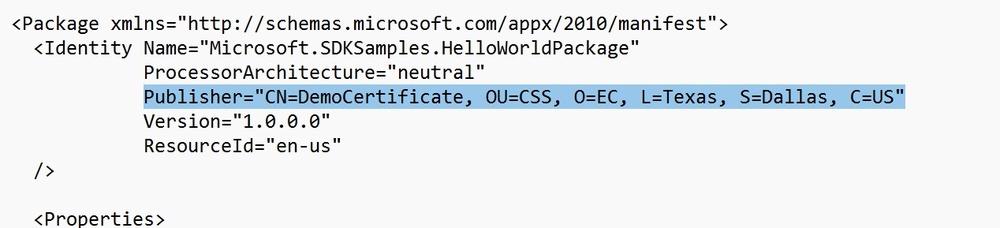
NOTE: The subject line may be in reverse order depending on your settings and certificate. To check, see if the Publisher line in the AppxManifest.xml file begins with CN as the first entry. If it does not, make sure the order is switched such that it does.
NOTE: Check that the Publisher line in the AppxManifest.xml file contains S instead of ST. If you see ST as a field, replace it with S.
Step 4: Replace the PublisherDisplayName Line
- Replace the PublisherDisplayName line with your organization’s name if it is currently incorrect.

- Save and close the AppxManifest.xml file.
Repack the Package
With the manifest updated, the working directory is packed back into a single .appx or .msix file. This new package is the one that will be signed.
Step 1: Run the MakeAppx Pack Command
Repack the file using the following command:
"C:\Program Files (x86)\Windows Kits\10\bin\<build number>\<architecture>\makeappx.exe" pack
/d "<target directory>"
/p "<target location with package name and extension (.appx)>"
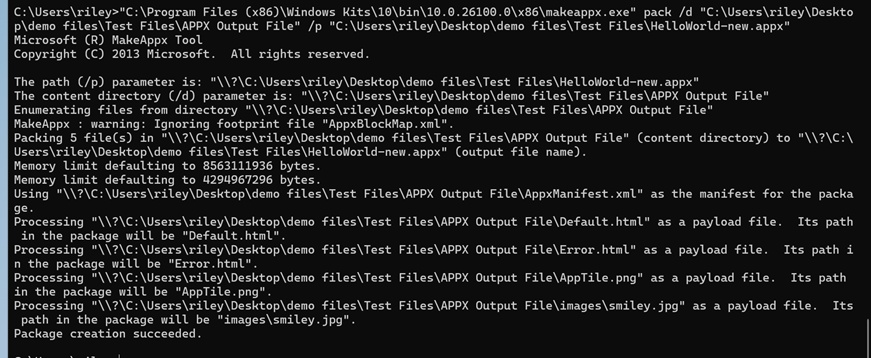
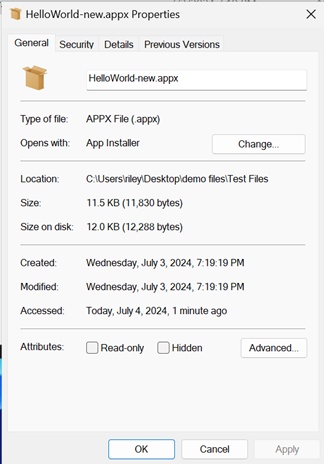
Step 2: Clear the Read-Only Attribute
View the file properties of the newly packed file, and confirm “Read only” is NOT checked or the signing will fail.
Sign the Package Using Signtool
Proceed with Windows signing using the certificate you used to modify the manifest. The private key stays inside the HSM — Signtool reaches it through the Encryption Consulting Key Storage Provider.
Step 1: Run the Signtool Command
From an administrator Command Prompt, run the following command against the new package:
signtool sign /csp "Encryption Consulting Key Storage Provider"
/kc  <key name of the private key associated with the certificate>
/fd  <the desired signing algorithm to be used when signing>
/f   <the location of the certificate to be used for signing>.pem
/tr  <the URL of the time stamping server to be used>
/td  <the algorithm to be used with the time stamping server>
<the path to the new .appx file>
An example command is as below:
signtool sign /csp "Encryption Consulting Key Storage Provider"
/kc "DemoCert1" /fd "SHA256"
/f "C:\Users\riley\Desktop\demo files\Signing Certificates\DemoCert1.pem"
/tr http://timestamp.digicert.com /td SHA256
"C:\Users\riley\Desktop\demo files\Test Files\HelloWorld-new.appx"
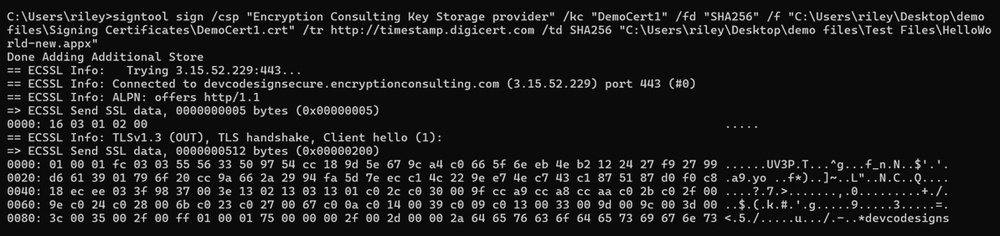
NOTE: Point /f at the same certificate file you prepared in the Prepare the Signing Certificate section, and used to update the manifest. The documented requirement is the .pem file; if you supply a differently named copy of the same certificate, make sure the subject still matches the Publisher line in the manifest.
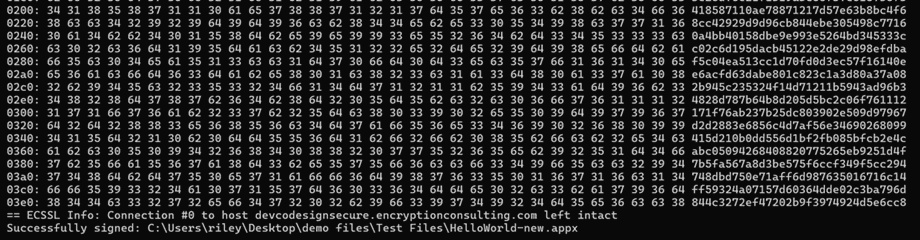
A successful signing will show an output as below:
Step 2: Flag Reference
The following are the flags and their meaning in the command:
| Flag | Description |
|---|---|
| /csp | This specifies the Key Service Provider to be used. This should always be “Encryption Consulting Key Storage Provider”. |
| /kc | This should be the name of the private key associated with your certificate. This will likely be the same name as the certificate name. |
| /fd | This is the signing algorithm to be used with the signing function. This can be SHA256, SHA384, or SHA512. |
| /f | The location of the certificate to be used for signing, with a .pem extension. This should correspond to the same certificate named in the /kc flag. |
| /tr | (Optional) This is the URL of the timestamping authority to be used. If /tr is not in use, and timestamping is not required, then /td should also be left out of this command. |
| /td | (Optional) This is the signing algorithm to be used with the timestamping server. This can be SHA256, SHA384, or SHA512. This algorithm should be the same as the /fd field. If /tr is not in use, and timestamping is not required, then /td should also be left out of this command. |
| <file path> | This is the path to the repacked .appx or .msix package to be signed. |
Verify the Signature
After the signing operation completes, confirm that a valid digital signature has been applied to the package.
Step 1: Open the Package Properties
- Right-click the signed .appx or .msix file and select Properties.
- Select the Digital Signatures tab at the top of the Properties window.
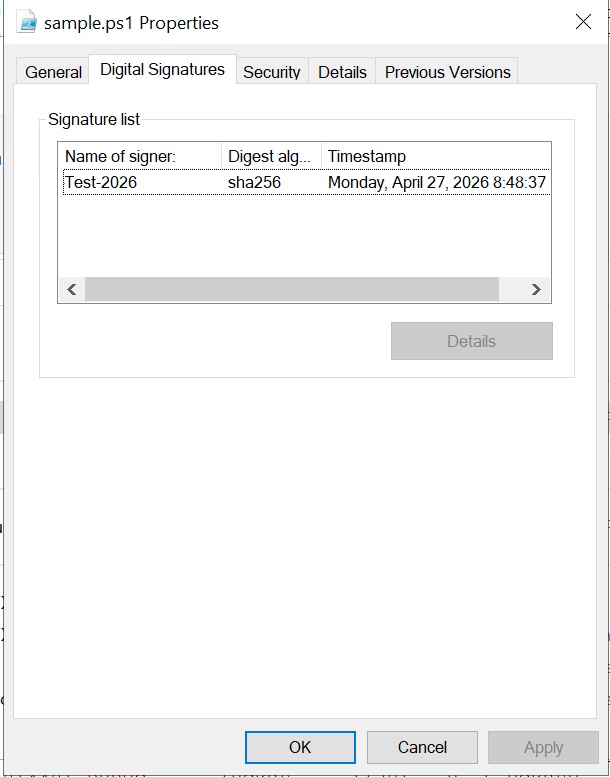
- Select the name of the signer in the signature list and click Details to confirm that the signature is valid, that it chains to the expected certificate, and that the timestamp is present.
Step 2: Cross-Check in CodeSign Secure
Open the CodeSign Secure portal and navigate to Reports > Signing Request Report, where every signing request performed through the KSP is recorded for audit purposes.
Step 3: Confirm the Package Installs
As a final check, install the signed package on a test machine that trusts the signing certificate chain. A publisher mismatch between the certificate subject and the manifest Publisher line is the most common cause of installation failure — if this occurs, revisit the Update the AppxManifest.xml section.