
PKCS#11 Wrapper – GPG2, Debian & RPM Signing Integration Guide
GPG2, or GNU Privacy Guard 2, is a free, open-source implementation of the OpenPGP standard designed to provide powerful encryption and signing capabilities. Combined with Encryption Consulting’s PKCS#11 Wrapper, the signing key is held in your HSM and reached through GPG’s smartcard daemon, so the private key never leaves the HSM and every signing operation is recorded centrally.
Debian and RPM package signing both delegate to GPG2 for the actual signature, so all three signing types share the same foundation. Sections 1 to 10 build that foundation on an Ubuntu machine. After that, go to Section 11 for GPG2 signing, Section 12 for Debian signing, or Section 13 for RPM signing — each of the last two adds only the extra steps specific to that package format.
NOTE: To perform Debian and RPM signings, you will still need to configure and set up GPG on your machine, which means completing Sections 1 to 10 first.
Prerequisites: An Ubuntu machine with root access, access to the CodeSign Secure portal, and a sample file, .deb, or .rpm package to sign.
Prerequisites and Root Access
The whole of this workflow is performed as the root user, because the GnuPG home directory used throughout is /root/.gnupg.
Step 1: Log In as the Root User
First, you need to be logged in as the root user before we move forward with GPG2 signing.
sudo su
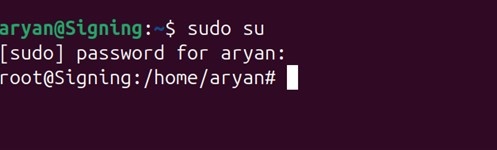
Step 2: Install the Wrapper Dependencies
To set up the PKCS#11 Wrapper, you will need to run the following commands and install some dependencies and packages on your Ubuntu machine:
sudo apt-get install curl
sudo apt-get install liblog4cxx12
Install the EC PKCS#11 Wrapper
The wrapper exposes your HSM keys through the standard PKCS#11 interface, which is what GPG’s smartcard daemon will talk to later in this guide.
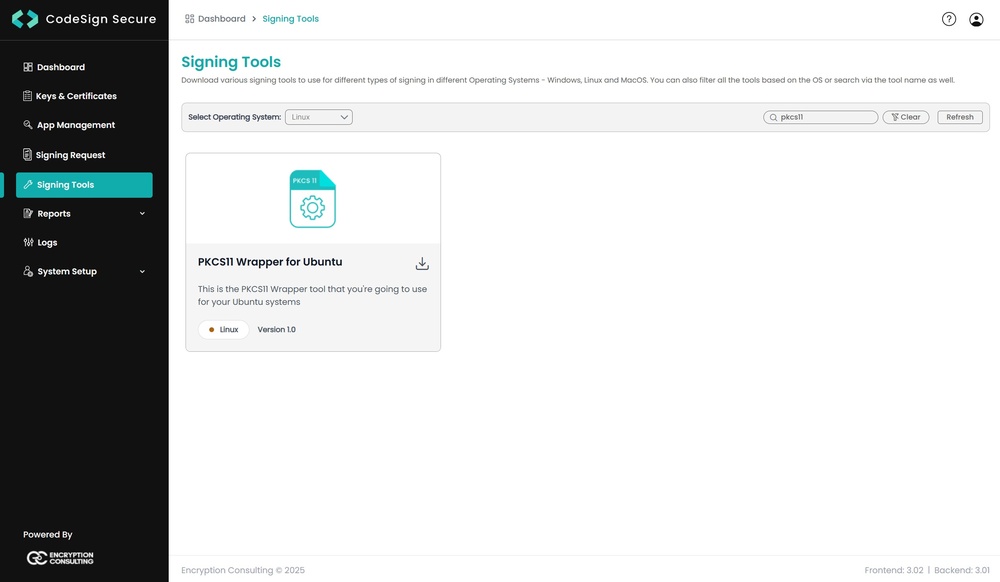
Step 1: Download the PKCS#11 Wrapper for Ubuntu
Go to EC CodeSign Secure v3.02’s Signing Tools section and download the PKCS11 Wrapper for Ubuntu.
Step 2: Generate a P12 Authentication Certificate
After that, generate a P12 Authentication certificate from the System Setup > User > Generate Authentication Certificate dropdown.
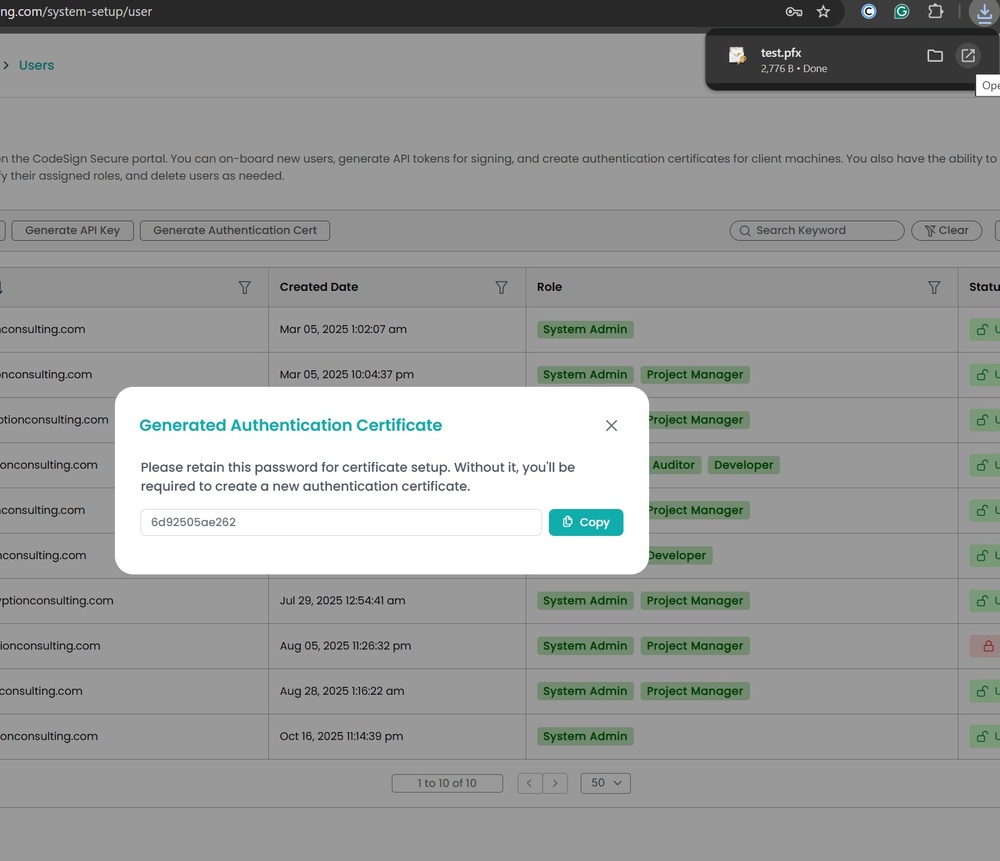
NOTE: The certificate password is displayed only once, so copy and store it safely. Both the certificate path and its password are entered into ec_pkcs11client.ini in the next step.
Step 3: Edit the Configuration Files
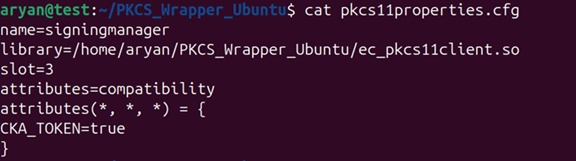
Go to your Ubuntu client system and edit the configuration files (ec_pkcs11client.ini and pkcs11properties.cfg) downloaded in the PKCS11 Wrapper.
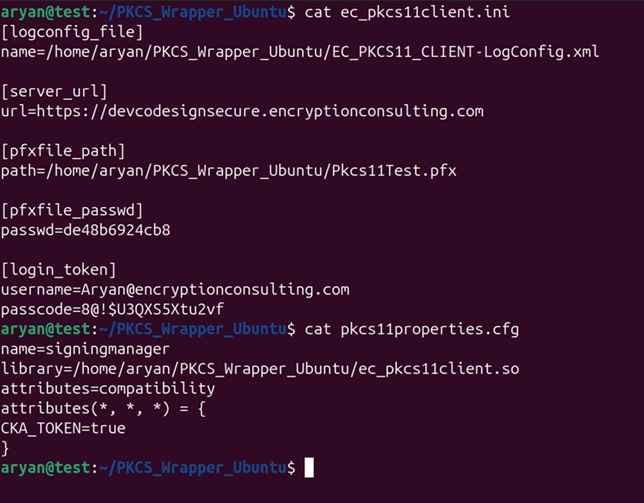
NOTE: When using Luna HSM, add the slot number in the pkcs11properties.cfg file as shown below.
Step 4: Set the EC_INI_FILE_PATH Environment Variable
Now we need to add the environment variable for the pkcs11 client library.
Run the below command to open the bashrc file:
nano ~/.bashrc

Now add the EC_INI_FILE_PATH variable with the path of the .ini at the end of the bashrc file, like:
export EC_INI_FILE_PATH=\
/home/aryan/pkcs11-client/ec_pkcs11client.ini
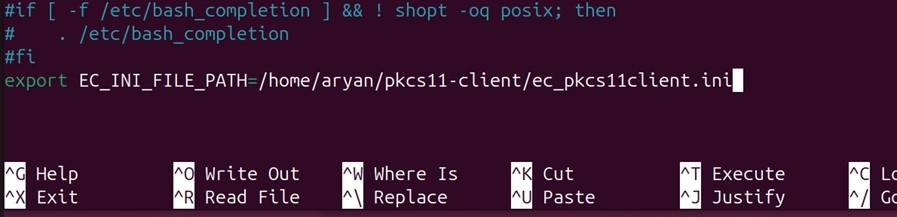
Press Ctrl+X, then enter Y, and then press Enter to save.
Reload the environment variables:
source ~/.bashrc

Check whether the variable has been set correctly:
echo $EC_INI_FILE_PATH

NOTE: There must be no space between the dollar sign and the variable name, or the shell will print a literal dollar sign instead of the value. If you cannot see the file location from the echo command, open a new terminal and try again.
Install GnuPG 2.5.4
GnuPG 2.5.4 is required. If your distribution does not package that version, it must be built from source, which is what the remainder of this section and Section 4 cover.
Step 1: Check the Packaged Version
Check the default version of gnupg in your ubuntu machine:
sudo apt-cache policy gnupg
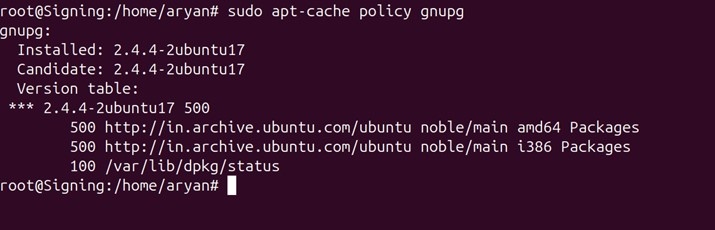
If the 2.5.4 version is present in your system, you can run the below command and go to Section 5:
sudo apt install gnupg
Since this version is not present, you would need to perform the following steps.
Step 2: Install the Build Tools
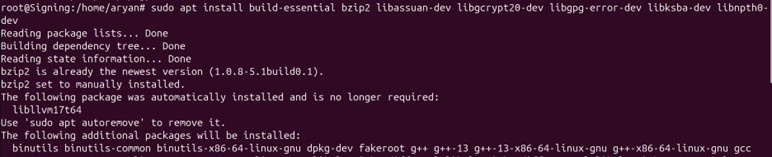
Install the required build tools and dependencies for the gnupg package.
sudo apt install build-essential bzip2 libassuan-dev \
  libgcrypt20-dev libgpg-error-dev libksba-dev libnpth0-dev
Step 3: Download and Extract GnuPG
Download the 2.5.4 version of gnupg using the below command:
wget https://www.gnupg.org/ftp/gcrypt/gnupg/gnupg-2.5.4.tar.bz2
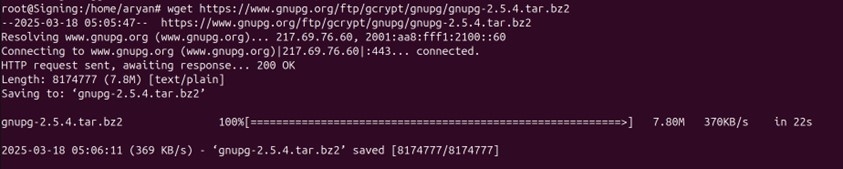
Extract the Archive:
tar -xjvf gnupg-2.5.4.tar.bz2
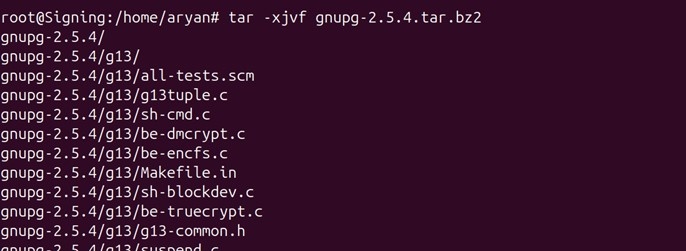
Go to the newly created gnupg-2.5.4 directory:
cd gnupg-2.5.4

Step 4: Run Configure and Read the Output
Run the configure file:
./configure
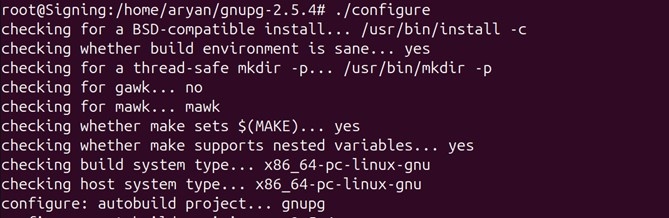
If this release of GnuPG requires some newer shared libraries than you have installed, the output of the configure command will tell you, as shown in the image below.
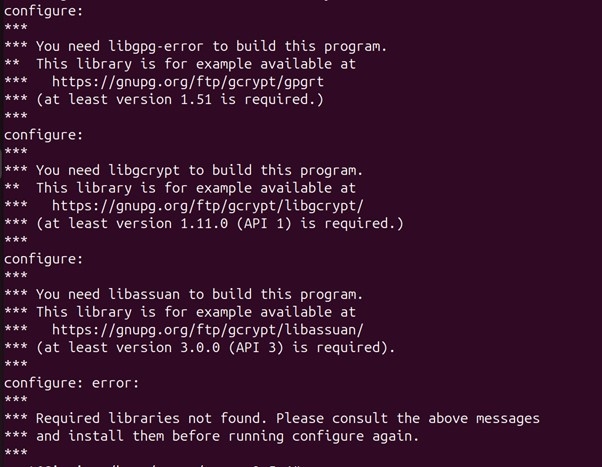
The above output of the configure command tells us we need to build and install the latest version of the libgpg-error, libgcrypt, and libassuan libraries. These are installed in Section 4.
Install the Additional Dependencies for GPG2
Each of the libraries below is built the same way: download, extract, configure, make, install, refresh the linker cache, and return to the GnuPG directory. Install them in the order given, because later libraries depend on earlier ones.
Step 1: Install libgpg-error
Install the libgpg-error version from the link provided as the configure command output.
wget https://gnupg.org/ftp/gcrypt/gpgrt/libgpg-error-1.51.tar.bz2

Extract the archive:
tar xf libgpg-error-1.51.tar.bz2

Go to the newly created libgpg-error-1.51 directory:
cd libgpg-error-1.51/

Run the configure file:
./configure
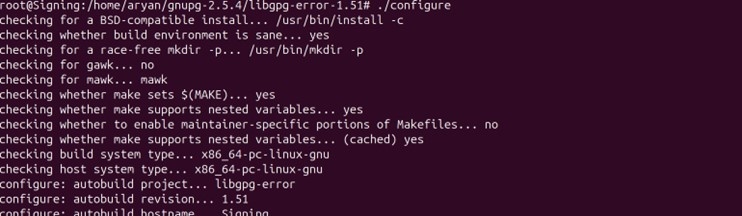
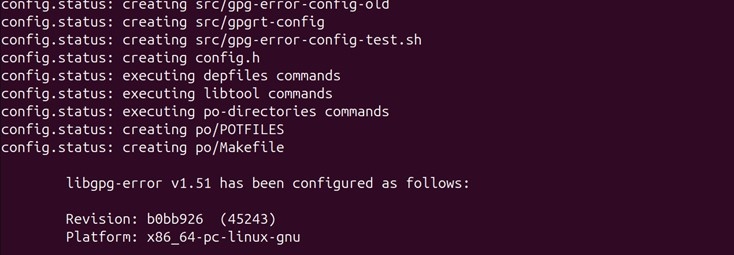
Run the make command:
make
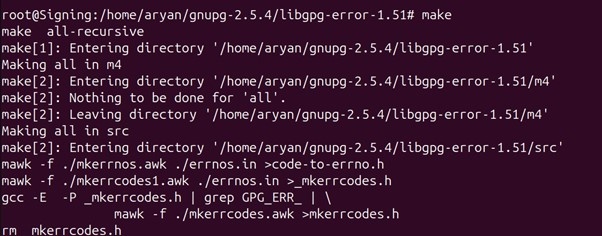
Install the package:
sudo make install
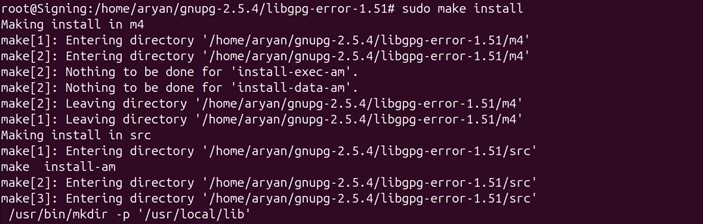
Update the system’s dynamic linker cache using the below command:
sudo ldconfig

Go back one directory (../gnupg-2.5.4) to install other libraries:
cd ..

Step 2: Install libgcrypt
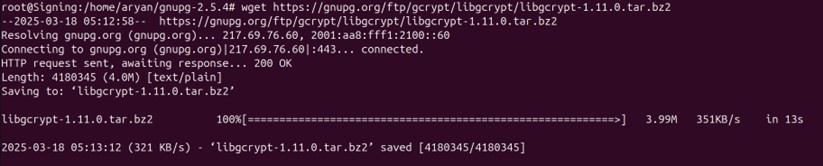
Install the libgcrypt version from the link provided as the configure command output.
wget https://gnupg.org/ftp/gcrypt/libgcrypt/libgcrypt-1.11.0.tar.bz2
Extract the archive:
tar xf libgcrypt-1.11.0.tar.bz2

Go to the newly created libgcrypt-1.11.0 directory:
cd libgcrypt-1.11.0/

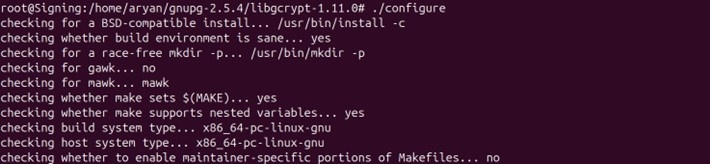
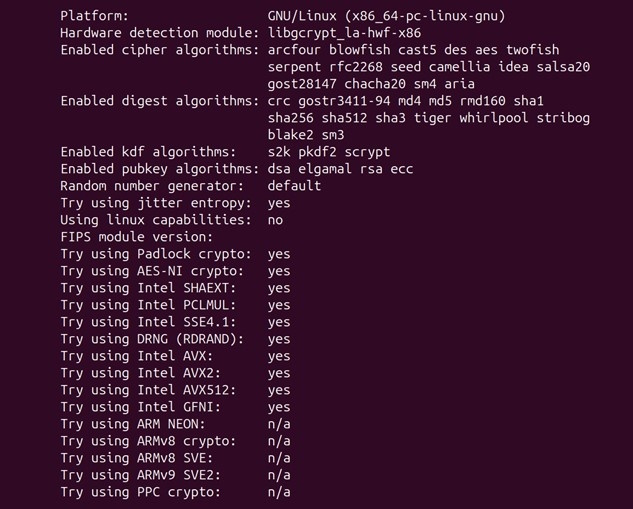
Run the configure file:
./configure
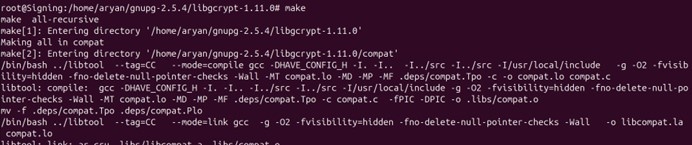
Run the make command:
make
Install the package:
sudo make install
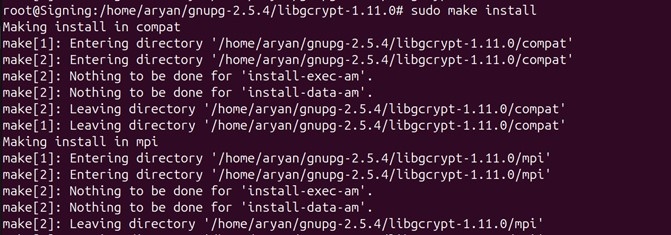
Update the system’s dynamic linker cache using the below command:
sudo ldconfig

Go back one directory (../gnupg-2.5.4) to install other libraries:
cd ..

Step 3: Install libassuan
Install the libassuan version from the link provided as the configure command output.
wget https://gnupg.org/ftp/gcrypt/libassuan/libassuan-3.0.0.tar.bz2
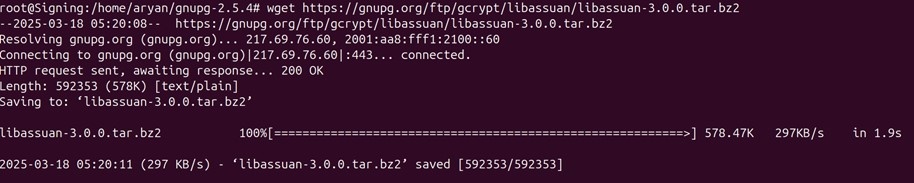
Extract the archive:
tar xf libassuan-3.0.0.tar.bz2

Go to the newly created libassuan-3.0.0 directory:
cd libassuan-3.0.0/

Run the configure file:
./configure
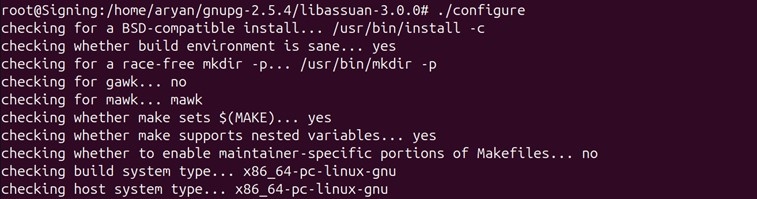
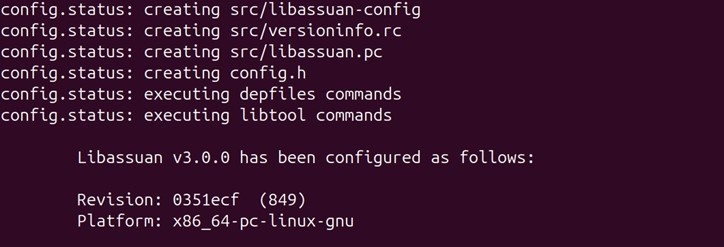
Run the make command:
make
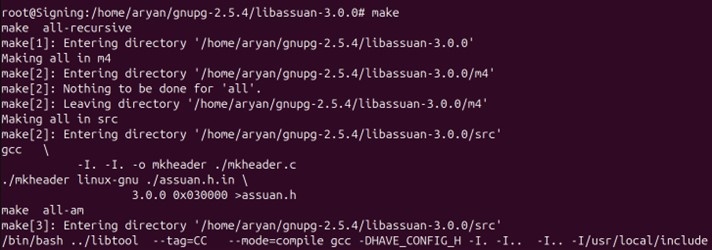
Install the package:
sudo make install
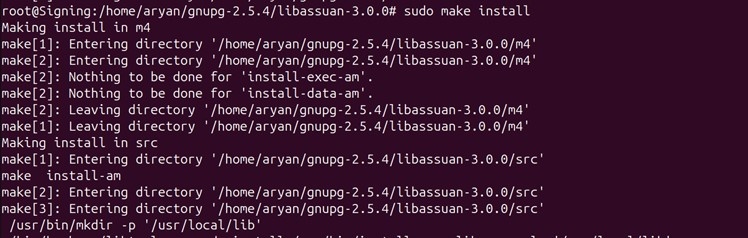
Update the system’s dynamic linker cache using the below command:
sudo ldconfig

Go back one directory (../gnupg-2.5.4) to install other libraries:
cd ..

Step 4: Run Configure Again
Run the configure file from the gnupg-2.5.4 directory:
./configure
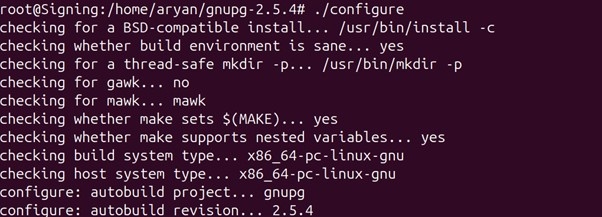
Check the output of the above command.
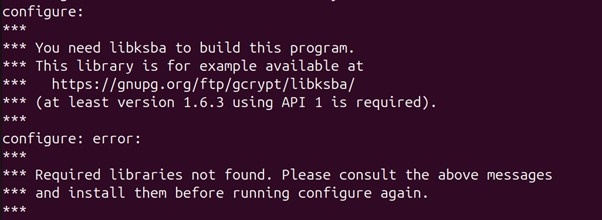
The above output of the configure command again tells us we need to build and install another library with the latest version, for libksba.
Step 5: Install libksba
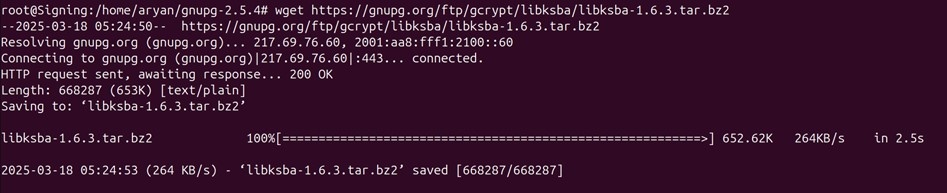
Install the libksba version from the link provided as the configure command output.
wget https://gnupg.org/ftp/gcrypt/libksba/libksba-1.6.3.tar.bz2
Extract the archive:
tar xf libksba-1.6.3.tar.bz2

Go to the newly created libksba-1.6.3 directory:
cd libksba-1.6.3/

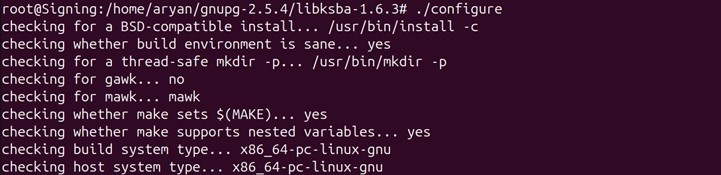
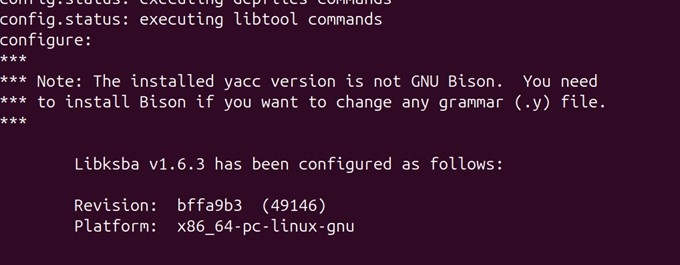
Run the configure file:
./configure
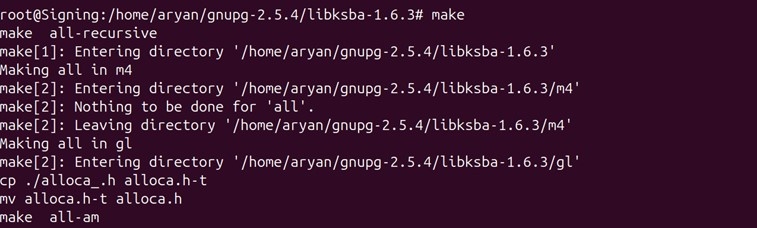
Run the make command:
make
Install the package:
sudo make install
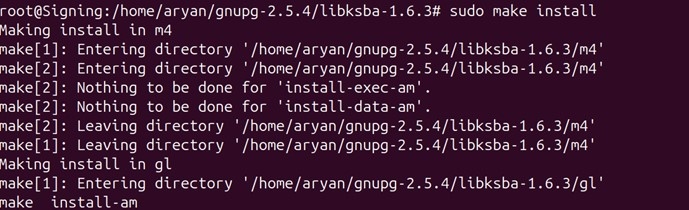
Update the system’s dynamic linker cache using the below command:
sudo ldconfig

Go back one directory (../gnupg-2.5.4) to install other libraries:
cd ..

Complete the GnuPG Installation
With every dependency in place, the configure command should now finish without reporting a missing library, and GnuPG can be built and installed.
Step 1: Run Configure Once More
Run the configure file again from the gnupg-2.5.4 directory:
./configure
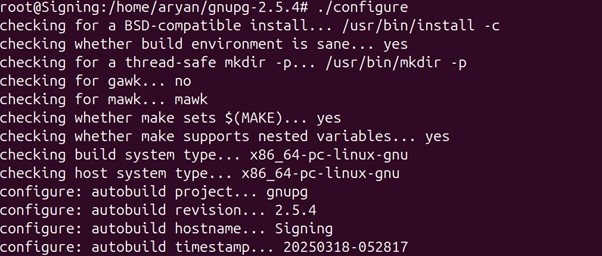
Check the output of the above command.
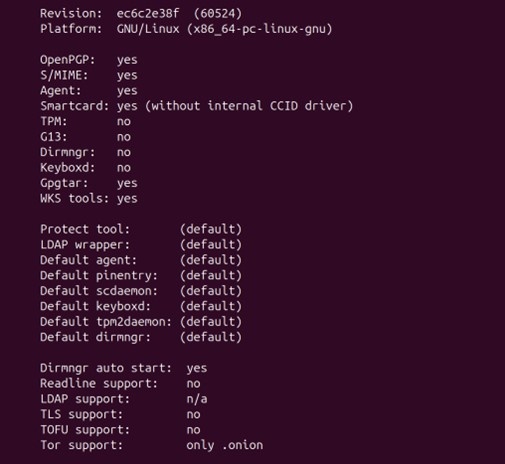
Since there is no error of package version, we can move forward with the installation.
Step 2: Build and Install GnuPG
Run the make command:
make
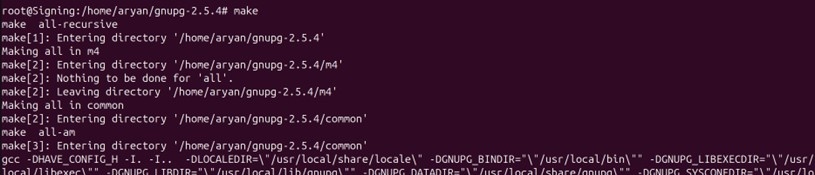
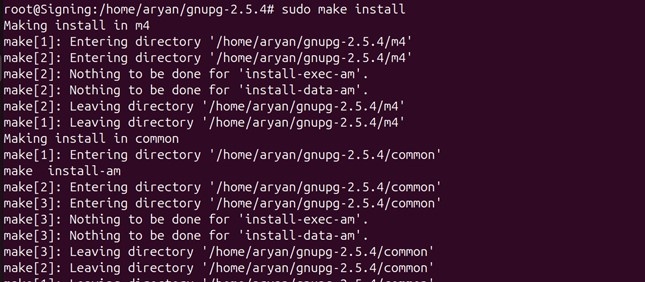
Install the package:
sudo make install
Step 3: Verify the Installation
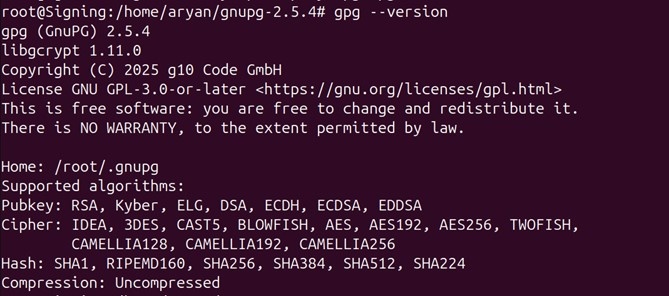
Check whether gpg has been installed correctly or not:
gpg --version
Check whether gpg-agent has been installed correctly or not:
gpg-agent --version

Install gnupg-pkcs11-scd 0.11.0
gnupg-pkcs11-scd replaces GnuPG’s own smartcard daemon with one that speaks PKCS#11, which is how GPG reaches the keys in your HSM through the Encryption Consulting wrapper.
Step 1: Check the Packaged Version
Check the default version of gnupg-pkcs11-scd in your ubuntu machine:
sudo apt-cache policy gnupg-pkcs11-scd

If the required version, 0.11.0, is installed on your machine, run the below command:
sudo apt install gnupg-pkcs11-scd
Otherwise, you would need to perform the following steps.
Step 2: Install the Build Tools
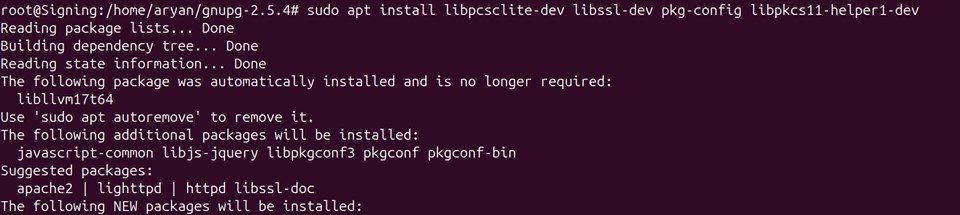
Install the required build tools and dependencies for the gnupg-pkcs11-scd package.
sudo apt install libpcsclite-dev libssl-dev pkg-config \
  libpkcs11-helper1-dev
Step 3: Download, Build and Install
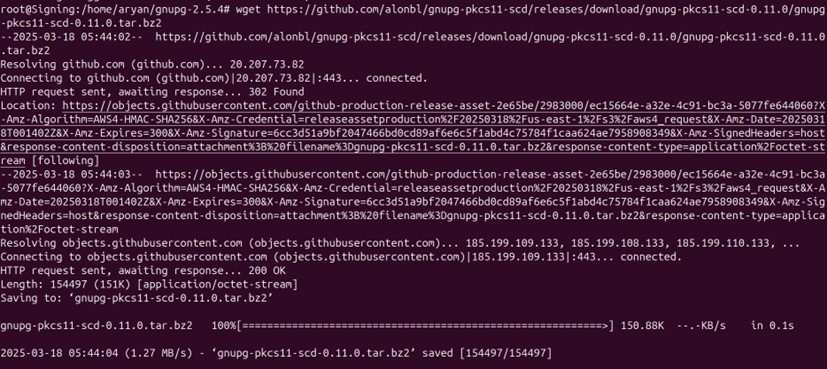
Download the required package:
wget https://github.com/alonbl/gnupg-pkcs11-scd/releases/\
download/gnupg-pkcs11-scd-0.11.0/\
gnupg-pkcs11-scd-0.11.0.tar.bz2
Extract the Archive:
tar xf gnupg-pkcs11-scd-0.11.0.tar.bz2

Go to the newly created gnupg-pkcs11-scd-0.11.0 directory:
cd ./gnupg-pkcs11-scd-0.11.0/

Run the configure file:
./configure
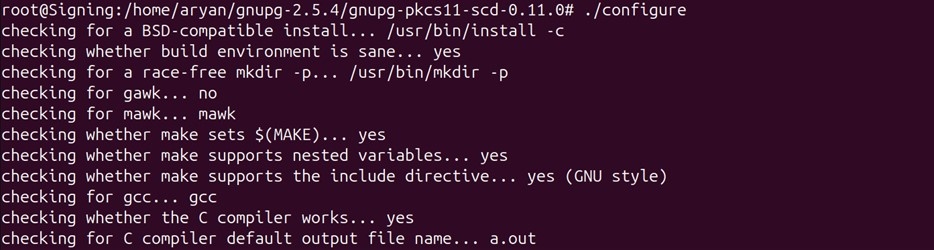
Check the output of the above command.
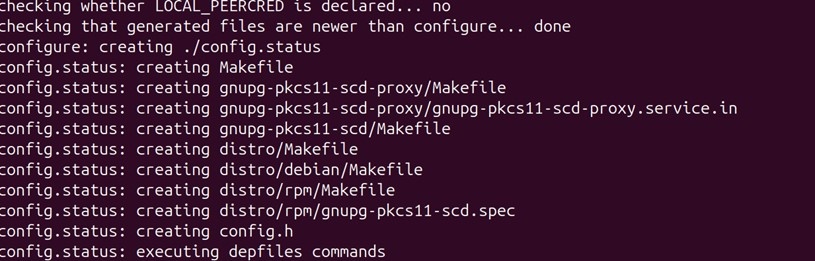
Since there is no error of package version, we can move forward with the installation.
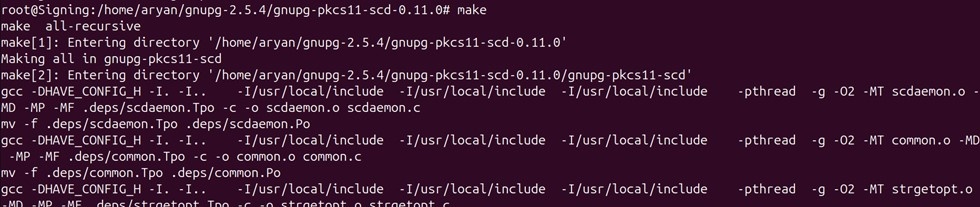
Run the make command:
make
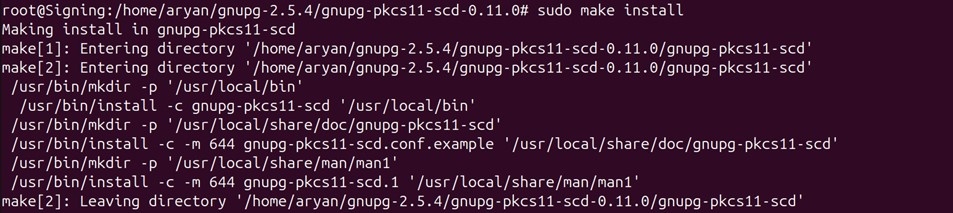
Install the package:
sudo make install
Update the system’s dynamic linker cache using the below command:
sudo ldconfig

Check whether gnupg-pkcs11-scd has been installed correctly or not:
gnupg-pkcs11-scd --version

Create the GnuPG Directory and Environment Variables
GnuPG keeps its configuration and sockets in a home directory. Because this workflow runs as root, that directory is /root/.gnupg.
Step 1: Create the GnuPG Directory
Check whether the /root/.gnupg directory exists or not in your system:
ls -ld /root/.gnupg

If not, then use the below command to make the directory:
mkdir /root/.gnupg

Step 2: Add the GPG Environment Variables
Add the environment variables for the GPG Agent and the gnupg-pkcs11 socket directory.
Open the bashrc file using the below command:
nano ~/.bashrc

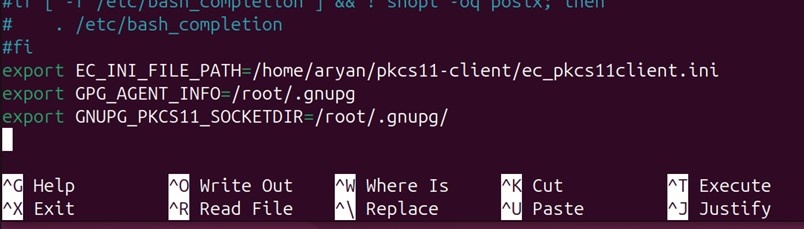
Paste the below commands as per the file locations in your system, at the end of the file, like:
export GPG_AGENT_INFO=/root/.gnupg
export GNUPG_PKCS11_SOCKETDIR=/root/.gnupg/
Press Ctrl+X, then enter Y, and then press Enter to save.
Reload the bashrc file:
source ~/.bashrc

To check these variables, run:
echo $GPG_AGENT_INFO
echo $GNUPG_PKCS11_SOCKETDIR

If you cannot see the file location from the echo commands, open a new terminal and try again.
Create the Configuration Files
Five configuration files are created in the /root/.gnupg directory. Together they tell GPG to use an agent, tell that agent to use the PKCS#11 smartcard daemon, and tell the daemon which wrapper library to load.
NOTE: Each directive below belongs on its own line in the file. On the published documentation page these appear run together on a single line.
Step 1: Create gnupg-pkcs11-scd.conf
Create a gnupg-pkcs11-scd.conf file in the /root/.gnupg directory.
Run the following command to create or edit the file:
nano /root/.gnupg/gnupg-pkcs11-scd.conf

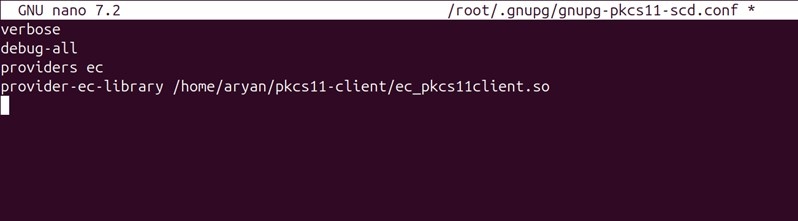
Modify and configure the file as per the below content and your system’s file locations:
verbose
debug-all
providers ec
provider-ec-library /home/aryan/pkcs11-client/ec_pkcs11client.so
Press Ctrl+X, then enter Y, and then press Enter to save.
Step 2: Create gpg-agent.conf
Create a gpg-agent.conf file in the /root/.gnupg directory.
Run the following command to create or edit the file:
nano /root/.gnupg/gpg-agent.conf

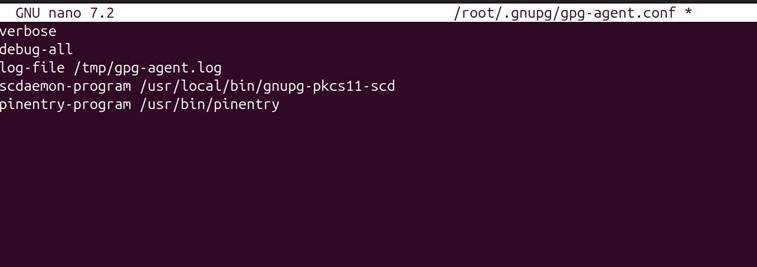
Modify and configure the file as per the below content and your system’s file locations:
verbose
debug-all
log-file /tmp/gpg-agent.log
scdaemon-program /usr/local/bin/gnupg-pkcs11-scd
pinentry-program /usr/bin/pinentry
Press Ctrl+X, then enter Y, and then press Enter to save.
Step 3: Create gpg.conf
Create a gpg.conf file in the /root/.gnupg directory.
Run the following command to create or edit the file:
nano /root/.gnupg/gpg.conf

Modify and configure the file as per the below content and your system’s file locations:
use-agent
#log-file /tmp/gpg.log
NOTE: You can uncomment the second line, by removing the # symbol, to generate a gpg.log file.

Press Ctrl+X, then enter Y, and then press Enter to save.
Step 4: Create pkcs11-scd.conf
Create a pkcs11-scd.conf file in the /root/.gnupg directory.
Run the following command to create or edit the file:
nano /root/.gnupg/pkcs11-scd.conf

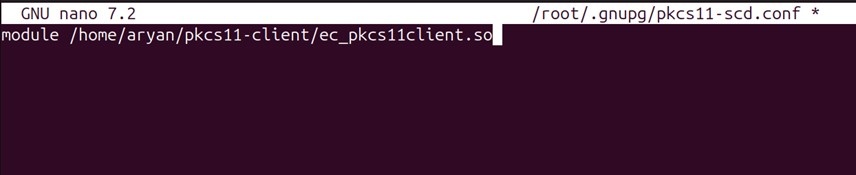
Modify and configure the file as per the below content and your system’s file locations:
module /home/aryan/pkcs11-client/ec_pkcs11client.so
Press Ctrl+X, then enter Y, and then press Enter to save.
Step 5: Create scdaemon.conf
Create a scdaemon.conf file in the /root/.gnupg directory.
Run the following command to create or edit the file:
nano /root/.gnupg/scdaemon.conf

Add the below directive to this file:
disable-ccid

Press Ctrl+X, then enter Y, and then press Enter to save.
Start the GPG Agent
Only one gpg-agent may run at a time. Any agent started before the configuration files existed will not have picked them up, so it must be stopped and replaced.
Step 1: Check for a Running Agent
To check if gpg-agent is running on your ubuntu machine:
ps -aef | grep gpg

If any agent is already running, you will need to kill that instance and start a new one.
Step 2: Stop Any Existing Agent
To kill an instance of the agent, use the following command with the changes to the PID number, which is the number after the “root” user in the above image, as per your machine.
kill -9 134028

Repeat for any other agent process listed:
kill -9 136706

NOTE: The PIDs above are from the example machine. Use the values shown in your own ps output.
Step 3: Start a New Agent
Start a new gpg agent:
sudo gpg-agent --verbose --debug-level advanced --daemon

Check again that only one gpg-agent is running on your ubuntu machine:
ps -aef | grep gpg

Retrieve and Import the Keys into GPG2
The keys themselves stay in the HSM. What is imported into GPG2 is a reference to the key on the token, which is why the key generation dialog is told that the key already exists on a card.
Step 1: Reload the Agent
Reload the agent:
gpg-connect-agent <<EOF
RELOADAGENT
EOF
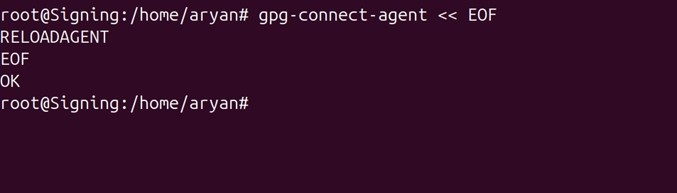
NOTE: This is a shell here-document: type the first line, press Enter, type RELOADAGENT, press Enter, then type EOF and press Enter. The same applies to the SCD LEARN command below.
Step 2: Retrieve the Card Status
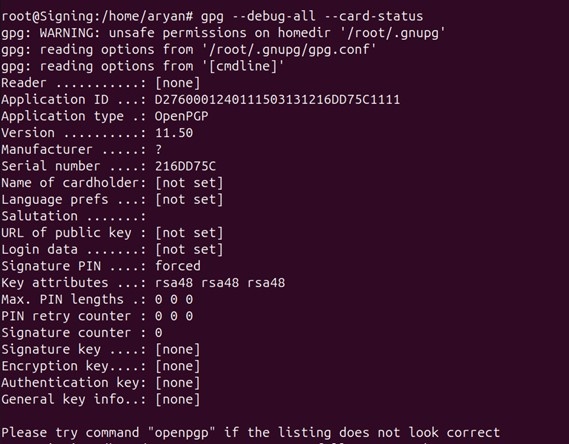
Retrieve card status:
gpg --debug-all --card-status
Step 3: List the Key Friendly Names
Get the key friendly names and certificates:
gpg-connect-agent <<EOF
SCD LEARN
EOF
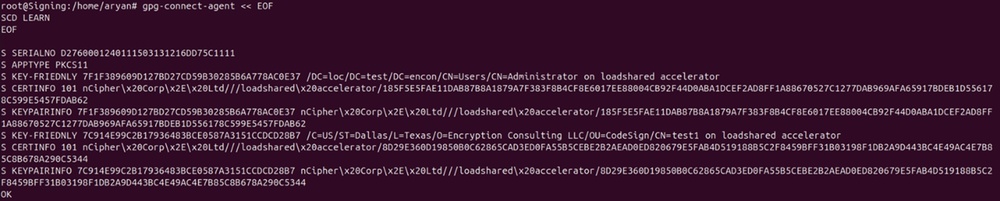
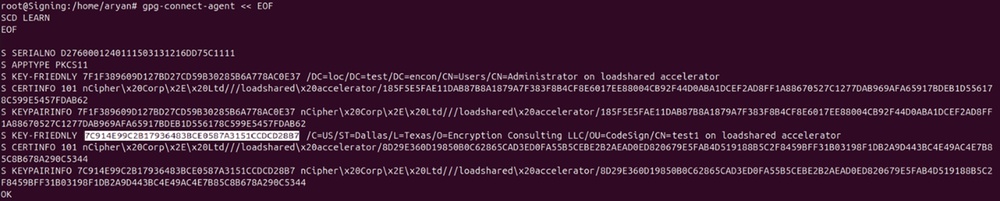
Copy the required KEY FRIENDLY Id. You can compare the respective CKA_ID of the key you want to use for signing from the CodeSign Secure portal and copy the KEY FRIENDLY Id.
Step 4: Import the Key into GPG2
Import the key into GPG 2:
gpg --expert --full-generate-key

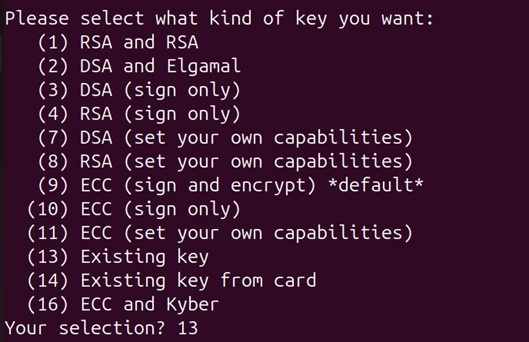
This command will ask you for various inputs to properly import and set the permissions for the key in your machine.
-
First, it will ask you to select a number from the list. You will need to enter 13 as the key was already created from the CodeSign Secure portal.
-
Then, you will need to enter the KEY FRIENDLY Id that you had taken from the earlier steps.

-
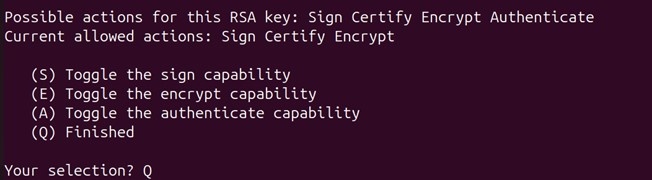
It will then ask you to confirm the permissions for this key. Type “Q”.
-
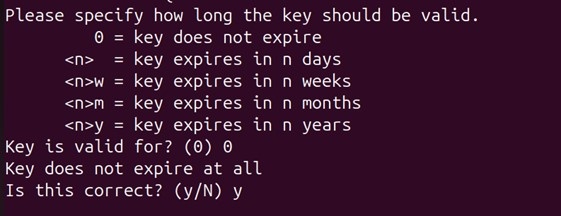
Now, you will need to set the key expiry date in your system. The default selection is “key does not expire”.
-
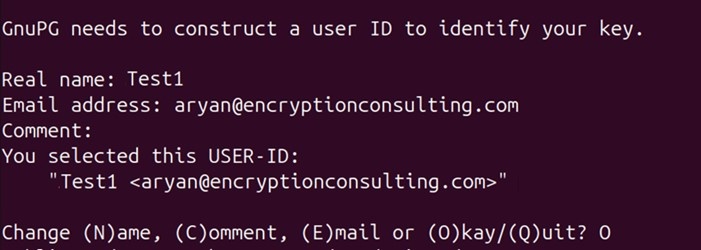
Finally, it will prompt you to enter the key identification details for easier system access. Provide the name and email address for that key and confirm your settings by entering “O”.
-
Your key will successfully get imported into GPG2 and now can be used for signing.

NOTE: Now you have GPG2 set up and installed on your machine. Continue with Section 11 for GPG2 signing, Section 12 for Debian signing, or Section 13 for RPM signing.
GPG2 Signing and Verification
With the key imported, signing is a single gpg command that produces a detached .gpg signature file alongside the input.
Step 1: Find the Public Key ID
List all the keys available for GPG2 signing:
gpg --list-keys
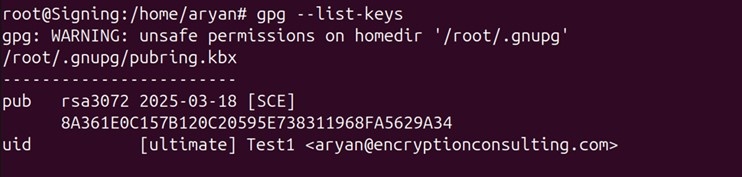
Copy the pub key ID for the key you want to use for signing.
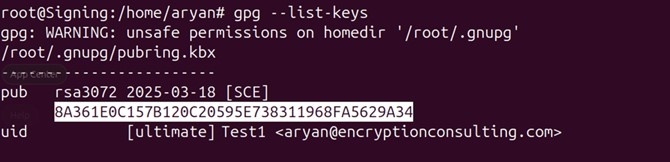
Step 2: Sign the File
Look for the file that you will sign using the key we just imported into GPG2.

Run the signing command:
gpg --sign \
  --default-key <PUB Key ID> \
  <File Path that needs to be signed>
A sample command is provided below:
gpg --sign \
  --default-key 8A361E0C157B120C20595E738311968FA5629A34 \
  /home/aryan/pkcs11-client/testfile

It has successfully generated a signature file (testfile.gpg).
Step 3: Verify the Signature
Run the verification command:
gpg --verify <Generated Signature Path>
A sample command is provided below:
gpg --verify /home/aryan/pkcs11-client/testfile.gpg

Step 4: Cross-Check in CodeSign Secure
Open the CodeSign Secure portal and navigate to Reports > Signing Request Report, where every signing request performed through the wrapper is recorded for audit purposes.
Additional Steps for Debian Signing and Verification
Debian signing relies on GPG2 (GNU Privacy Guard) keys, so before proceeding you will need to have completed Sections 1 to 10. Unlike GPG2 signing, the key is not named on the command line — it is set as the default key in gpg.conf.
Step 1: Find the Public Key ID
List all the keys available for GPG2 signing:
gpg --list-keys
Copy the pub key ID for the key you want to use for signing.
Step 2: Set the Default Key in gpg.conf
Mention the pub key ID in the gpg.conf file that we created earlier.
Open the gpg.conf using the below command:
nano /root/.gnupg/gpg.conf

This should be the content inside this file.

Now, add the respective pub key ID as the default key at the end of the file, like:
default-key 8A361E0C157B120C20595E738311968FA5629A34

Press Ctrl+X, then enter Y, and then press Enter to save.
Step 3: Install the dpkg-sig Utility
Check whether the Debian package utility is available:
sudo apt-cache policy dpkg-sig
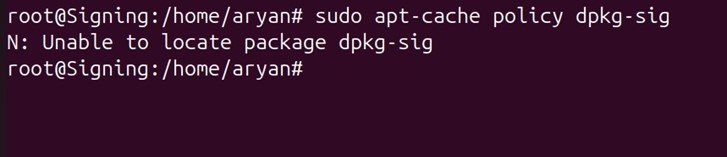
If the above gives an error or returns an empty output, refer to the below steps to download and install the dpkg-sig package.
-
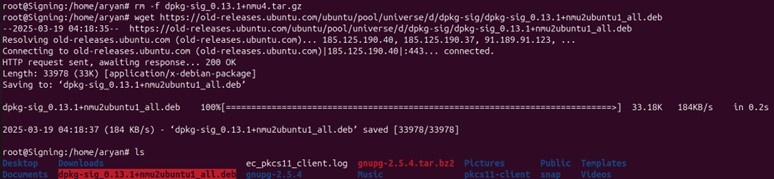
Download the dpkg-sig package:
wget https://old-releases.ubuntu.com/ubuntu/pool/universe/d/\
dpkg-sig/dpkg-sig_0.13.1+nmu2ubuntu1_all.deb
-
Install the package:
sudo apt install ./dpkg-sig_0.13.1+nmu2ubuntu1_all.deb
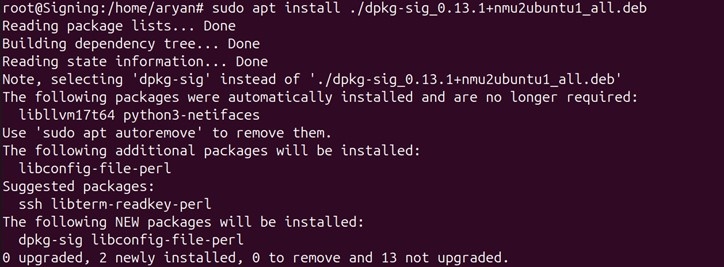
NOTE: Use the same filename you downloaded. The published documentation page downloads one filename and installs a different one, so the install step will fail if copied literally.
-
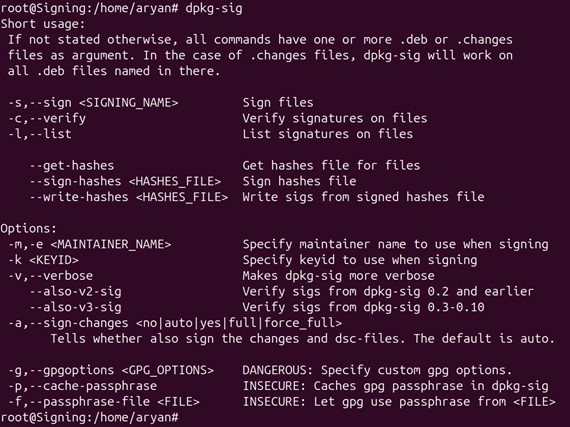
Check whether dpkg-sig has installed correctly in your system:
dpkg-sig
Step 4: Sign the Debian Package
Locate the Debian file, which you need to sign using the key that you had set in the gpg.conf file as the default key.

Run the signing command:
dpkg-sig --sign builder <File Path you want to sign>
A sample command is provided below:
dpkg-sig --sign builder /home/aryan/pkcs11-client/testsample.deb

Step 5: Verify the Signature
Run the verification command:
dpkg-sig --verify <File Path which got signed>
A sample command is provided below:
dpkg-sig --verify /home/aryan/pkcs11-client/testsample.deb

Additional Steps for RPM Signing and Verification
RPM signing also delegates to GPG2, so Sections 1 to 10 must be complete. RPM needs the public key exported and imported into its own keyring, and a .rpmmacros file that names the key to use.
Step 1: Install RPM and gnupg2
Install the rpm package on your machine:
sudo apt install rpm
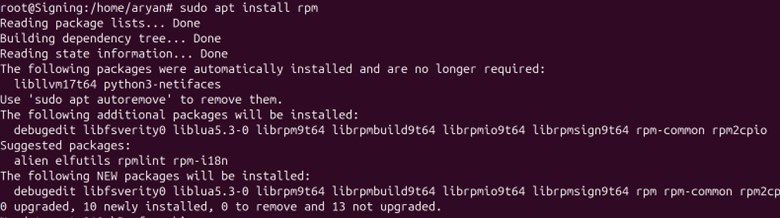
Check whether rpm has been installed correctly:
rpm --version

Install the gnupg2 package:
sudo apt install gnupg2
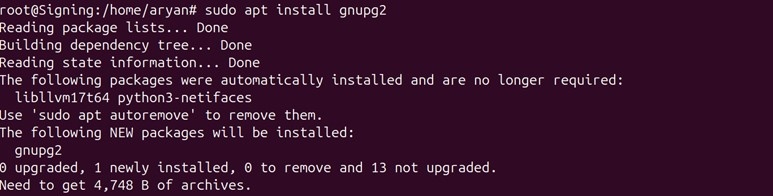
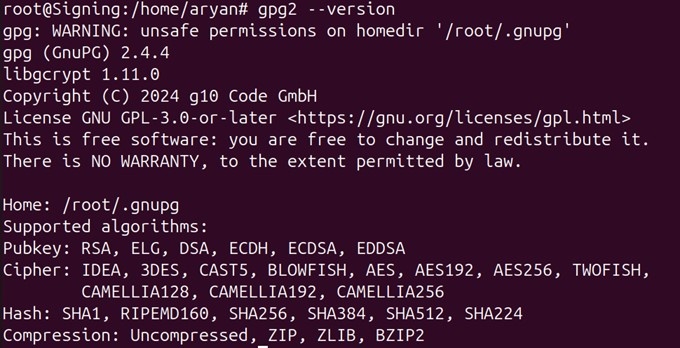
Check whether gpg2 has installed correctly:
gpg2 --version
Step 2: Export the Public Key
List all the keys available for GPG2 signing:
gpg --list-keys
Copy the set pub key uid name for the key you want to use for signing.
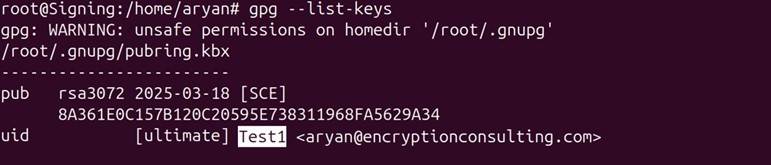
Export the respective key to a file with the pub key uid name as per your setup, like:
gpg --export -a "Test1" > ~/RPM-GPG-KEY

NOTE: The uid name used here, Test1, is the name you set when importing the key in Section 10. It must match exactly, including capitalisation.
Step 3: Import the Key into RPM
Import this file into RPM:
rpm --import ~/RPM-GPG-KEY

Step 4: Create the .rpmmacros File
Create a .rpmmacros file, which will tell the RPM package which GPG key to use for signing.
Run the following command to create or edit the file:
nano ~/.rpmmacros

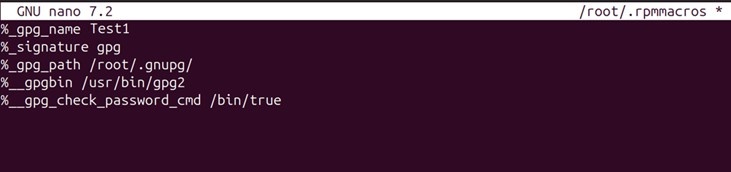
Modify the ~/.rpmmacros with file locations as per the paths set in your ubuntu machine and the required pub key uid name.
%_gpg_name Test1
%_signature gpg
%_gpg_path /root/.gnupg/
%__gpgbin /usr/bin/gpg2
%__gpg_check_password_cmd /bin/true
Press Ctrl+X, then enter Y, and then press Enter to save.
Step 5: Sign the RPM Package
Locate the RPM file that you need to sign using the key we just imported into RPM.

Run the signing command:
rpm --verbose --addsign <File Path to be signed>
A sample command is provided below:
rpm --verbose --addsign /home/aryan/pkcs11-client/RPMsample.rpm

Step 6: Verify the Signature
Run the verification command:
rpm --verbose --checksig <File Path which was signed>
A sample command is provided below:
rpm --verbose --checksig /home/aryan/pkcs11-client/RPMsample.rpm
Step 7: Cross-Check in CodeSign Secure
Open the CodeSign Secure portal and navigate to Reports > Signing Request Report, where every signing request performed through the wrapper is recorded for audit purposes.
- Prerequisites and Root Access
- Install the EC PKCS#11 Wrapper
- Install GnuPG 2.5.4
- Install the Additional Dependencies for GPG2
- Complete the GnuPG Installation
- Install gnupg-pkcs11-scd 0.11.0
- Create the GnuPG Directory and Environment Variables
- Create the Configuration Files
- Start the GPG Agent
- Retrieve and Import the Keys into GPG2
- GPG2 Signing and Verification
- Additional Steps for Debian Signing and Verification
- Additional Steps for RPM Signing and Verification