
PKCS#11 Wrapper – XML Signing Integration Guide
For XML signing, we use XMLSecTool, which is a powerful command-line tool that provides a range of functionalities for securing XML documents. Combined with our PKCS11 Wrapper Tool, you will easily be able to digitally sign XML files and ensure their integrity and authenticity.
XMLSecTool runs on Java and reads its signing key from a PKCS#11 configuration file rather than from a keystore on disk. Because that configuration points at Encryption Consulting’s PKCS#11 wrapper, the private key never leaves the HSM and every signing operation is recorded centrally. Unlike file signing, the resulting signature is embedded inside the XML document itself, and a new signed document is written to the output path.
Section 1 covers the steps common to both platforms. After that, follow only the track for your operating system — Sections 2 and 3 for Linux (Ubuntu), or Sections 4 and 5 for macOS.
Prerequisites: Access to the CodeSign Secure portal, administrative rights on the client machine, and a sample XML file to sign.
Common Setup
Both platforms need the same two things before the wrapper will work: an SSL authentication certificate that identifies your machine to CodeSign Secure, and the two configuration files that ship inside the PKCS#11 Wrapper download.
Step 1: Create the SSL Authentication Certificate
To create the SSL Auth Certificate, go to the CodeSign Secure Portal > System Setup > User. From the right drop down, select the “Generate Authentication Certificate” option.
Enter the certificate name, user name, and expiry date. A certificate is generated and downloaded, and its password is displayed.
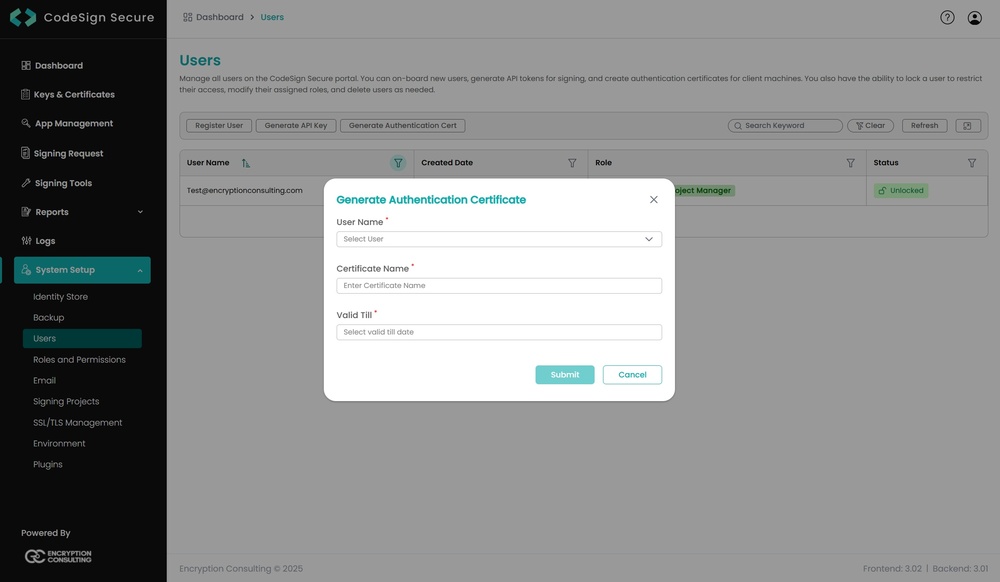
NOTE: The password is displayed only once, so copy and store it safely. Both the certificate path and its password are entered into ec_pkcs11client.ini in your platform track.
Step 2: Understand the Two Configuration Files
The PKCS#11 Wrapper download contains two files that must be edited before use. The same fields apply on both platforms.
- pkcs11properties.cfg: Describes the PKCS#11 token to XMLSecTool. Update it with the correct library path, which is ec_pkcs11client.so on Ubuntu and the equivalent library on macOS.
- ec_pkcs11client.ini: Points the wrapper at your CodeSign Secure server and at the authentication certificate from Step 1. The fields to update are listed below.
| Field | Description |
|---|---|
| name | The path location of the Log xml file you downloaded with the PKCS11 Wrapper tool (EC_PKCS11_CLIENT-LogConfig.xml). |
| url | Verify the server url of your CodeSign Secure portal. |
| username | The username of your CodeSign Secure account. |
| passcode | The secret passcode which was used to set up the CodeSign Secure portal. |
| path | The path location of your SSL Authentication certificate. |
| passwd | The password of your SSL Authentication certificate. |
NOTE: When using Luna HSM, the slot number must also be added to the pkcs11properties.cfg file. Each platform track below shows this variation.
Linux (Ubuntu): Install and Configure
To perform XML Signing using XMLSec Tool and our PKCS11 Wrapper in a Linux (Ubuntu) machine, you would need to follow the below steps.
Step 1: Download the PKCS#11 Wrapper
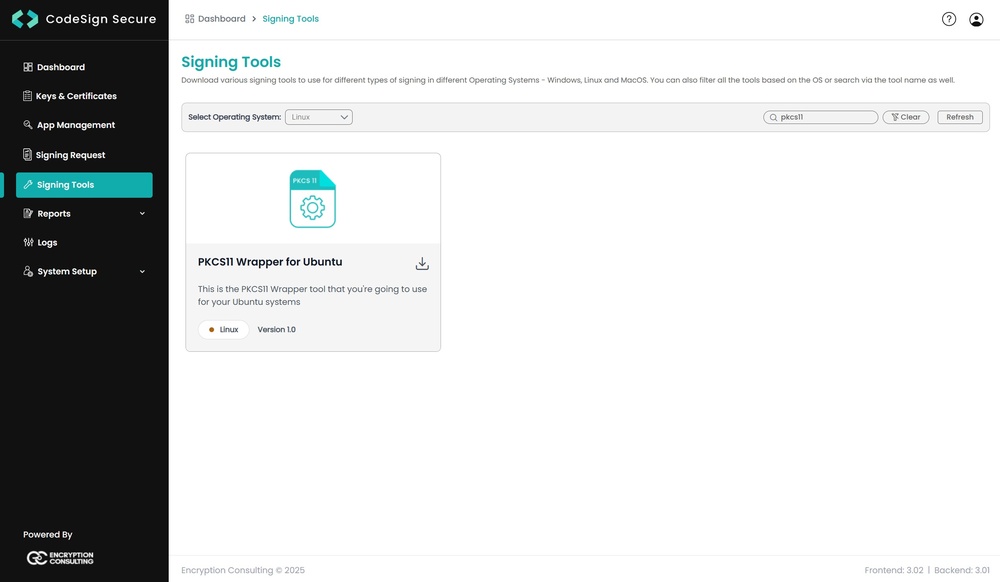
Download our PKCS11 Wrapper Tool from the CodeSign Secure portal in the Signing Tools section in your Ubuntu machine.
Step 2: Download XMLSecTool
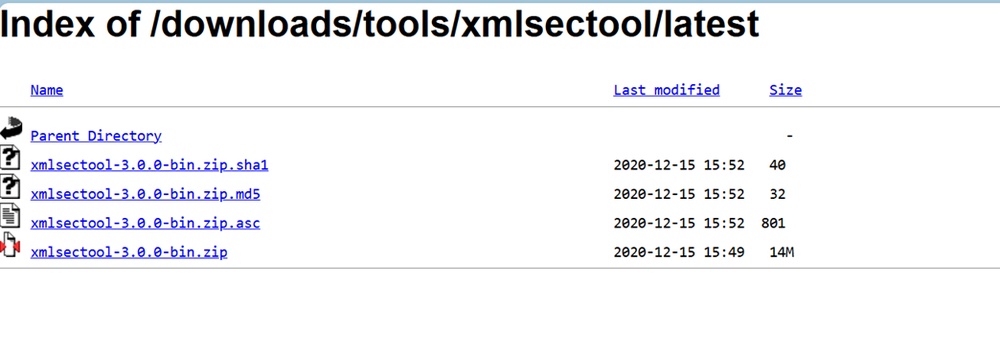
Next we will need to download the latest version of XMLSec Tool (xmlsectool-3.0.0-bin.zip) using this link. You will need to extract the zip file into a directory of your choice.
Step 3: Update pkcs11properties.cfg
Go to your PKCS11 Wrapper directory (../PKCS11_Wrapper_Ubuntu).
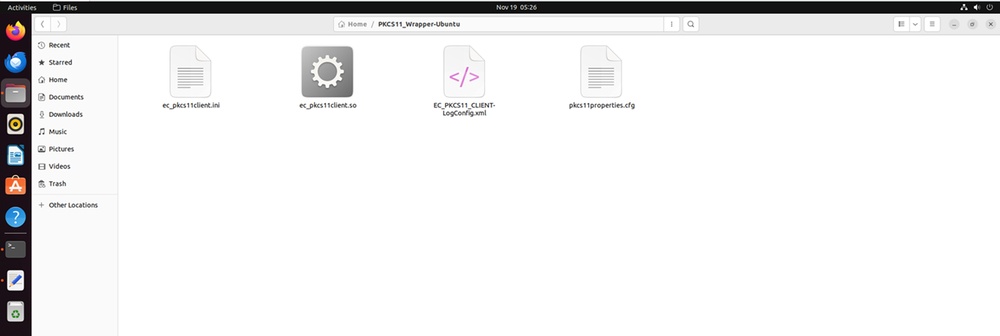
Open the “pkcs11properties.cfg” file in a text editor and update it with the correct library path (ec_pkcs11client.so).
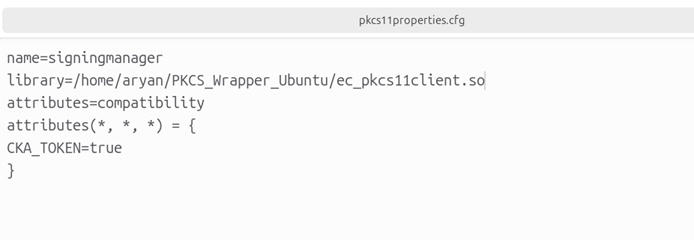
NOTE: When using Luna HSM, add the slot number in the pkcs11properties.cfg file as shown below.
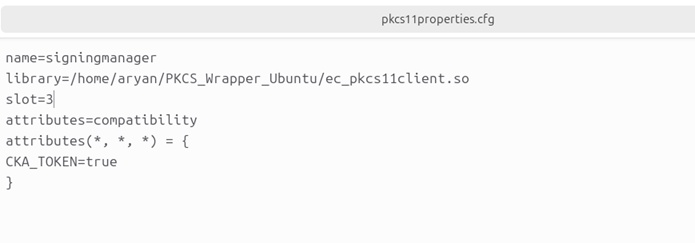
Step 4: Update ec_pkcs11client.ini
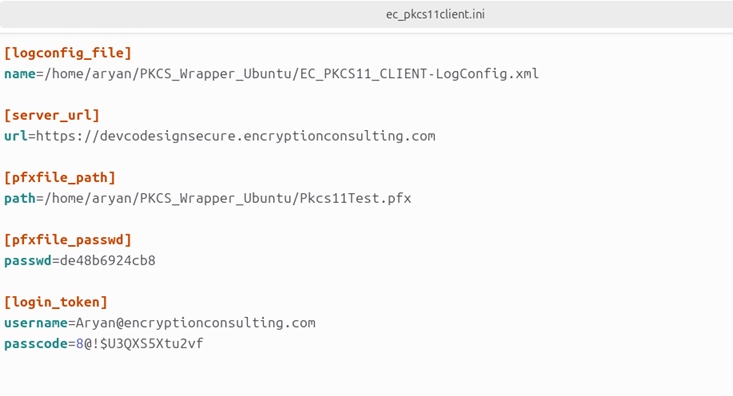
Open the “ec_pkcs11client.ini” file in a text editor and update the six fields listed in Section 1, Step 2.
The initialization file should look like this with all the correct file paths and settings.
Step 5: Set the EC_INI_FILE_PATH Environment Variable
Now we need to add the environment variable for the pkcs11 client library.
Run the below command to open the bashrc file:
nano ~/.bashrc

Now add the EC_INI_FILE_PATH variable with the path of the .ini at the end of the bashrc file, like:
export EC_INI_FILE_PATH=\
/home/administrator/PKCS11_Wrapper-Ubuntu/ec_pkcs11client.ini
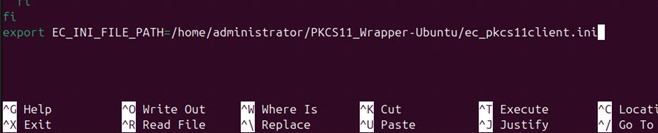
Press Ctrl+X, then enter Y, and then press Enter to save.
Reload the environment variables:
source ~/.bashrc

Check whether the variable has been set correctly:
echo $EC_INI_FILE_PATH

NOTE: If you cannot see the file location from the echo command, open a new terminal and try again.
Step 6: Install Java
Now, you would need to download and install Java in your Ubuntu machine. Open Terminal from the interface or press Ctrl+Alt+T.
Run the below commands to install the Amazon Corretto 17 java version on your machine. You can check other supported Java versions with XMLSec Tool here.
wget -O - https://apt.corretto.aws/corretto.key \
  | sudo gpg --dearmor \
    -o /usr/share/keyrings/corretto-keyring.gpg
echo "deb [signed-by=/usr/share/keyrings/corretto-keyring.gpg] \
https://apt.corretto.aws stable main" \
  | sudo tee /etc/apt/sources.list.d/corretto.list
Now install the package using the below commands:
sudo apt-get update
sudo apt-get install -y java-17-amazon-corretto-jdk
To check whether Java has installed properly or not, run the below command:
java -version
Step 7: Set the JAVA_HOME Environment Variable
Now, you would need to add a “JAVA_HOME” environment variable in your system. Run the below command to find the correct path of Java in your system.
update-alternatives --config java
It might ask you to choose between paths if you have multiple Java versions installed. Enter the number which corresponds to your Java version.
The path will look something similar to this: /usr/lib/jvm/java-17-amazon-corretto/bin/java
Before you set the JAVA_HOME variable system wide, you should take a backup of the environment file.
cp ~/.bashrc ~/.bashrc.bak
NOTE: If you make an error while setting the environment variables, restore your own backup with “cp ~/.bashrc.bak ~/.bashrc”. To reset to the system default instead, use “cp /etc/skel/.bashrc ~/”, which discards any other customisations in the file.
Replace the path of the Java file before running the below command to set the JAVA_HOME variable.
echo "export JAVA_HOME=/usr/lib/jvm/java-17-amazon-corretto" \
  >> ~/.bashrc
NOTE: Only add the path up to the main directory, that is java-17-amazon-corretto, and not as far as the bin/java executable.
Check the last 3 lines of the file to verify the change by running the below command:
tail -3 ~/.bashrc
Run the below command to reload the environment variable:
source ~/.bashrc
Step 8: Install the Remaining Packages
You would also need to install some other pre-requisite packages to perform XML signing.
sudo apt-get install curl
sudo apt-get install liblog4cxx-dev
sudo apt-get install liblog4cxx12
NOTE: If the “sudo apt-get install liblog4cxx12” command gives an error, install the package directly for your architecture using the commands below.
For amd architecture:
wget http://archive.ubuntu.com/ubuntu/pool/universe/l/log4cxx/\
liblog4cxx12_0.12.1-4_amd64.deb
sudo dpkg -i liblog4cxx12_0.12.1-4_amd64.deb
For arm architecture:
wget http://ports.ubuntu.com/pool/universe/l/log4cxx/\
liblog4cxx12_0.12.1-4_arm64.deb
sudo dpkg -i liblog4cxx12_0.12.1-4_arm64.deb
We are now ready with our environment to perform the XML signing using XMLSec tool and PKCS11 Wrapper.
Linux (Ubuntu): Sign and Verify
The signing command must be run from the directory containing your configuration, so that the relative paths in the command resolve correctly.
Step 1: Change to the Working Directory
For signing, change the working directory of the terminal to that folder which contains your “ec_pkcs11client.ini” file.
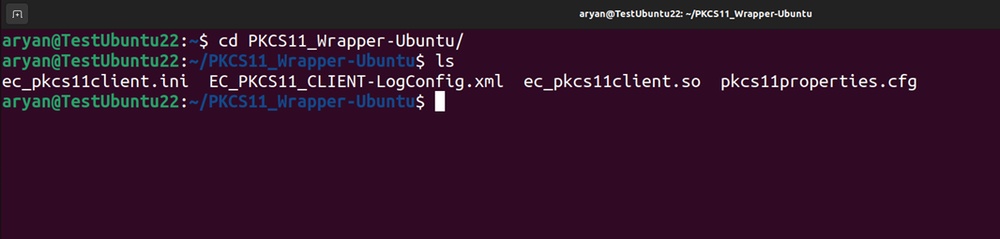
Step 2: Run the Signing Command
Now, run the signing command from this directory.
<Path of xmlsectool.sh file> --sign \
  --pkcs11Config <Path of pkcs11properties.cfg> \
  --keyAlias <Key alias of the signing certificate> \
  --keyPassword NONE \
  --inFile <Path of XML file> \
  --outFile <Path of the signed XML file>
A sample command is provided below:
../xmlsectool-3.0.0-bin/xmlsectool-3.0.0/xmlsectool.sh --sign \
  --pkcs11Config pkcs11properties.cfg \
  --keyAlias DemoCertificate \
  --keyPassword NONE \
  --inFile ../xmlSample.xml \
  --outFile ../out-xmlSample.xml
Step 3: Verify the Signature
For verification, run the following command:
<Path of xmlsectool.sh file> --verifySignature \
  --pkcs11Config <Path of pkcs11properties.cfg> \
  --keyAlias <Key alias of the signing certificate> \
  --keyPassword NONE \
  --inFile <Path of the signed XML file>
A sample command is provided below:
../xmlsectool-3.0.0-bin/xmlsectool-3.0.0/xmlsectool.sh \
  --verifySignature \
  --pkcs11Config pkcs11properties.cfg \
  --keyAlias DemoCertificate \
  --keyPassword NONE \
  --inFile ../out-xmlSample.xml
Step 4: Option Reference
The following are the options and their meaning in the commands:
| Option | Description |
|---|---|
--sign |
Signs the input document and writes a signed copy to the output path. |
--verifySignature |
Checks the signature on an already signed document. |
--pkcs11Config |
The path of the pkcs11properties.cfg file, which directs XMLSecTool to the PKCS#11 wrapper. |
--keyAlias |
The key alias of the signing certificate in CodeSign Secure. |
--keyPassword |
The key password. This is NONE because access is controlled by the wrapper configuration rather than by a keystore password. |
--inFile |
The path of the XML file to sign, or of the signed file to verify. |
--outFile |
The path of the signed XML file to produce when signing. |
Step 5: Cross-Check in CodeSign Secure
Open the CodeSign Secure portal and navigate to Reports > Signing Request Report, where every signing request performed through the wrapper is recorded for audit purposes.
macOS: Install and Configure
To perform XML Signing using XMLSec Tool and our PKCS11 Wrapper in a MacOS machine, you would need to follow the below steps.
Step 1: Download the PKCS#11 Wrapper
Download our PKCS11 Wrapper Tool from the CodeSign Secure portal in the Signing Tools section in your MacOS.
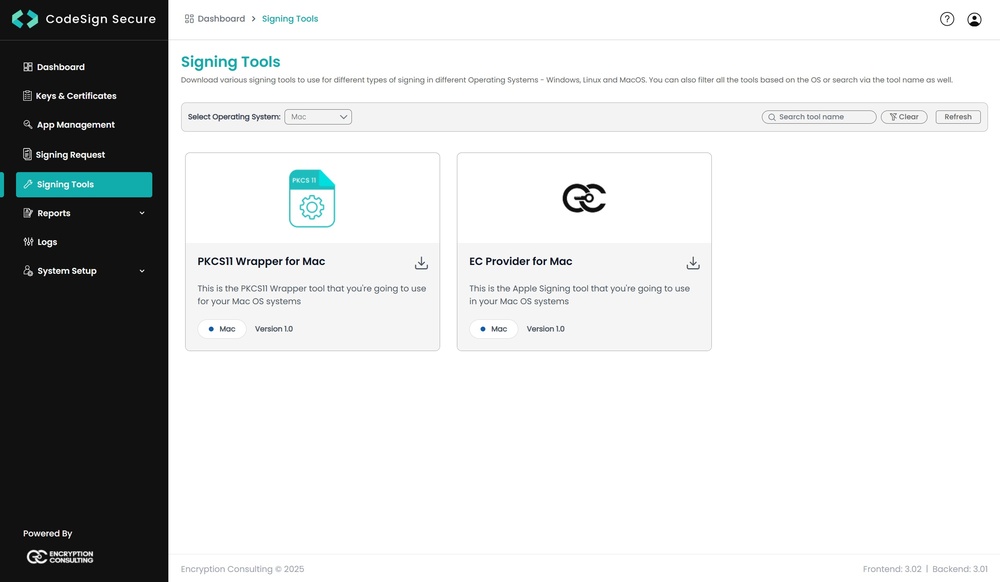
Step 2: Update the Configuration Files
Go to your PKCS11 Wrapper directory (../PKCS11_Wrapper-Mac) and update the “pkcs11properties.cfg” and “ec_pkcs11client.ini” with the required details.
For “pkcs11properties.cfg”, update the library path.
NOTE: When using Luna HSM, add the slot number in the pkcs11properties.cfg file as shown below.
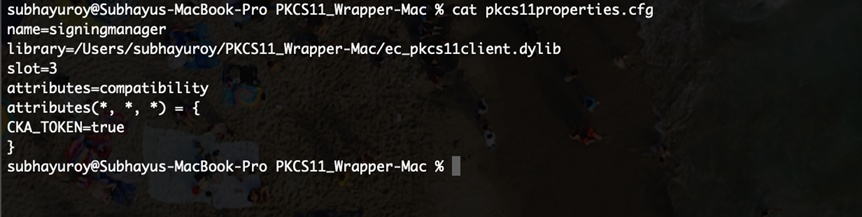
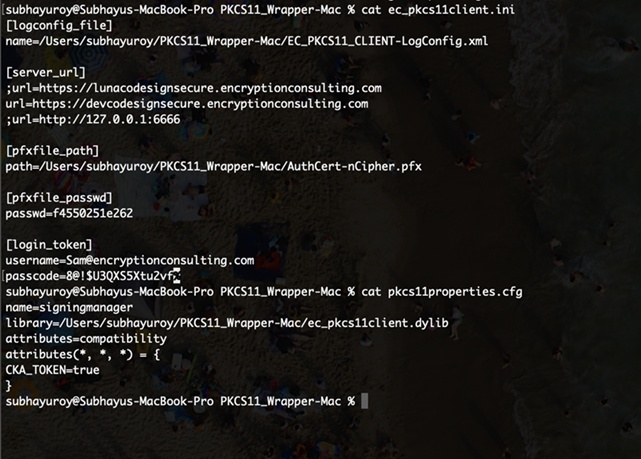
For the “ec_pkcs11client.ini” file, update the six fields listed in Section 1, Step 2.
The initialization and configuration files should look like this with all the correct file paths and settings.
Step 3: Download XMLSecTool
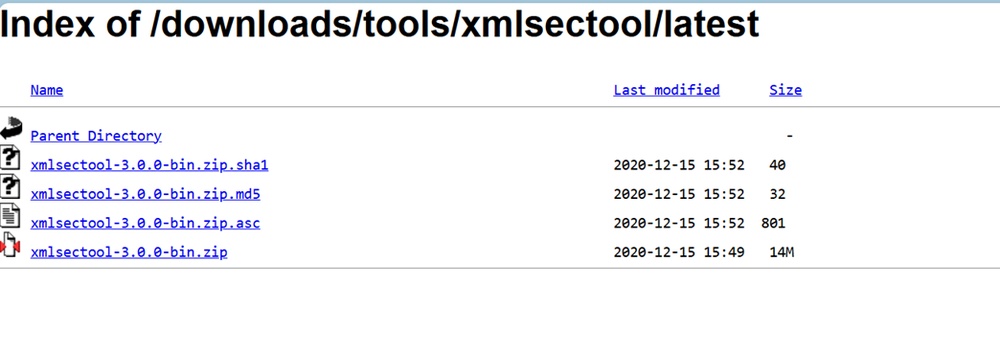
Next we will need to download the latest version of XMLSec Tool (xmlsectool-3.0.0-bin.zip) using this link. You will need to extract the zip file into a directory of your choice.
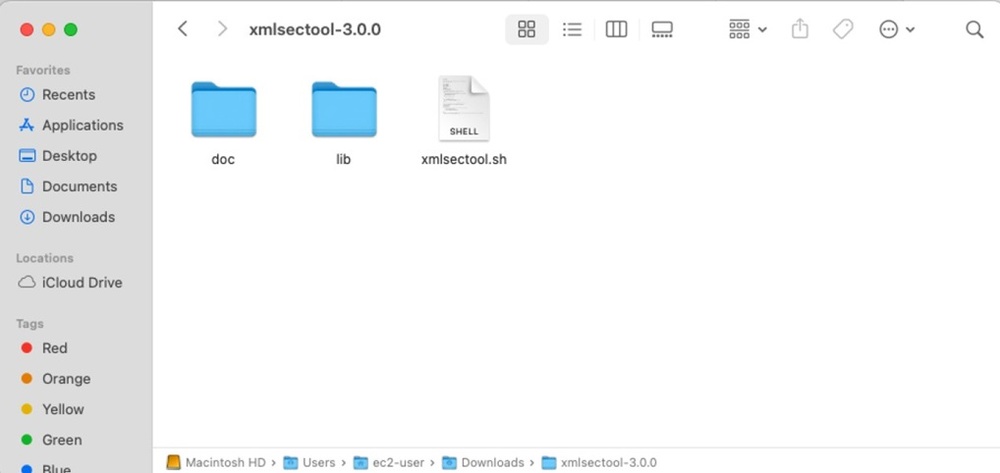
You will need this shell file to perform the XML signing.
Step 4: Install Java
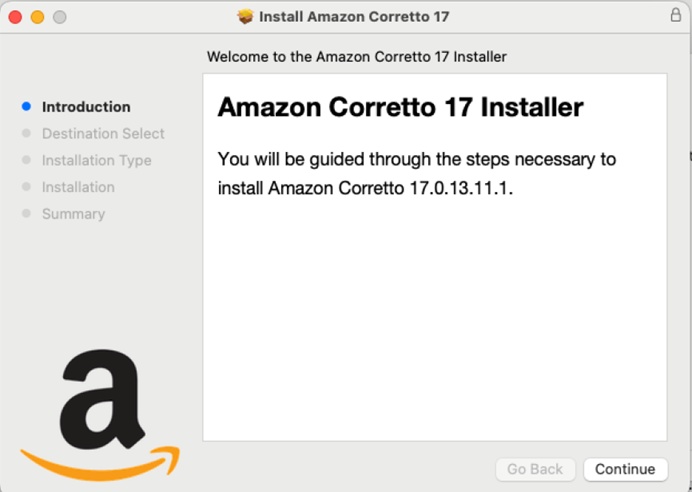
Now, you would need to download and install Java in your MacOS machine. Download the .pkg file of the Amazon Corretto 17 java version using this link. You can check other supported Java versions with XMLSec Tool here.
Double-click the downloaded file to begin the installation wizard and follow the steps in the wizard.
To check whether Java has installed properly or not, run the below command:
java -version
Step 5: Set the JAVA_HOME Environment Variable
Now, you would need to add a “JAVA_HOME” environment variable in your system. First you will need to get the complete installation path using the below command.
/usr/libexec/java_home --verbose

Replace the path of the Java file before running the below command to set the JAVA_HOME variable.
echo 'export JAVA_HOME="/Library/Java/JavaVirtualMachines/\
amazon-corretto-17.jdk/Contents/Home"' >> ~/.zshrc
Run the below command to reload the environment variable:
source ~/.zshrc
Step 6: Install the Remaining Packages
You would also need to install some other pre-requisite packages to perform XML signing.
brew install log4cxx
brew install curl
We are now ready with our MacOS environment to perform the XML signing using XMLSec tool and PKCS11 Wrapper.
macOS: Sign and Verify
As on Linux, the signing command is run from the directory containing your configuration files.
Step 1: Change to the Working Directory
For signing, change the working directory of the terminal to that folder which contains your “ec_pkcs11client.ini” file.
Step 2: Run the Signing Command
Now, run the signing command from this directory.
<Path of xmlsectool.sh file> --sign \
  --pkcs11Config <Path of pkcs11properties.cfg> \
  --keyAlias <Key alias of the signing certificate> \
  --keyPassword NONE \
  --inFile <Path of XML file> \
  --outFile <Path of the signed XML file>
A sample command is provided below:
../xmlsectool-3.0.0/xmlsectool.sh --sign \
  --pkcs11Config pkcs11properties.cfg \
  --keyAlias gpg2 \
  --keyPassword NONE \
  --inFile ../sample.xml \
  --outFile SignedSample.xml
NOTE: The path to xmlsectool.sh differs from the Linux example because the archive is extracted to a different depth. Use whichever path matches your own extraction.
Step 3: Verify the Signature
For verification, run the following command:
<Path of xmlsectool.sh file> --verifySignature \
  --pkcs11Config <Path of pkcs11properties.cfg> \
  --keyAlias <Key alias of the signing certificate> \
  --keyPassword NONE \
  --inFile <Path of the signed XML file>
A sample command is provided below:
../xmlsectool-3.0.0/xmlsectool.sh --verifySignature \
  --pkcs11Config pkcs11properties.cfg \
  --keyAlias gpg2 \
  --keyPassword NONE \
  --inFile ../SignedSample.xml
Step 4: Cross-Check in CodeSign Secure
Open the CodeSign Secure portal and navigate to Reports > Signing Request Report, where every signing request performed through the wrapper is recorded for audit purposes.