
Apple Signing Integration Guide
Using CodeSign Secure and our Apple Signing CSP, you have the ability to quickly and efficiently set up your environment to sign any type of Apple file including .app, .dmg, .pkg, .ipa, and .mpkg files with ease. Configuration of your Mac to run our Apple CSP is a very quick and easy process.
Unlike the Windows signing workflows, macOS does not use the Encryption Consulting Key Storage Provider. Instead, a dedicated provider application named ECCssProvider is installed into your Applications folder and acts as the bridge between Apple’s native codesign utility and the HSM. The private key never leaves the HSM, and every signing operation is recorded centrally for audit purposes.
There are three preparatory stages: installing the provider, authenticating your machine with a P12 certificate held in Keychain Access, and making the signing certificate chain available locally. Once those are complete, signing is a single codesign command.
Prerequisites: Ensure you have a username and access to the CodeSign Secure webpage, a Mac on which you have administrator rights, and the Apple file you intend to sign.
Install the EC Provider for Mac
The EC Provider for Mac, ECCssProvider, is the component that exposes your CodeSign Secure certificates to Apple’s signing tools. It must be installed and connected to your portal before anything can be signed.
Step 1: Download the EC Provider for Mac
From the CodeSign Secure webpage, go to the Signing Tools section and download the EC Provider for Mac.
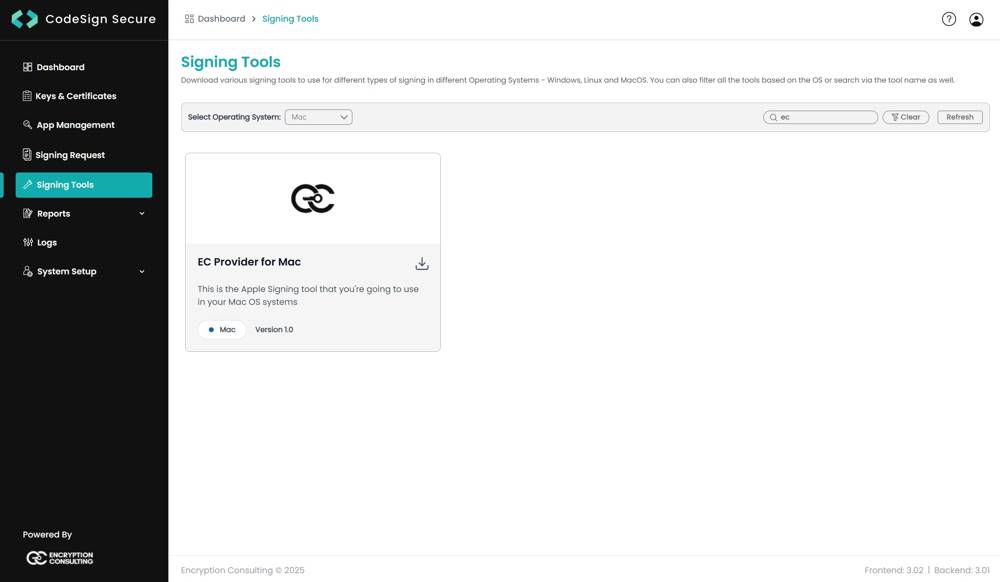
Step 2: Install and Launch ECCssProvider
Unzip the file and transfer the unzipped file to the Applications folder. From here, run the ECCssProvider application.
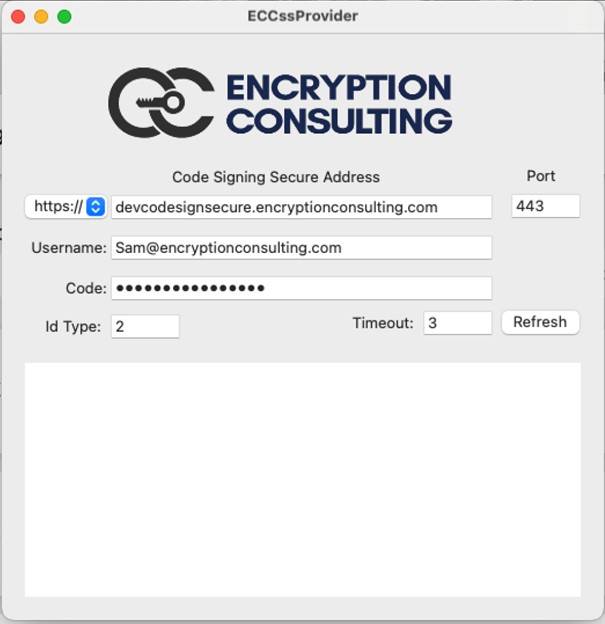
Step 3: Connect the Provider to CodeSign Secure
Ensure you have your CodeSign Secure URL, Username, and code entered into the application and then select refresh. The page should now show different certificates you have access to for signing.
The application window takes the following details:
- Code Signing Secure Address and Port: The hostname of your CodeSign Secure server and the port it listens on, typically 443.
- Username: The username you use to log in to the CodeSign Secure portal.
- Code: The secret code set when your CodeSign Secure solution was configured.
- Id Type and Timeout: Leave these at their defaults unless your deployment requires otherwise.
After selecting Refresh, the lower panel acquires an auth token and lists your keychain items as matching Cert and Key pairs.
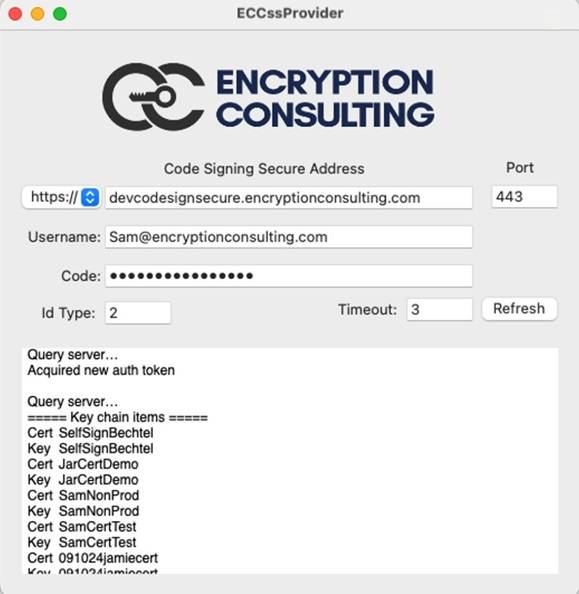
NOTE: Take note of the order in which the certificates are listed in this window. Section 5 relies on that ordering to identify the certificate you want to sign with.
Set up the P12 Authentication Certificate
Now, we must set up the P12 certificate for access to signing on the server. This certificate authenticates your machine to the CodeSign Secure server, and on macOS it lives in Keychain Access rather than in an environment variable.
Step 1: Generate the Authentication Certificate
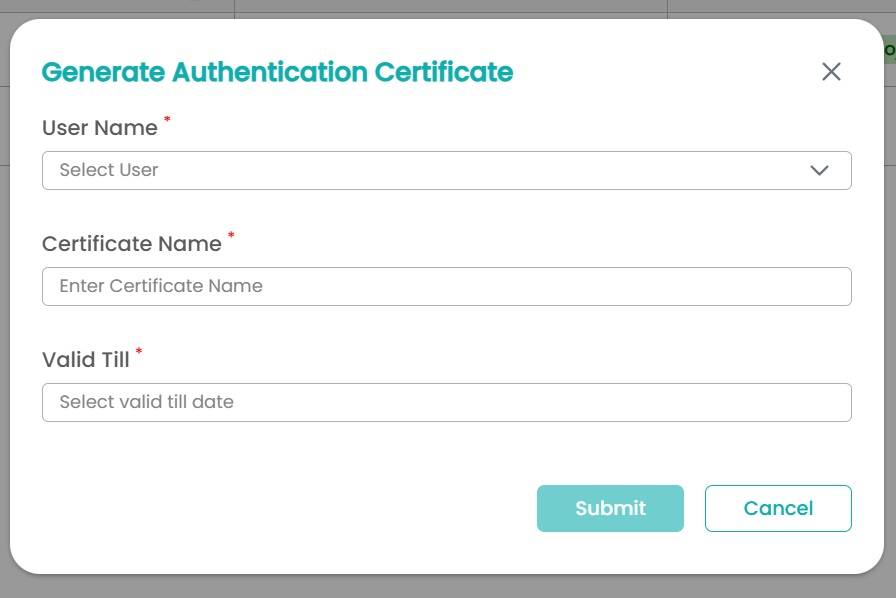
First, go to the CodeSign Secure webpage and select the settings section. From here, select “User”. Finally, on the drop-down menu on the right, select “Generate Authentication Certificate”.
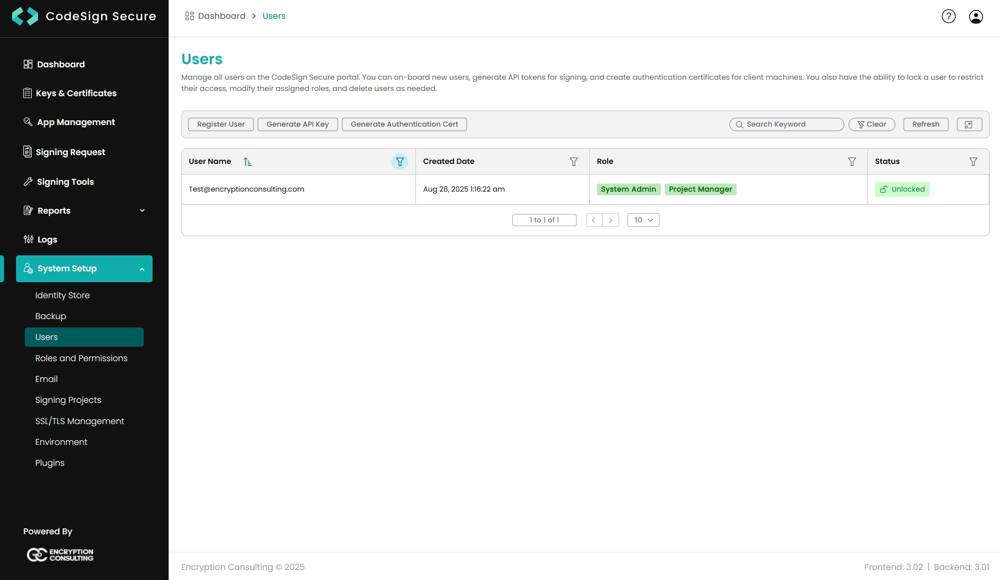
Step 2: Enter the Details and Download the Certificate
Enter the Certificate Name, UserName, and Expiration Date of the P12 certificate, then select the “Generate” option.
A p12 certificate should be generated and downloaded to your machine. Save the password of the certificate as well as the certificate itself.
NOTE: The certificate password is displayed only once, so store it safely before continuing. You will be prompted for it in the next step.
Step 3: Import the P12 into Keychain Access
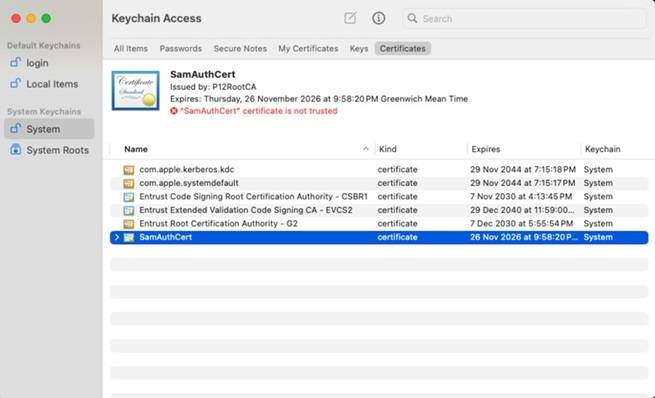
Double-click your newly downloaded P12 certificate and open it with the application “Key Chain Access”. It should prompt you for the administrator password and the certificate password, which will put the certificate in your System key chain.
Step 4: Grant ECCssProvider Access to the Key
After putting the authentication certificate into your key access chain, open the key itself. It should be in the drop-down of the authentication certificate.
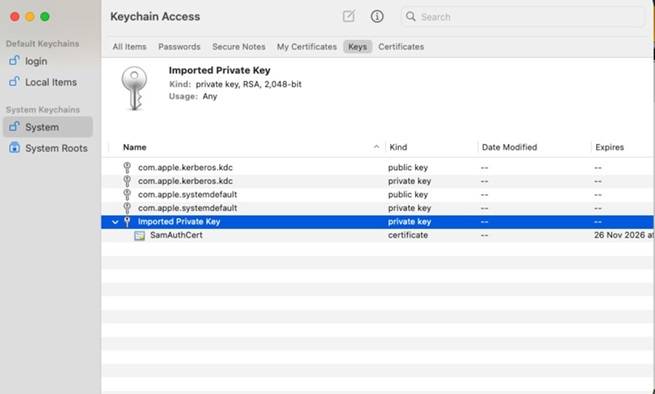
Right-click it and select Get Info. From there, select Access Control and allow access to the certificate using the ECCssProvider.app application.
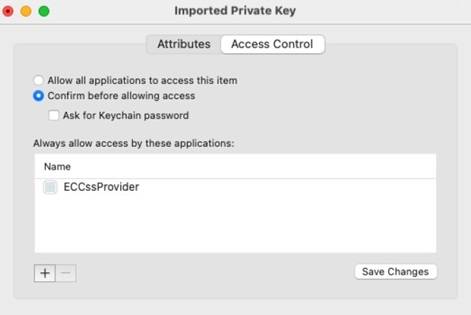
NOTE: You will likely need to restart your machine to see that permission actually change. If signing later fails with an authentication error, confirm this permission has taken effect.
Import the Signing Certificate Chain
Next, ensure you have the full certification path of the certificate you will be signing within your Keychain Access. Mac devices tend not to start with the known certification chains like Windows machines do, so if you are using an OV/EV certificate for signing, you must upload that entire certification chain.
Step 1: Verify the Full Certification Path
Open Keychain Access and confirm that the root and any intermediate certificates for your signing certificate are present, so that the certificate shows a complete chain of trust.
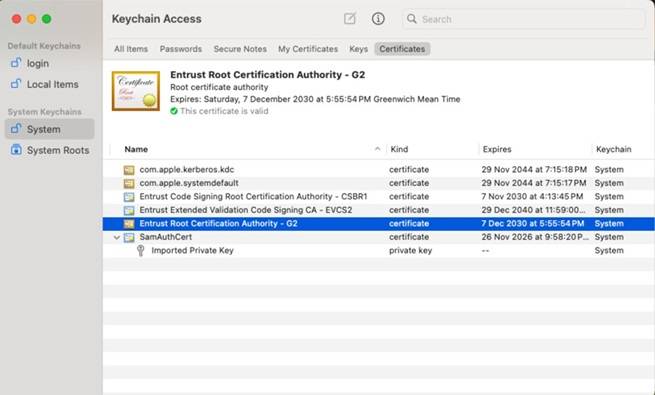
If any part of the chain is missing, import the remaining certificates into Keychain Access before continuing.
Set the TLS Authentication Certificate
With the P12 certificate in the keychain, the provider must be told to use it when it connects to the CodeSign Secure server.
Step 1: Run the TLS Client Command
Now, we need to run the following command:
/Applications/ECCssProvider.app/Contents/MacOS/ECCssProvider
  --batch --tlsclient <Auth Cert Name>
This command will set the authentication certificate we uploaded as the TLS authentication certificate when connecting to the CodeSign Secure server.
Substitute <Auth Cert Name> with the Certificate Name you entered when generating the P12 certificate in Section 2.
On success the provider confirms that the TLS client identity has been set to the certificate name you supplied.

Identify the Signing Certificate Hash
Apple’s codesign utility identifies a signing identity by hash rather than by name, so the next step is to list the available certificates and read the hash of the one you intend to use.
Step 1: Export the Smartcard Certificate List
Now, we need to run:
security export-smartcard -i
  com.encryptionconsulting.ECCssProvider.CssToken:ECCSS
This command pulls up all of the certificates listed in the ECCssProvider GUI and details about those certificates.
Step 2: Read the SHA1 Hash
The important detail we need is the SHA1 hash of that certificate. We will use that hash to determine which certificate we are signing with.
The certificates are in the same number order as they appear in the GUI, so match the position of your intended certificate in the ECCssProvider window against this output.
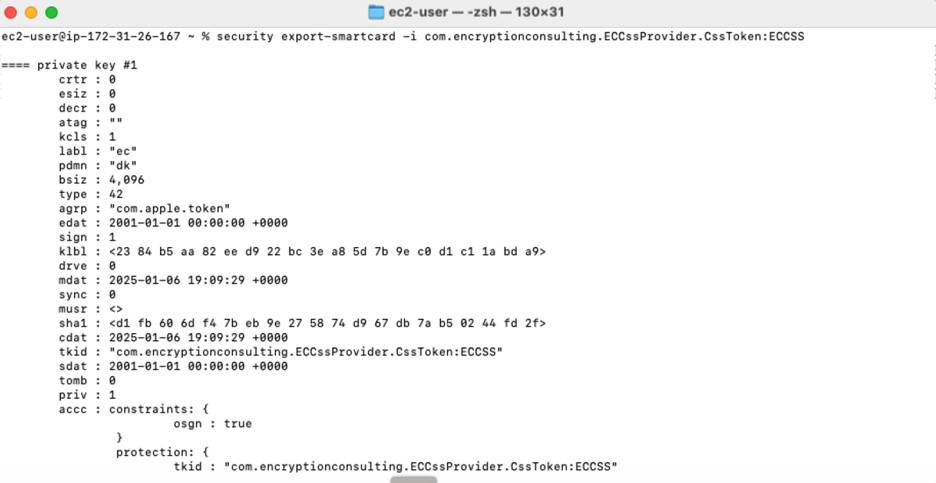
NOTE: The hash is displayed as space-separated hex pairs inside angle brackets. Remove the brackets and all spaces before using it — codesign expects one continuous string. This becomes the -s value in the signing command in Section 6.
Sign the File
With the provider connected, the authentication certificate in place, and the signing certificate hash in hand, the file can be signed with Apple’s native codesign utility.
Step 1: Run the Codesign Command
Finally, we run our codesign command:
codesign -f -s <Hash of the Certificate for signing>
  <Application or file to be signed>
Then, we provide the hash of the certificate we are using and the path to the file to be signed.
If the file already carries a signature, codesign reports that it is replacing the existing signature, which is the effect of the -f flag.

Step 2: Flag Reference
The following are the flags and their meaning in the command:
| Flag | Description |
|---|---|
| -f | For overwriting old signatures on files. |
| -s | To specify what we are signing, given as the hash of the signing certificate. |
| <hash> | The SHA1 hash of the certificate being used for signing, as located in Section 5. |
| <file path> | The path to the application or file to be signed, such as a .app, .dmg, .pkg, .ipa, or .mpkg file. |
Verify the Signature
Confirm that the signature has been applied correctly before distributing the file.
Step 1: Display the Signature Details
Use codesign to read back the signature that was applied to the file:
codesign -dv --verbose=4 <Application or file that was signed>
Check that the authority chain shown matches the certificate you intended to sign with.
Step 2: Validate the Signature
Then confirm the signature itself is valid:
codesign --verify --strict --verbose=2 <Application or file that was signed>
Step 3: Cross-Check in CodeSign Secure
Open the CodeSign Secure portal and navigate to Reports > Signing Request Report, where every signing request performed through the provider is recorded for audit purposes. Confirm that a signing request appears for the certificate you used.