
Macro Signing Integration Guide
Signing Windows Excel Macro files is possible using the signtool command. A macro-enabled workbook carries executable VBA code, so signing it lets Excel confirm who produced that code and that it has not been altered since.
Macro signing uses exactly the same tooling as ordinary Windows signing — Microsoft’s signtool together with Encryption Consulting’s Key Storage Provider (KSP). The only difference is the file you point the command at: a .xlsm workbook rather than an executable. The private key remains inside the HSM and every signing operation is recorded centrally.
Sections 1 to 4 prepare the client machine and are identical to the Windows Signing setup. If you have already completed that setup on this machine, go straight to Section 5, which performs the signing, and Section 6, which verifies it.
Prerequisites: Access to the CodeSign Secure portal, administrative rights on the client machine, and a macro-enabled workbook (.xlsm) to sign.
Set up CodeSign Secure KSP
The Encryption Consulting Key Storage Provider (KSP) for Windows is a software component that extends the Microsoft Cryptography API: Next Generation (CNG) framework. Its primary purpose is to enable Windows applications, such as signtool.exe, to interact seamlessly with the cryptographic keys and certificates stored within an HSM.
Step 1: Download the EC KSP
- Log in to the CodeSign Secure portal and navigate to the Signing Tools section to download “Encryption Consulting CNG-SigningKSP” (also listed as “EC KSP for Windows”).
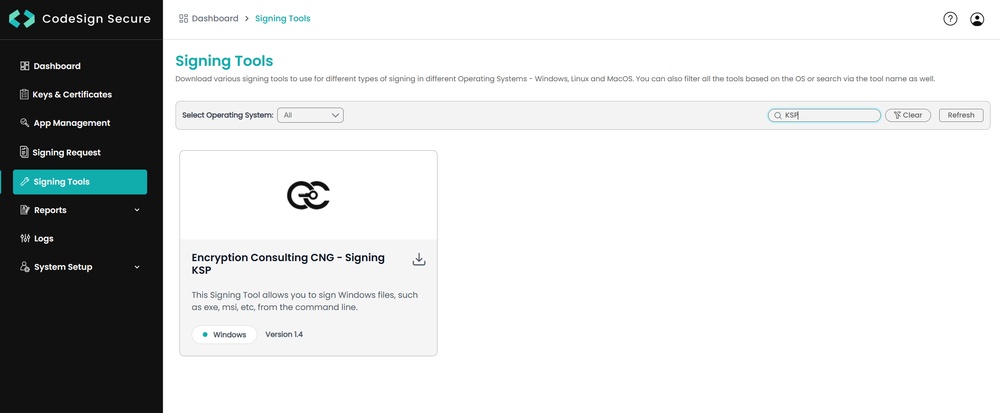
- Extract the zip file to get the “Setup.msi” file.
Step 2: Install the EC KSP
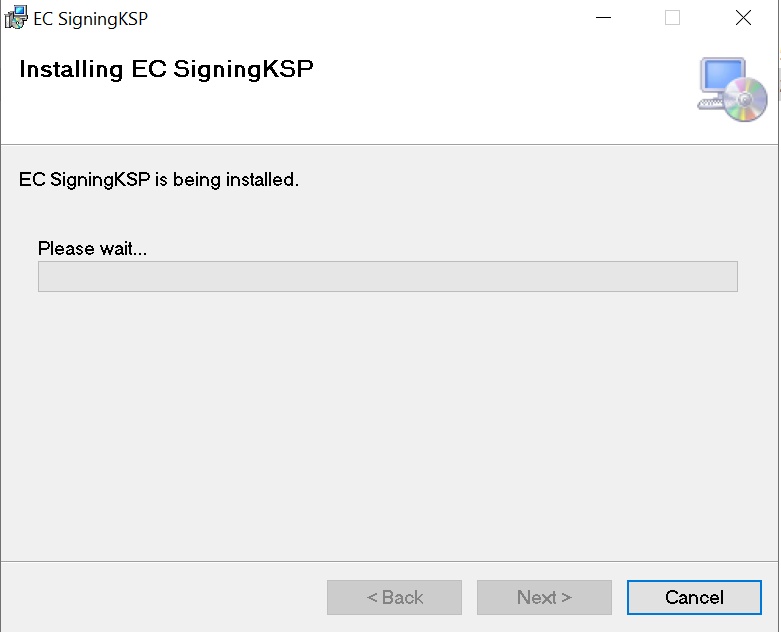
- Run the “Setup.msi” installer with Administrator privileges.
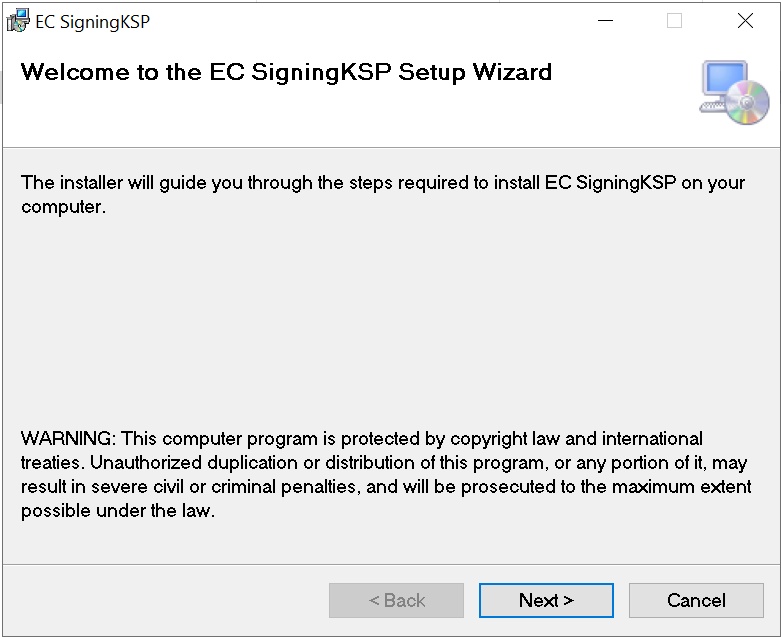
-
Follow the on-screen prompts of the installation wizard.
- Accept the End-User License Agreement.
- Choose the installation directory (the default is C:\Program Files\Encryption Consulting\SigningKSP).
- Choose whether you want to install the KSP for Everyone or just for the current user.
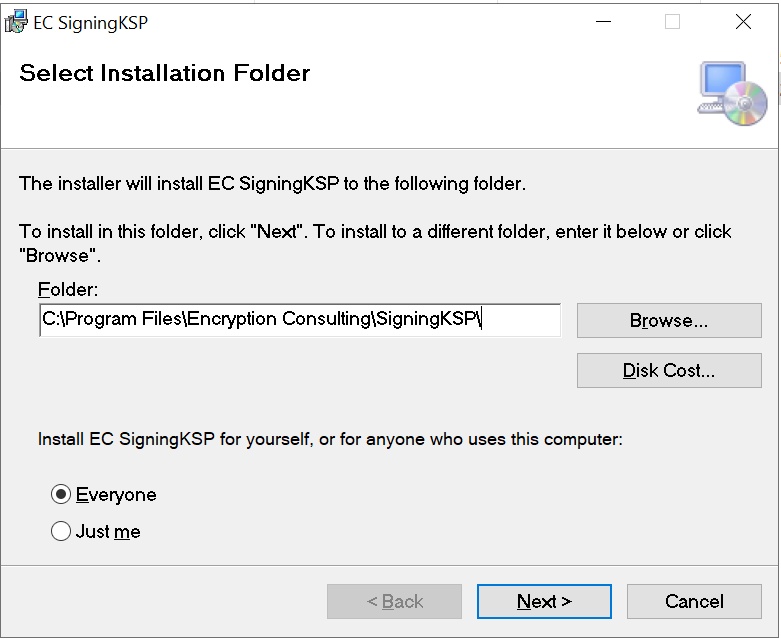
-
Enter the prompted details such as:
- Username: The username/email that you use to log in to the CodeSign Secure portal.
- Code: The secret code that you set at the time of setting up the CodeSign Secure solution (this is the code defined in your conf.ini configuration file).
- IdentityType: Keep this field as default (2). If your deployment authenticates against a local identity store, set this to 1 as described in the product documentation.
- CodeSign Secure URL: The URL to access the portal (remember to add “/api/” at the end of the URL). Leave the API BaseURL unchanged if it is already populated correctly.
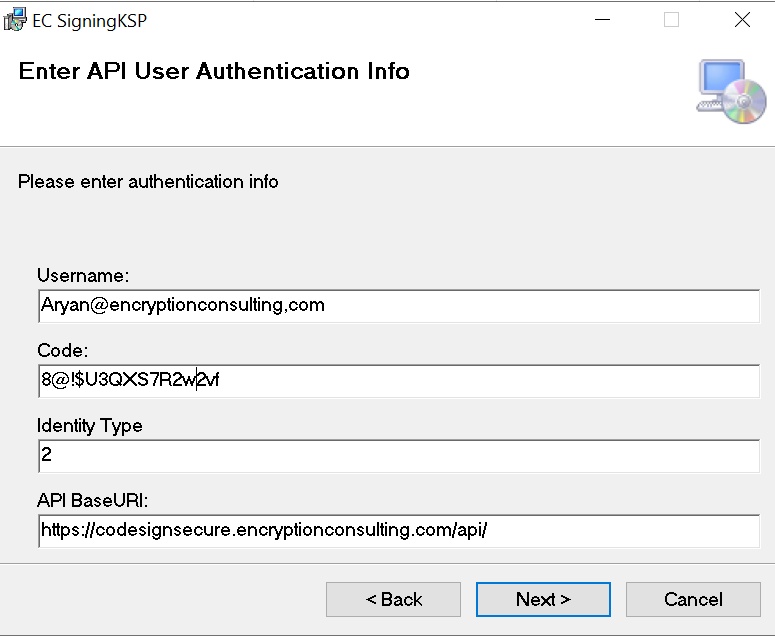
- Click Next and confirm the installation. When Windows asks whether you want to allow this program to make changes to your PC, click Yes.
Step 3: Configure the Registry Editor settings
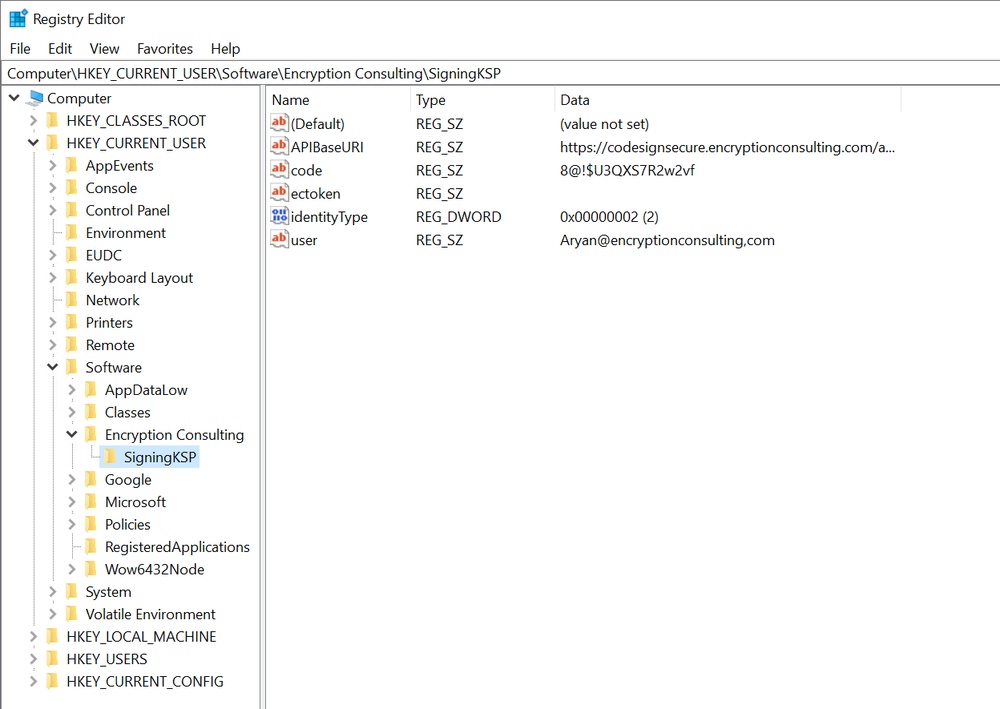
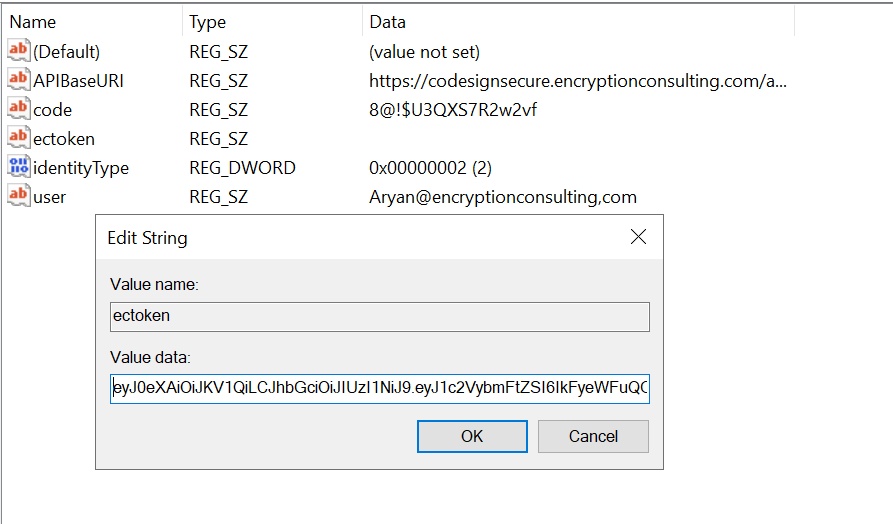
- Open the Registry Editor from the Start menu and navigate to HKEY_CURRENT_USER > Software > Encryption Consulting > SigningKSP.
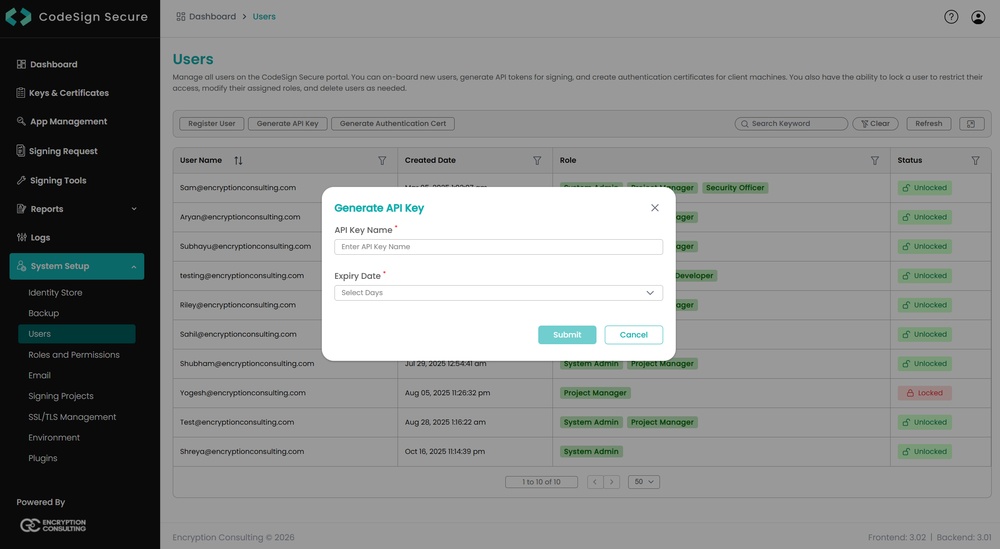
- Now open the CodeSign Secure portal and navigate to System Setup > User. Select the “Generate API Key” option.
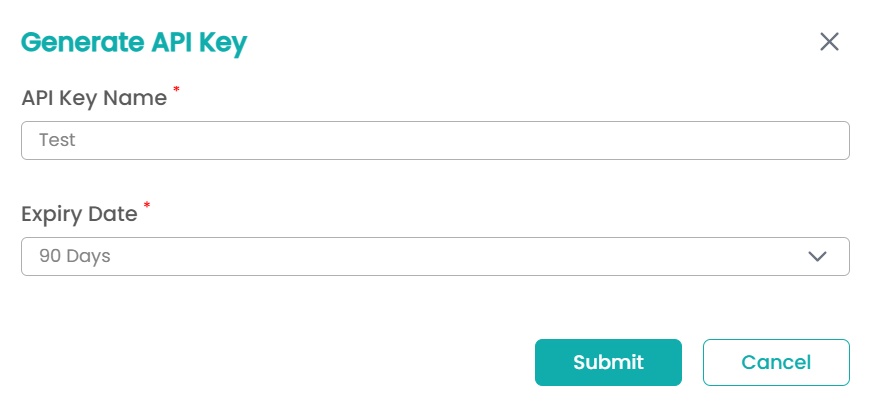
- Create a token for your account by providing a name and the validity period. Remember to copy the token as it will be shown only once.
- Add this token to the “ectoken” field in the Registry Editor.
Set up P12 Authentication Certificate
Setting up a P12 Certificate involves configuring your environment variables to authenticate your client machine with Encryption Consulting’s CodeSign Secure.
Step 1: Create a Machine Authentication Certificate
- Open the CodeSign Secure portal and navigate to System Setup > User. Select the “Generate Authentication Cert” option.
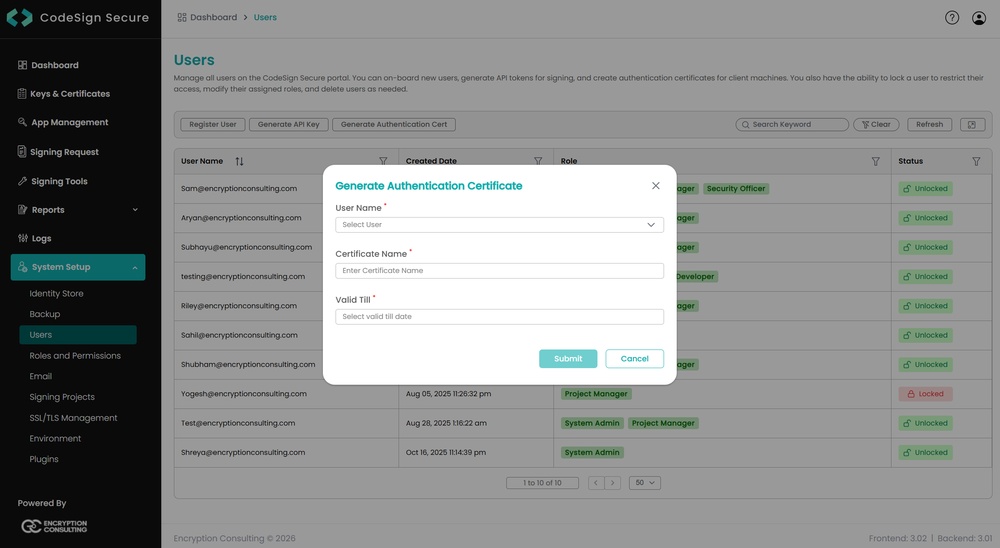
- Select the user name from the drop down and enter the details like certificate name and its expiry date.
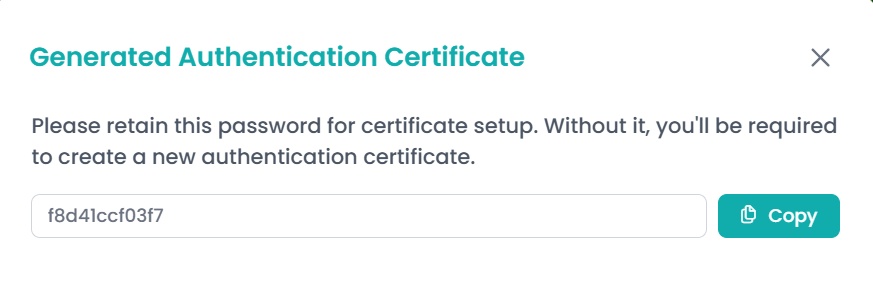
- It will then provide you with a .pfx certificate file and also display the password to the certificate file.
NOTE: This password will be displayed only once. So you must copy and store it safely to perform the authentication with the CodeSign Secure server.
Step 2: Configure the Environment Variables
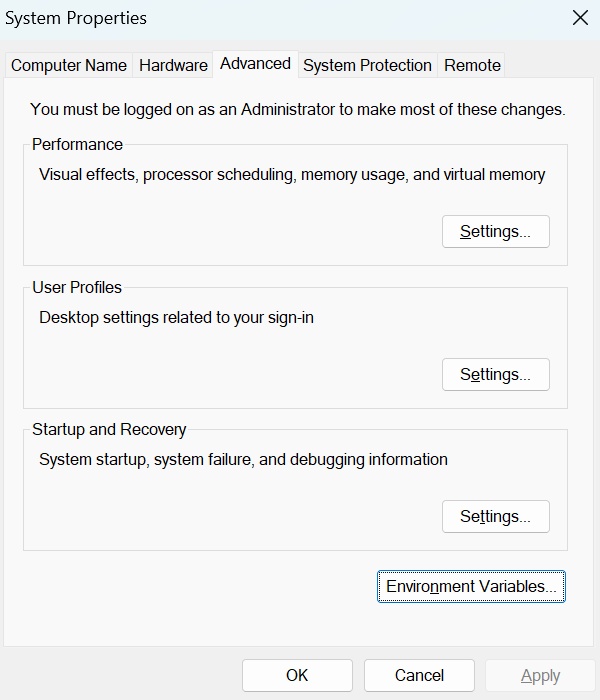
- Open the Environment Variables from your Start Menu.
-
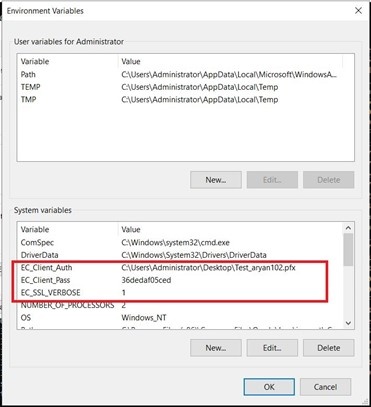
Add new system variables by clicking on the New button. Provide the following variable name and its corresponding details.
- EC_Client_Auth: Corresponds to the path of your SSL Authentication certificate, which can be created from CodeSign Secure.
- EC_Client_Pass: Corresponds to the password of your certificate, which is provided at the time of creation of the certificate.
- EC_SSL_VERBOSE: Corresponds to the setting to either enable (1) or disable (0) the debugging output for EC KSP.
Set up Signtool for Signing
Setting up signtool for code signing involves ensuring that the Signtool.exe utility is available on your machine and configured to correctly interact with Encryption Consulting’s cryptographic provider that provides access to your code signing certificate’s private key.
Step 1: Download and Install Windows SDK
- Using the following download link, download the Windows Software Development Kit: Windows SDK downloads – Windows apps | Microsoft Learn
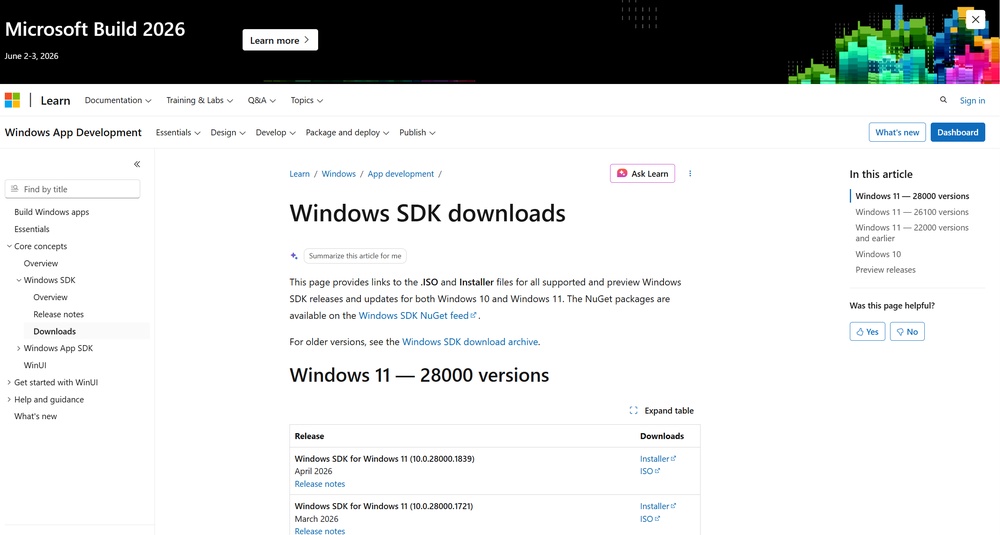
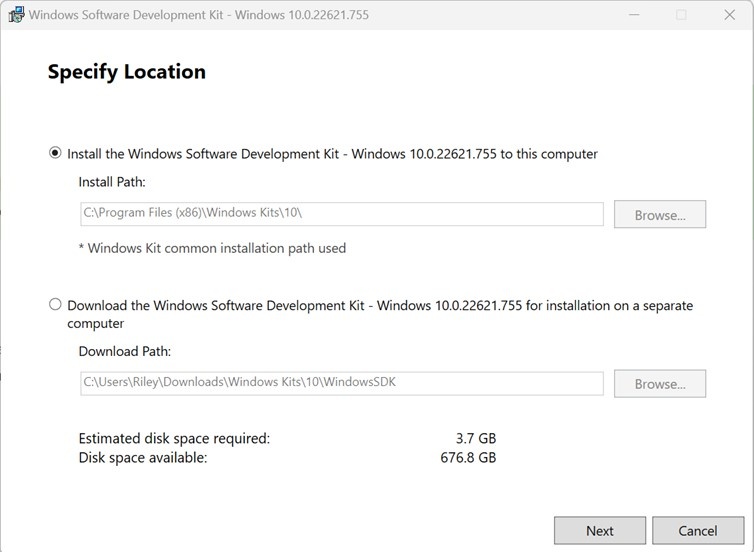
- Open the installer once downloaded and select “Next” on the first screen to keep the default settings.
-
Follow the on-screen prompts of the installation wizard.
- Accept the Windows Kits Privacy notice.
- Accept the End-User License Agreement.
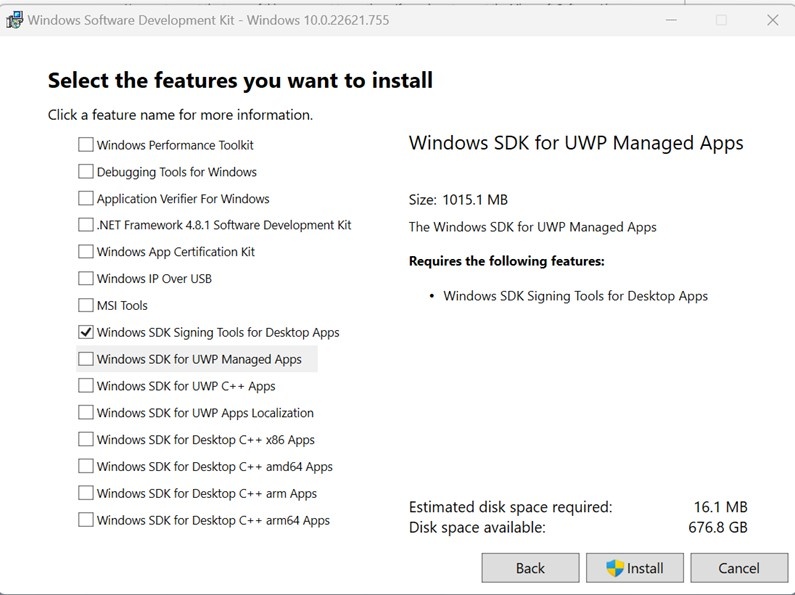
- Select “Windows SDK Signing Tools for Desktop Apps” and select “Install”.
- Go to the following path where the tools should have been downloaded to: “C:\Program Files (x86)\Windows Kits\10\bin”. Select the desired version directory and check whether the “signtool.exe” file is present.
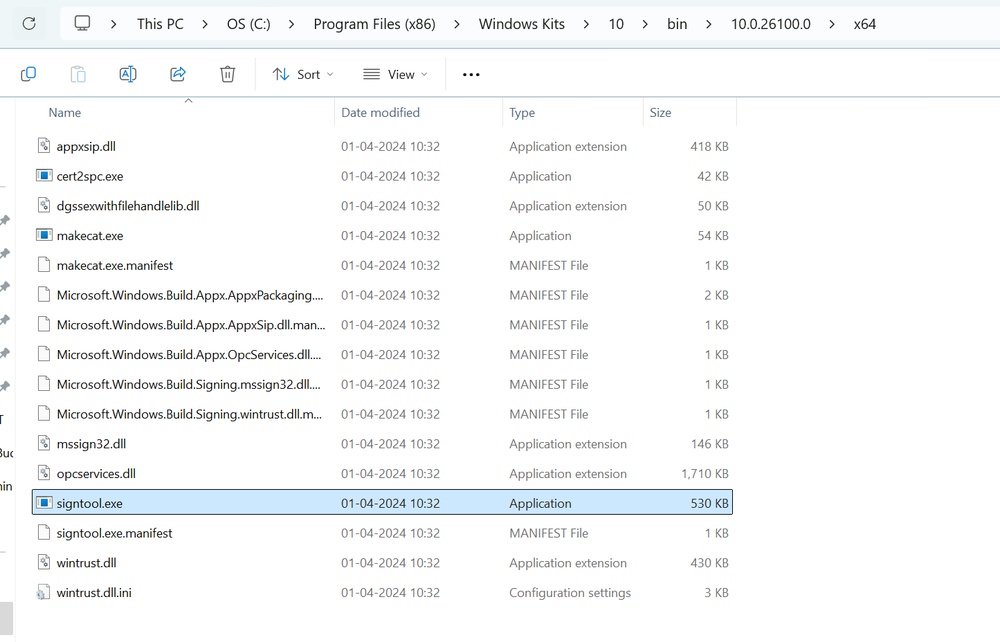
- Ensure you are in the x64 directory and copy this directory path.
Step 2: Add Path to Signtool.exe in Environment Variables
- Open the Environment Variables from the Start Menu.
- Scroll down through the system variables on the bottom table until you find PATH in the variable names.
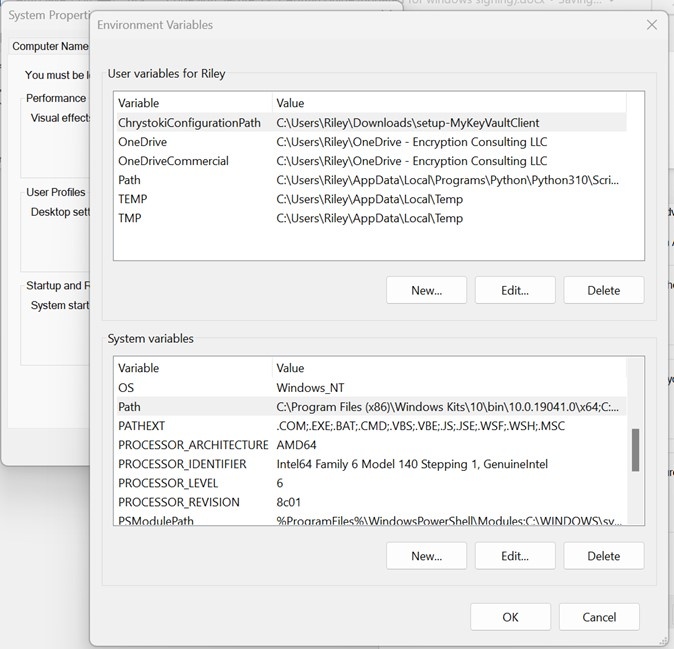
- Double-click on PATH in System Variables and select New on the left of the screen. Paste your copied directory path of “signtool.exe” into the new selection.
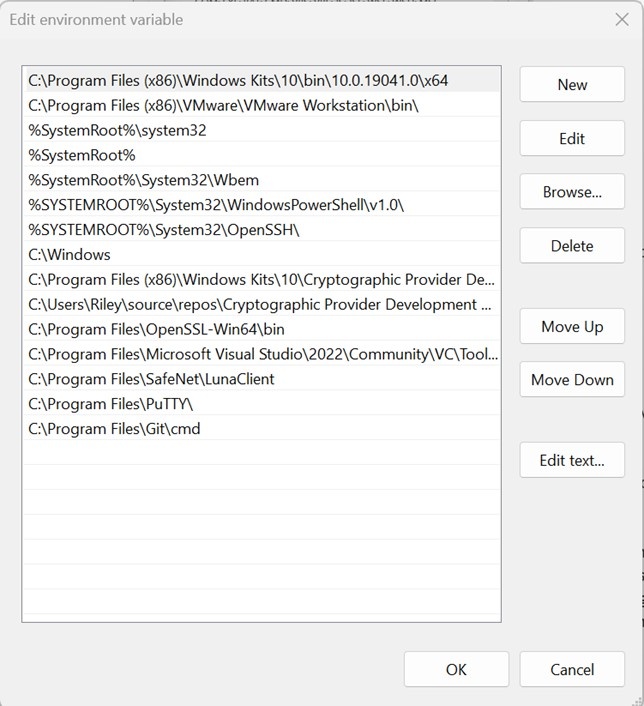
- Select OK at the bottom of each page to exit the Environment Variables page.
Obtain the Signing Certificate
The signing command references a public certificate whose private key is held in the HSM. Signtool is given this certificate in PEM format.
Step 1: Download the Public Certificate
Download the public certificate you wish to use for signing from the Keys and Certificates section of the CodeSign Secure portal, and make a note of the key name (alias) associated with it.
Place the certificate file somewhere convenient and note its full path, as it is supplied to signtool with the /f option.
NOTE: The key name you note here becomes the /kc value in Section 5, and the certificate path becomes the /f value.
Step 2: Confirm the Macro-Enabled Workbook
Place the .xlsm workbook you intend to sign somewhere convenient on the machine and make a note of its full path.
NOTE: Signing applies to the executable VBA content inside the workbook, so the file must be saved in a macro-enabled format such as .xlsm rather than .xlsx.
Sign the Macro-Enabled File
The signing command is the standard Windows signing command. In the command sample below, replace the file path with the path of any .xlsm file and run the signing command.
Step 1: Run the Signtool Command
From an administrator Command Prompt, run the following command against your macro-enabled workbook. The command is:
signtool sign /csp "Encryption Consulting Key Storage Provider" ^
  /kc <key name of the private key associated with the certificate> ^
  /f <the location of the certificate to be used for signing>.pem ^
  /fd SHA256 ^
  /tr http://timestamp.digicert.com ^
  /td SHA256 ^
  "<the path to the .xlsm file to be signed>"
A sample command is provided below:
signtool sign /csp "Encryption Consulting Key Storage Provider" ^
  /kc evcodesigning ^
  /f C:\Users\Administrator\Desktop\ForTesting\evcodesigning.pem ^
  /fd SHA256 ^
  /tr http://timestamp.digicert.com ^
  /td SHA256 ^
  "C:\Users\Administrator\Desktop\ForTesting\MacroTest.xlsm"
NOTE: The caret characters are Command Prompt line continuations. You may keep them or join the command onto a single line.
On success, signtool reports that the file was successfully signed.

Step 2: Flag Reference
The following are the flags and their meaning in the command:
| Flag | Description |
|---|---|
| /csp | This specifies the Key Service Provider to be used. This should always be “Encryption Consulting Key Storage Provider”. |
| /kc | This should be the name of the private key associated with your certificate. This will likely be the same name as the certificate name. |
| /f | The location of the certificate to be used for signing. Make sure to sign using a .pem file only. |
| /fd | The file digest algorithm to use for creating the file signature. This can be SHA256, SHA384, or SHA512. |
| /tr | (Optional) The URL of the RFC 3161 timestamp server. If /tr is not in use, then /td should also be left out of this command. |
| /td | (Optional) The digest algorithm used by the timestamp server. This should be the same as the /fd value. |
| <file path> | The path to the .xlsm workbook to be signed. Quote the path if it contains spaces. |
Verify the Signature
To verify the signed file, simply use the verify command. You can also inspect the signature through the file properties.
Step 1: Run the Signtool Verify Command
Run the following command against the signed workbook:
signtool.exe verify /pa <the path to the signed .xlsm file>
A sample command is provided below:
signtool.exe verify /pa ^
  C:\Users\Administrator\Desktop\ForTesting\MacroTest.xlsm

- /pa: Uses the Default Authentication Verification Policy, which is the appropriate policy for verifying a code signing signature.
Step 2: Review the Digital Signature
- Right click the signed workbook and select Properties.
- Select the Digital Signatures tab at the top of the Properties window.
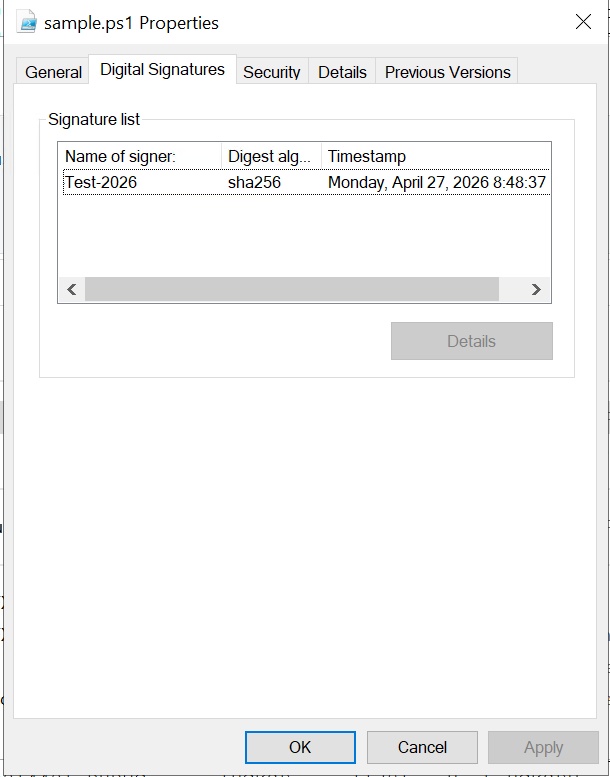
- Select the name of the signer in the signature list and click Details to confirm that the signature is valid, that it chains to the expected certificate, and that the timestamp is present.
Step 3: Cross-Check in CodeSign Secure
Open the CodeSign Secure portal and navigate to Reports > Signing Request Report, where every signing request performed through the KSP is recorded for audit purposes. Confirm that a signing request appears for the certificate you used.
Step 4: Confirm Excel Accepts the Signature
As a final check, open the signed workbook in Excel on a machine that trusts your signing certificate chain, and confirm that the macro content is recognized as signed.
NOTE: Excel decides whether to run signed macros based on its Trust Center settings and on whether the signing certificate is a trusted publisher on that machine. A valid signature therefore does not by itself guarantee that macros run without a prompt — the certificate chain must also be trusted on the machine opening the workbook.