
Mage Signing Integration Guide
“Mage.exe” is a command-line tool used in the Windows operating system for signing and verifying software manifests. CodeSign Secure allows you to drive Mage with a certificate whose private key never leaves your HSM, so manifest signing gains strong key custody and a complete central audit trail without any change to your build output.
Mage does not talk to the HSM directly. It selects a signing certificate from the Windows certificate store by its hash, and because that certificate is associated with the Encryption Consulting Key Storage Provider (KSP), the private key operation is transparently routed to the HSM. Signatures are inserted as XML elements inside the manifest files themselves.
Two signing methods are documented below — using an imported publicly trusted (preferably EV) certificate, or using a self-signed certificate issued from the CodeSign Secure portal. Sections 1 to 5 apply to both; choose whichever of Sections 6 or 7 matches your certificate strategy, then verify using Section 8.
Set up CodeSign Secure KSP
The Encryption Consulting Key Storage Provider (KSP) for Windows is a software component that extends the Microsoft Cryptography API: Next Generation (CNG) framework. Its primary purpose is to enable Windows applications, including Mage.exe, to interact seamlessly with the cryptographic keys and certificates stored within an HSM.
Step 1: Download the EC KSP
- Log in to the CodeSign Secure portal and navigate to the Signing Tools section to download “Encryption Consulting CNG-SigningKSP” (also listed as “EC KSP for Windows”).
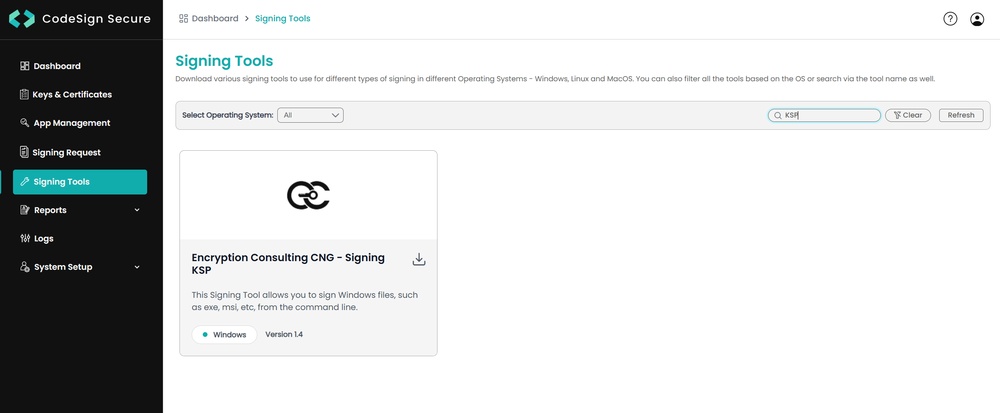
- Extract the zip file to get the “Setup.msi” file.
Step 2: Install the EC KSP
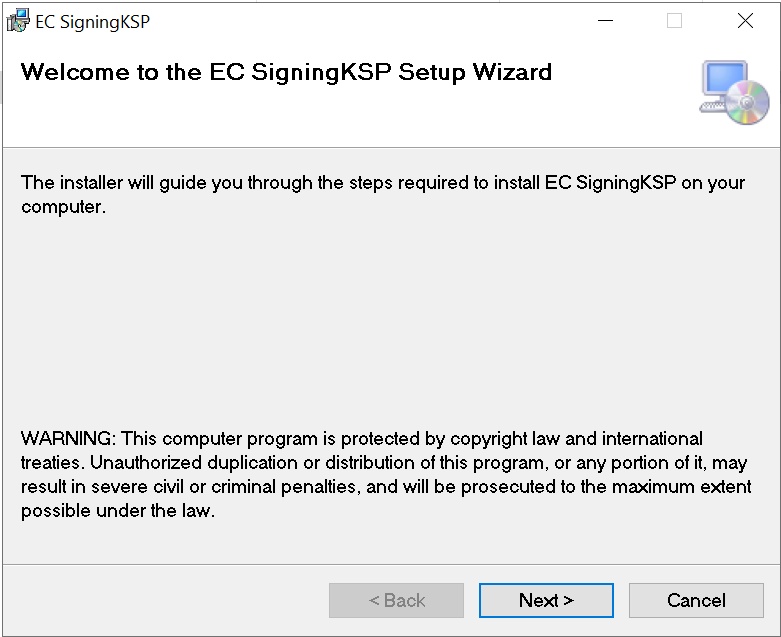
- Run the “Setup.msi” installer with Administrator privileges.
-
Follow the on-screen prompts of the installation wizard.
- Accept the End-User License Agreement.
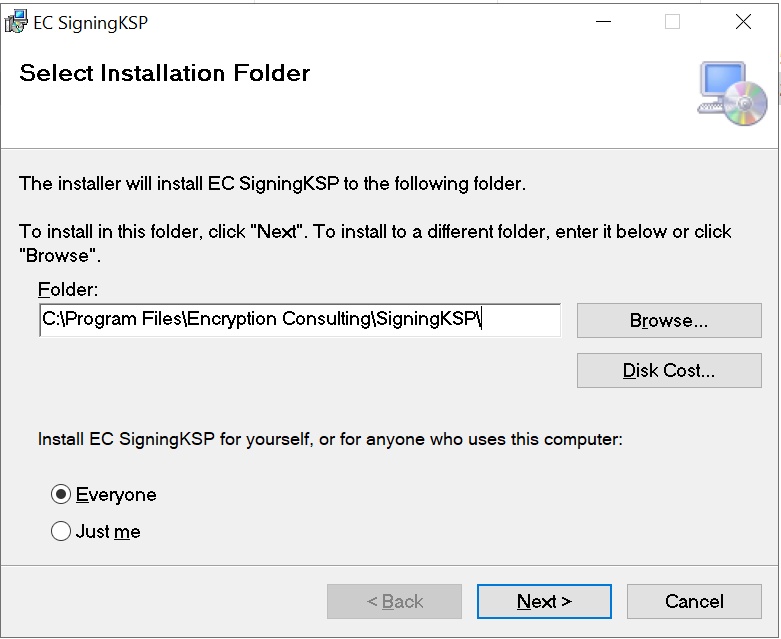
- Choose the installation directory (the default is C:\Program Files\Encryption Consulting\SigningKSP).
- Choose whether you want to install the KSP for Everyone or just for the current user.
-
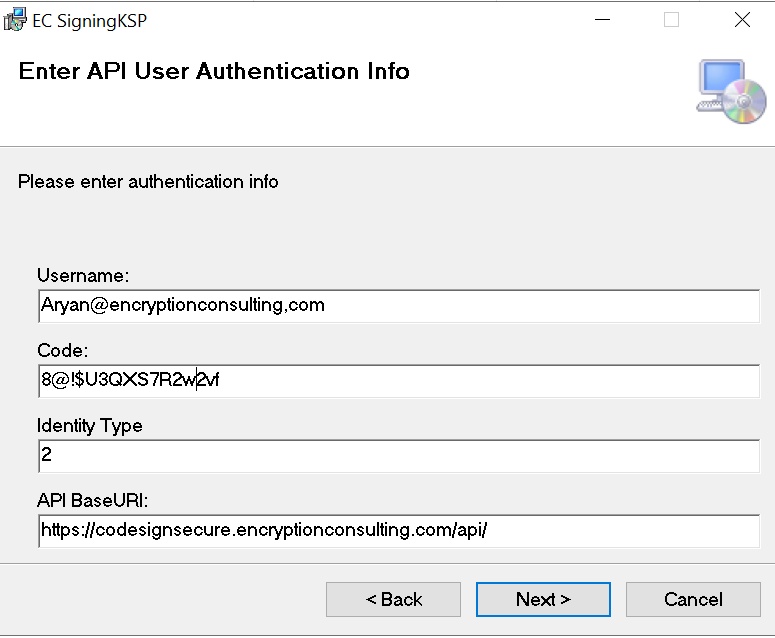
Enter the prompted details such as:
- Username: The username/email that you use to log in to the CodeSign Secure portal.
- Code: The secret code that you set at the time of setting up the CodeSign Secure solution (this is the code defined in your conf.ini configuration file).
- IdentityType: Keep this field as default (2). If your deployment authenticates against a local identity store, set this to 1 as described in the product documentation.
- CodeSign Secure URL: The URL to access the portal (remember to add “/api/” at the end of the URL). Leave the API BaseURL unchanged if it is already populated correctly.
- Click Next and confirm the installation. When Windows asks whether you want to allow this program to make changes to your PC, click Yes.
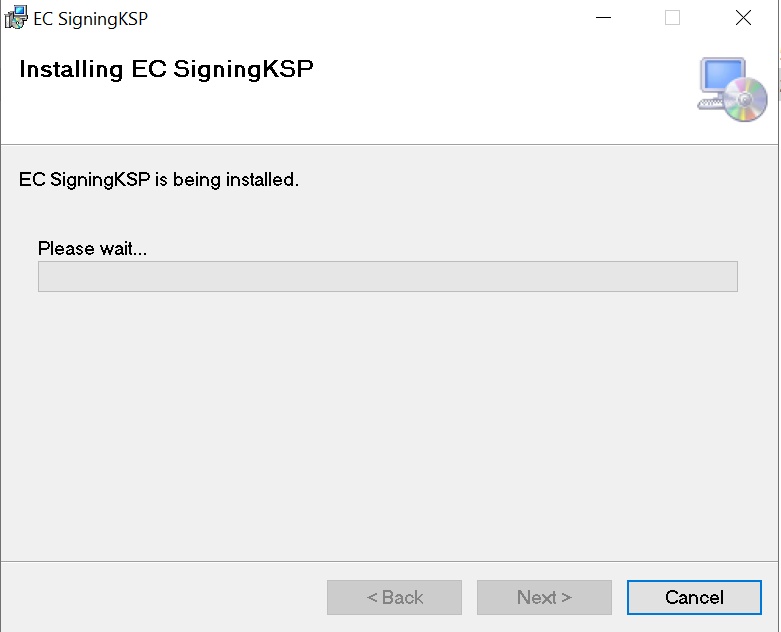
Step 3: Configure the Registry Editor settings
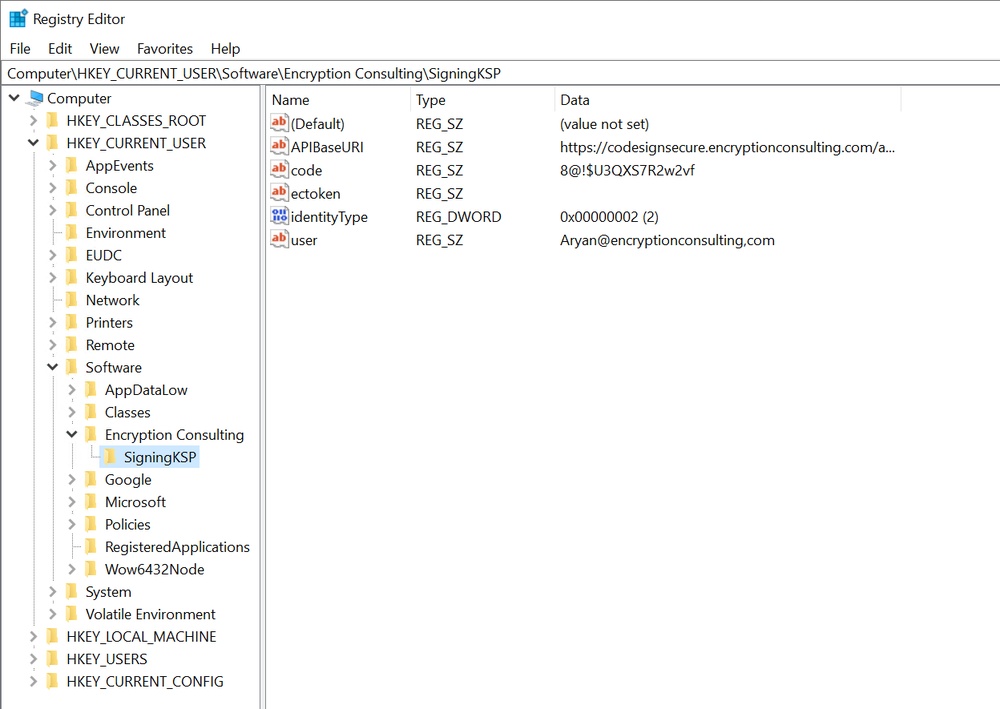
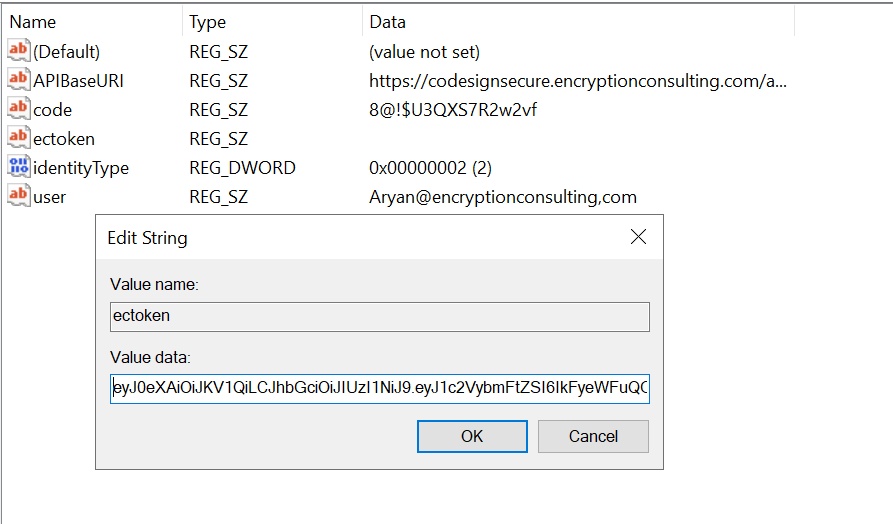
- Open the Registry Editor from the Start menu and navigate to HKEY_CURRENT_USER > Software > Encryption Consulting > SigningKSP.
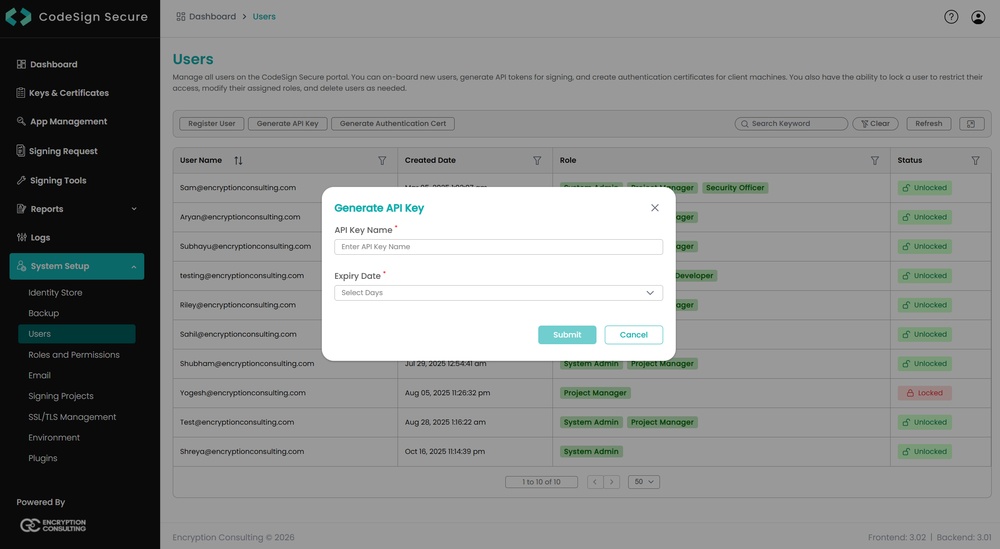
- Now open the CodeSign Secure portal and navigate to System Setup > User. Select the “Generate API Key” option.
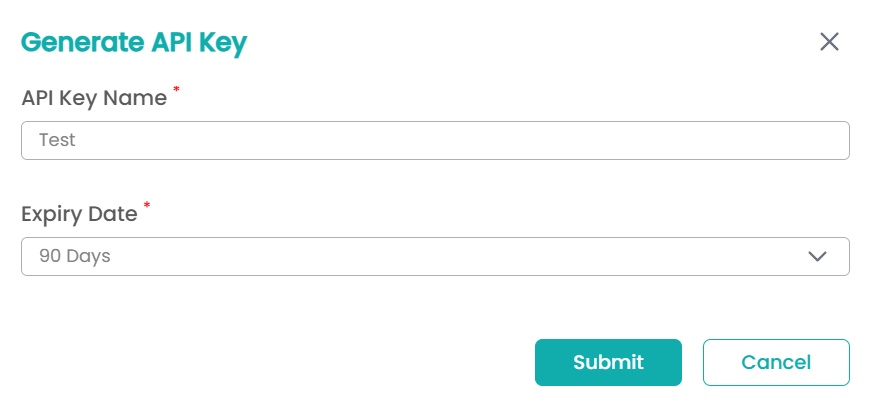
- Create a token for your account by providing a name and the validity period. Remember to copy the token as it will be shown only once.
- Add this token to the “ectoken” field in the Registry Editor.
Set up P12 Authentication Certificate
Setting up a P12 Certificate involves configuring your environment variables to authenticate your client machine with Encryption Consulting’s CodeSign Secure.
Step 1: Create a Machine Authentication Certificate
- Open the CodeSign Secure portal and navigate to System Setup > User. Select the “Generate Authentication Cert” option.
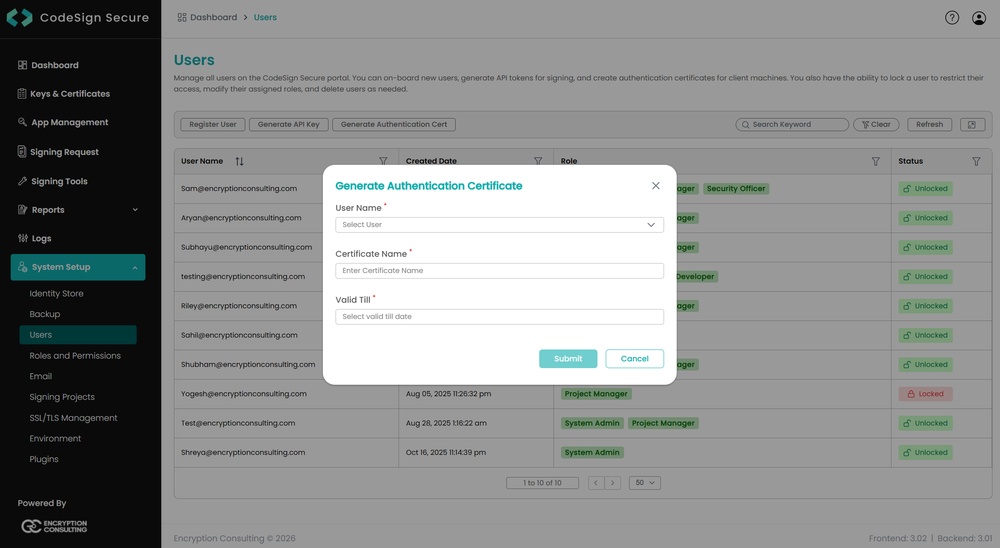
- Select the user name from the drop down and enter the details like certificate name and its expiry date.
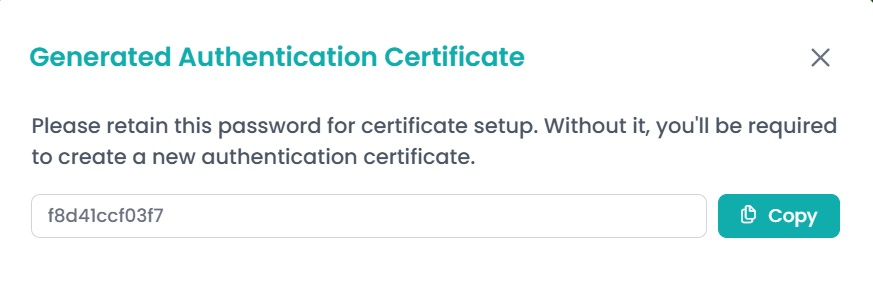
- It will then provide you with a .pfx certificate file and also display the password to the certificate file.
NOTE: This password will be displayed only once. So you must copy and store it safely to perform the authentication with the CodeSign Secure server.
Step 2: Configure the Environment Variables
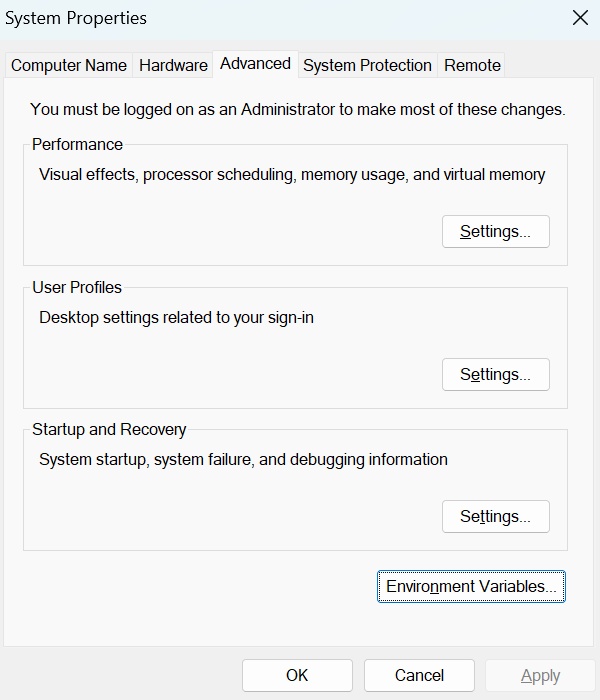
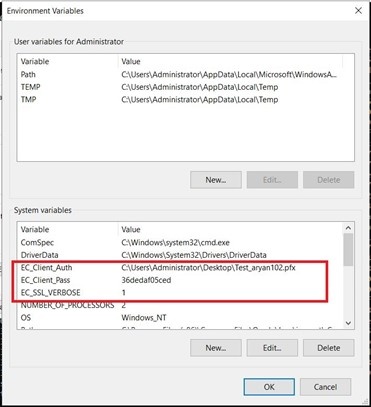
- Open the Environment Variables from your Start Menu.
-
Add new system variables by clicking on the New button. Provide the following variable name and its corresponding details.
- EC_Client_Auth: Corresponds to the path of your SSL Authentication certificate, which can be created from CodeSign Secure.
- EC_Client_Pass: Corresponds to the password of your certificate, which is provided at the time of creation of the certificate.
- EC_SSL_VERBOSE: Corresponds to the setting to either enable (1) or disable (0) the debugging output for EC KSP.
Install Mage and Configure the PATH
The following components must be present on the client machine before signing:
- Mage installed in your system.
- .NET Framework 4 or above.
- Signing certificate.
Step 1: Locate Mage.exe
Mage.exe is a .NET Framework tool, so it will either get automatically installed while you install .NET Framework using Visual Studio, or it is downloaded with the Windows SDK under “Windows SDK Signing Tools for Desktop Apps”.
You can locate it in the following file path:
C:\Program Files (x86)\Microsoft SDKs\Windows\v10.0A\bin\NETFX 4.8 Tools
NOTE: The NETFX version folder name will match the .NET Framework tooling installed on your machine, so it may differ from the example above.
Step 2: Set the PATH Environment Variable to Mage.exe
Once you have mage.exe in your system, you will need to set the PATH environment variable to mage.exe so that it can be invoked from any directory.
- Open the Environment Variables from the Start Menu.
- Scroll down through the system variables on the bottom table until you find PATH in the variable names.
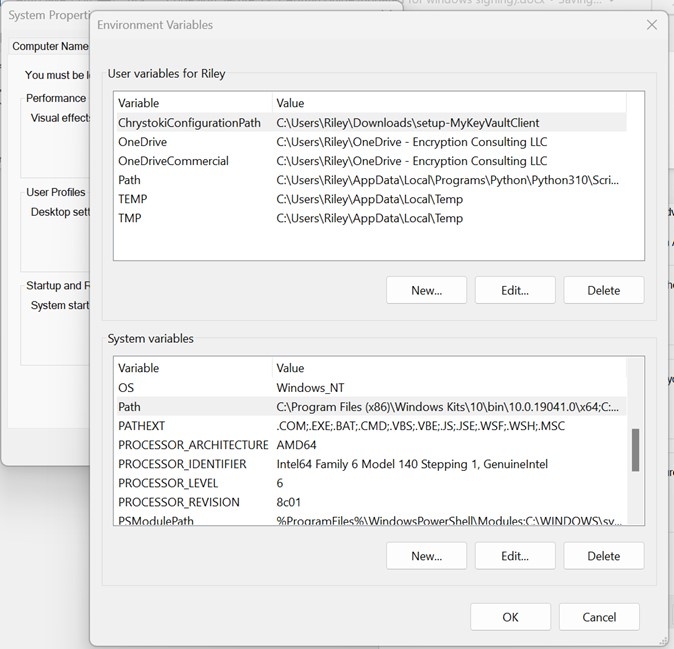
- Double click on PATH in system variables and select New on the left of the screen. Paste the directory path containing mage.exe into the new selection, then select OK on each page to exit.
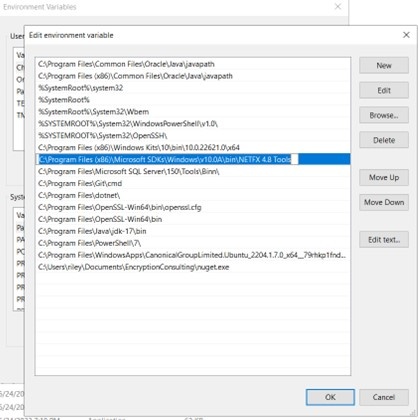
NOTE: Open a new command prompt after editing the PATH, as existing windows will not pick up the change. You can confirm the tool is reachable by running “mage -help”.
Mage Commands and Parameters
The parameters used throughout this guide are described below. You can also see these by running mage -help or mage -help verbose in your CMD.
| Flag | Description |
|---|---|
| -s, -Sign | Uses a key pair or X509 certificate to sign a file. Signatures are inserted as XML elements inside of the files. This command tells Mage to sign the selected/specified package. You must be connected to the Internet when signing a manifest that specifies a -TimestampUri value. |
| -ver, -Verify | Verifies that the manifest is signed correctly. Cannot be combined with other commands. |
| -a, -Algorithm | Specifies “sha256RSA” or “sha1RSA” as the algorithm to generate dependency digests with. |
| -ch, -CertHash | Provides the certificate hash or fingerprint. |
| -ti, -TimestampUri | Specifies the time stamp URL, for example http://timestamp.digicert.com. |
Obtain a Signing Certificate
Mage signing requires a code signing certificate whose private key is held in the HSM. There are two routes, and which one you choose determines whether you follow Section 6 or Section 7.
Option A: Publicly Trusted or MS PKI Certificate (preferably EV)
- Generate a CSR from the CodeSign Secure web portal. The key pair is created inside the HSM and only the request leaves it.
- Get the CSR signed using a publicly trusted CA (or MS PKI).
- Import that certificate back into the CodeSign Secure web portal.
- Continue with Section 6, which signs using this imported certificate.
Option B: Self-Signed Certificate from the Portal
- Generate a self-signed certificate from the CodeSign Secure web portal.
- Download the certificate and convert it from .pem to .crt format for better operations.
openssl x509 -outform der -in certificate.pem -out certificate.crt
- Continue with Section 7, which installs the full certificate chain before signing.
NOTE: A self-signed certificate is only trusted on machines where you install its chain, so Option B suits internal distribution.
Sign Using an EV Certificate (Command Line)
We will use Mage.exe to sign the manifest file. This method assumes you have completed Option A in Section 5, so the signed certificate is already present in your certificate store.
Step 1: Find the Certificate Hash
Specify the fingerprint or hash of your certificate. This can be found in the Details section of your certificate in the Certificate Manager.
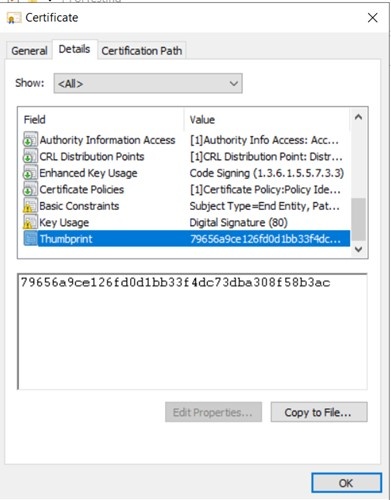
NOTE: Remove any spaces from the copied value, as the Certificate Manager displays it in space-separated pairs.
Step 2: Run the Mage Sign Command
The syntax of the signing command is:
NOTE: The shorthand forms of the parameters are interchangeable with the long forms, so “-ch” may be used in place of “-CertHash”.
mage -sign <file_name> -CertHash <hash_or_cert_fingerprint>
For example:
mage -sign Test.manifest
  -CertHash 79656a9ce126fd0d1bb33f4dc73dba308f58b3ac
Here,
- <file_name>: Specify the name of the file you want to sign, or the path of the file if it is not in the same directory.
- <hash_or_cert_fingerprint>: Specify the fingerprint or hash of your certificate, as located in Step 1.
A sample of the executed command:
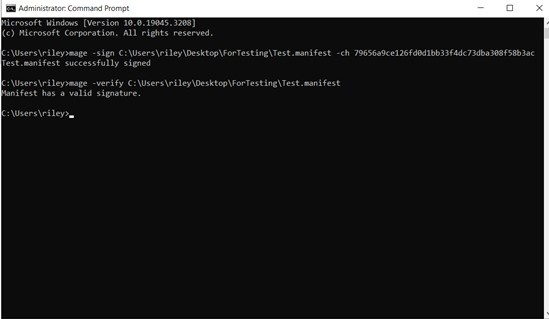
On success, Mage reports that the manifest was successfully signed. Once the command completes, verify the signature as described in Section 8.
Sign Using a Self-Signed Certificate from the Portal
This method also involves leveraging the Mage command line interface, which provides functionality to create, publish, sign, and manage packages without changing the project files. It assumes you have completed Option B in Section 5. Because the certificate is self-signed, its full chain must be installed into the correct Windows certificate stores before signing will succeed.
Step 1: Download the Certificate Chain
Download the Certificate Chain from the “Signing Tools” screen of the CodeSign Secure portal, and unzip it on your client machine.
Step 2: Install the Root CA Certificate
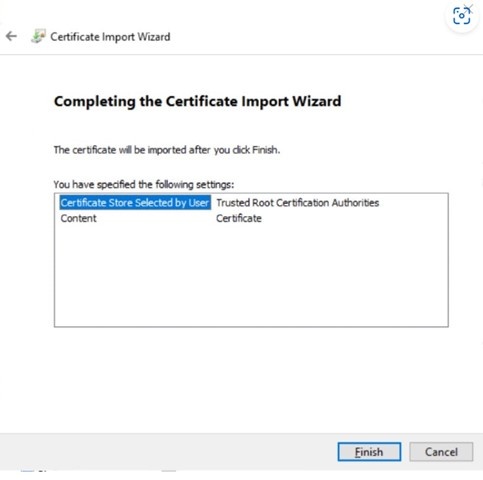
Click on the INSTALL CERTIFICATE button.
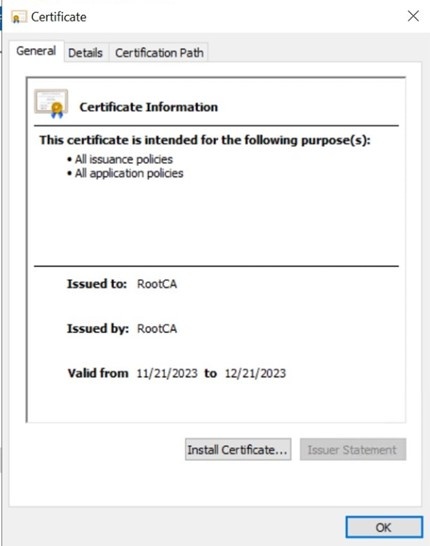
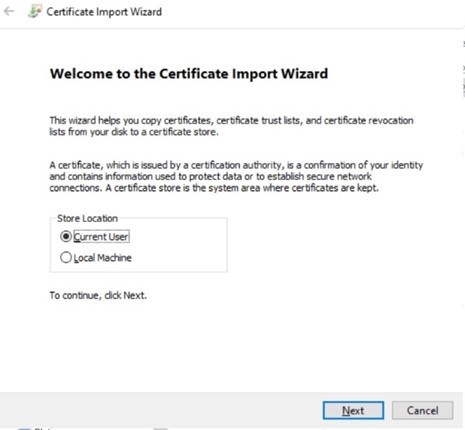
On the “Import Wizard” popup, select Current User and then hit NEXT.
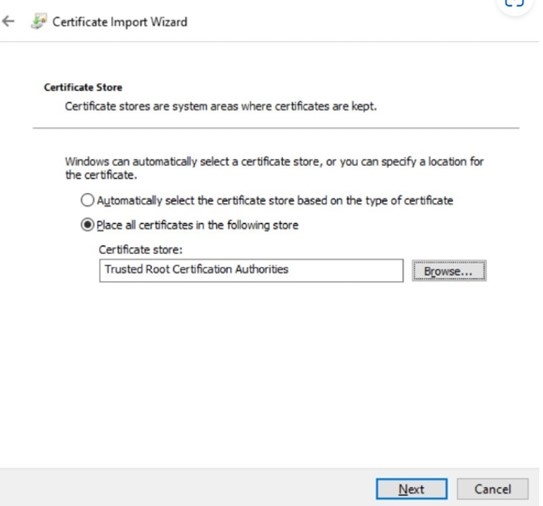
On the “Certificate Store” popup, choose Trusted Root Certification Authorities for the Root CA certificate and click on NEXT.
After verifying all the details, click on FINISH.
Step 3: Install the Issuing CA Certificate
After installing the Root CA, install the Issuing CA from the Certificate Chain folder (intermediate.crt).
Follow the same procedure as Step 2, except install this certificate in Intermediate Certification Authorities.
Step 4: Install the End Entity Certificate
After successfully installing the Issuing CA, install the End Entity certificate (or the self-signed certificate from our portal) into your system.
The process is the same, except this certificate will be installed in the Personal store.
Step 5: Run the Repairstore Command
Run the repairstore command using the thumbprint of this End Entity certificate. Like this:
certutil -f -repairstore
  -csp "Encryption Consulting Key Storage Provider"
  -user "My" <thumbprint of the certificate>
NOTE: This command is what associates the certificate with the Encryption Consulting KSP, so that Mage’s private key operation is routed to the HSM. Remove any spaces from the thumbprint before running it.
Step 6: Run the Mage Sign Command
When all of these steps have been completed successfully, try running the Mage command line command using this certificate’s thumbprint. The syntax is:
mage -sign <file_name> -CertHash <hash_or_cert_fingerprint>
For example:
mage -sign Test.manifest
  -CertHash 79656a9ce126fd0d1bb33f4dc73dba308f58b3ac
Here,
- <file_name>: Specify the name of the file you want to sign, or the path of the file if it is not in the same directory.
- <hash_or_cert_fingerprint>: Specify the fingerprint or hash of the End Entity certificate you installed in Step 4 and repaired in Step 5.
A sample of the executed command:
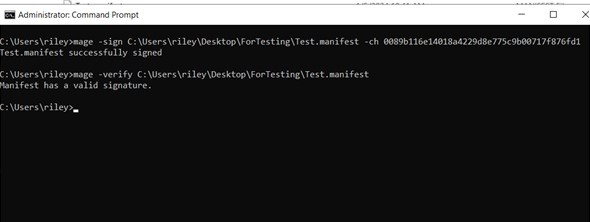
Verify the Signature
Whichever method you used, confirm that the manifest is signed correctly. The verify command cannot be combined with other commands, so it is run separately after signing.
Step 1: Run the Mage Verify Command
Run the following command against the signed manifest:
mage -verify <file_name>
For example:
mage -verify Test.manifest
Mage reports whether the manifest is signed correctly. A correctly signed manifest is confirmed with the message “Manifest has a valid signature.”
If verification fails, confirm that the certificate hash used for signing matches a certificate present in your store and that the repairstore command completed successfully.
Step 2: Cross-Check in CodeSign Secure
Open the CodeSign Secure portal and navigate to Reports > Signing Request Report, where every signing request performed through the KSP is recorded for audit purposes. Confirm that a signing request appears for the certificate you used.